
OUTER SILL RENEWAL. 1989 928 S4.
I bought an S4 from 928spares in 2014. Anderson assured me it was 'a good one'.
Well, he forgot too mention a massive list of issues hidden in the car and
rotten outer sills. So, BUYER BEWARE when purchasing a 928 even if the seller
claims to be 'a guru and legend' in 928s.
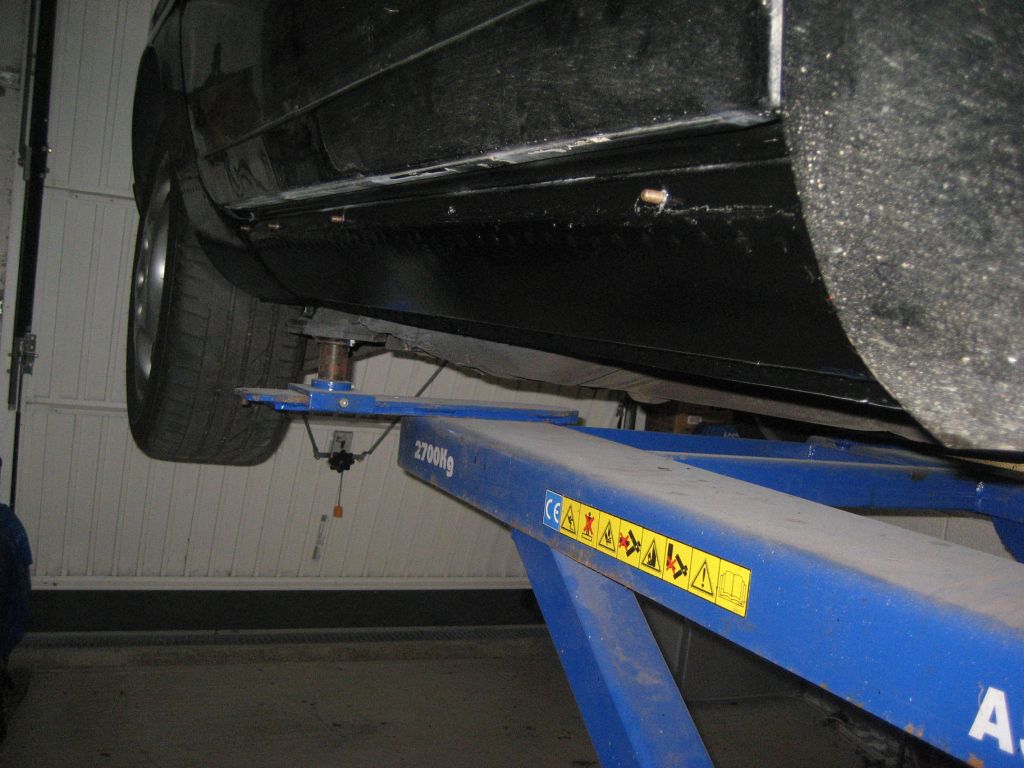
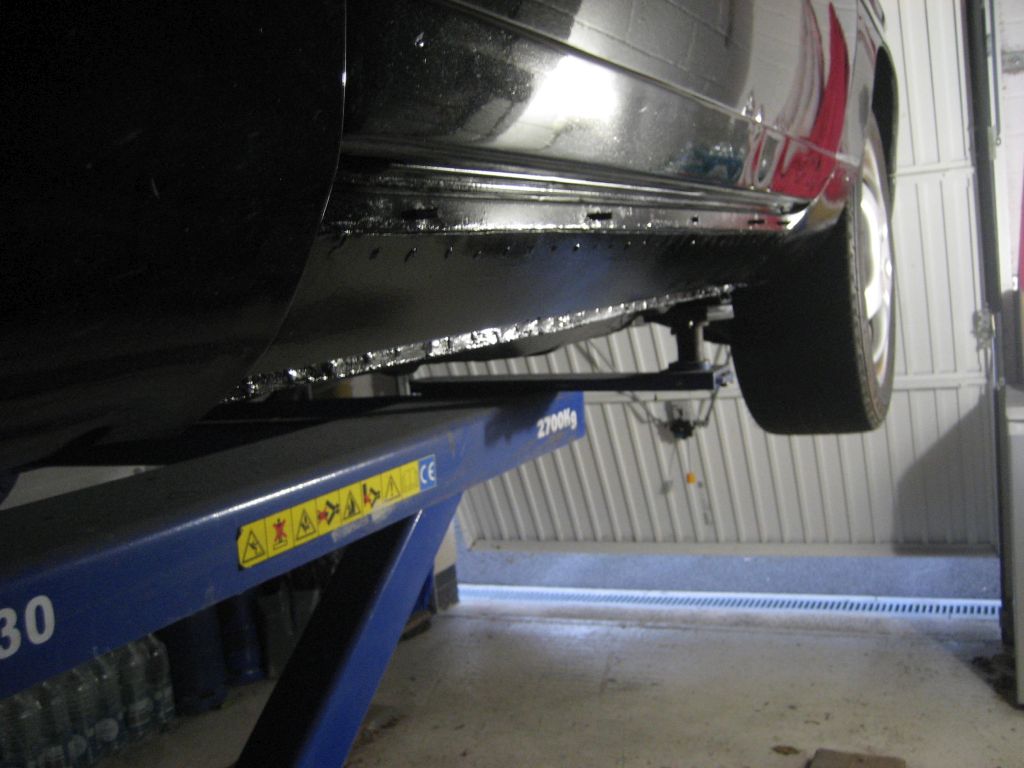
You need a lift to do this work. Previous panel work will help and ideally you
should be able to weld. There are mobile welders if you cannot weld however. The
work is time consuming, calls for precise work and is not for the fainthearted.
Cost wise, circa Ł1000 if you need the welding done but can do the panel+cutting
work yourself. Maybe Ł2000 if paying someone to do it all for you as the
cutting/panel work is very time consuming.
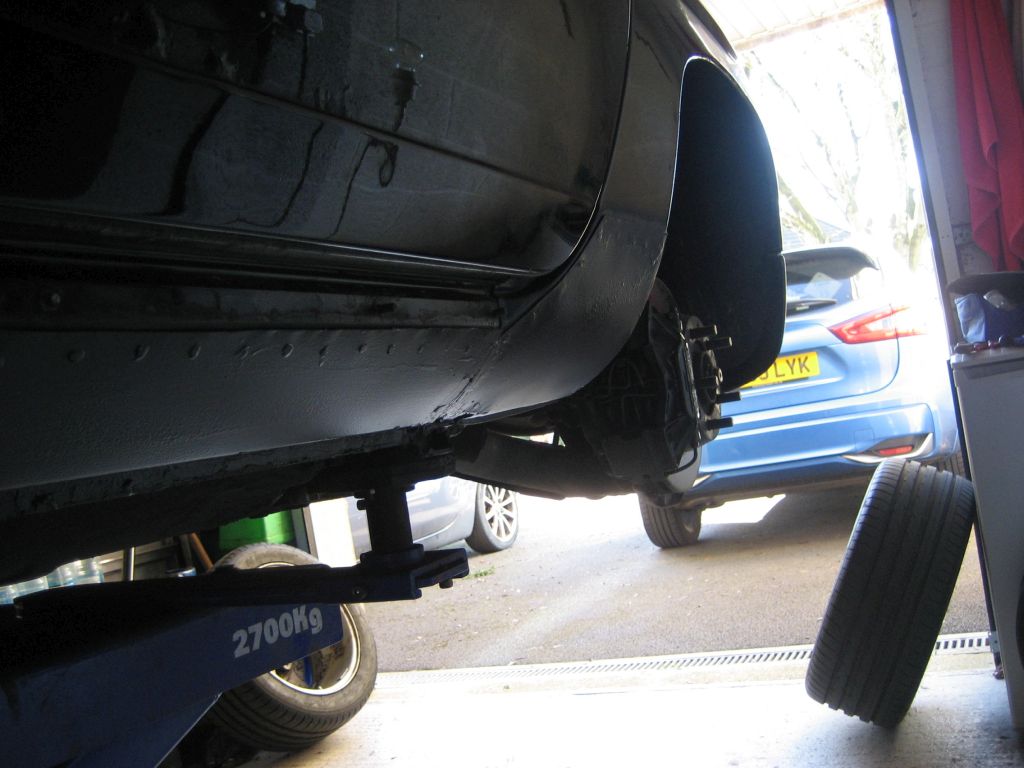
Raise your 928 on a lift. Look at the outer plastic sill covers that run the
whole length of the sills from the panel in-front of the rear wheel, to the
bottom edge of the front wing. Where this plastic sill cover meets the floor pan
underneath, it is held to the metal sill hidden beneath by philips head screws
(circa 7-8 of them). There is cut-outs in the plastic sill cover to accomodate
them. Locate them where they run along the plastic panel.
They will most likely be corroded solid in place as they get hammered by all the
road debris. I had to simply drill each head off with a high quality drill bit.
Luckily, because they were very corroded, the screw heads gave way without too
much resistance.
Now you need to undo the 5-6 screws that hold the outer plastic sill cover to
the top of the sill. They are hidden underneath a plastic closing panel. Open
the car door and look down at the top of the outer sill beside the '928' plastic
panel. Where the outer sill steps down, there is a plastic covering panel. BE
VERY CAREFUL with this panel. The plastic will be brittle and it is expensive to
renew. It is held to the sill by sliding into an aluminium lip. The correct way
to remove it is to unscrew a philips screw in-front of the rear quarter panel at
the back edge of the door, and then slide the covering panel out slowly, pulling
it towards the rear quarter/back edge of the door frame.
With that panel removed you have exposed the 5-6 small phillips screws that hold
the outer sill cover to the top of the sill. Again, they will most likely be
heavily corroded. I had to renew all of them and the threaded washers that hold
them. The screw nearest to the door hinge is a bitch to access and needs the
door fully open. With these unscrewed, the outer plastic sill cover is only held
on with sticky tape where it runs across the rear quarter panel. It should pull
away relatively easily as it is most likely 30 years old and dried out.
So pull the plastic cover away where it crosses the rear quarter panel and then
pull the panel towards the rear of the car holding it vertically. It slots into
the outer plastic panel at the bottom of the front wing, hence why it needs
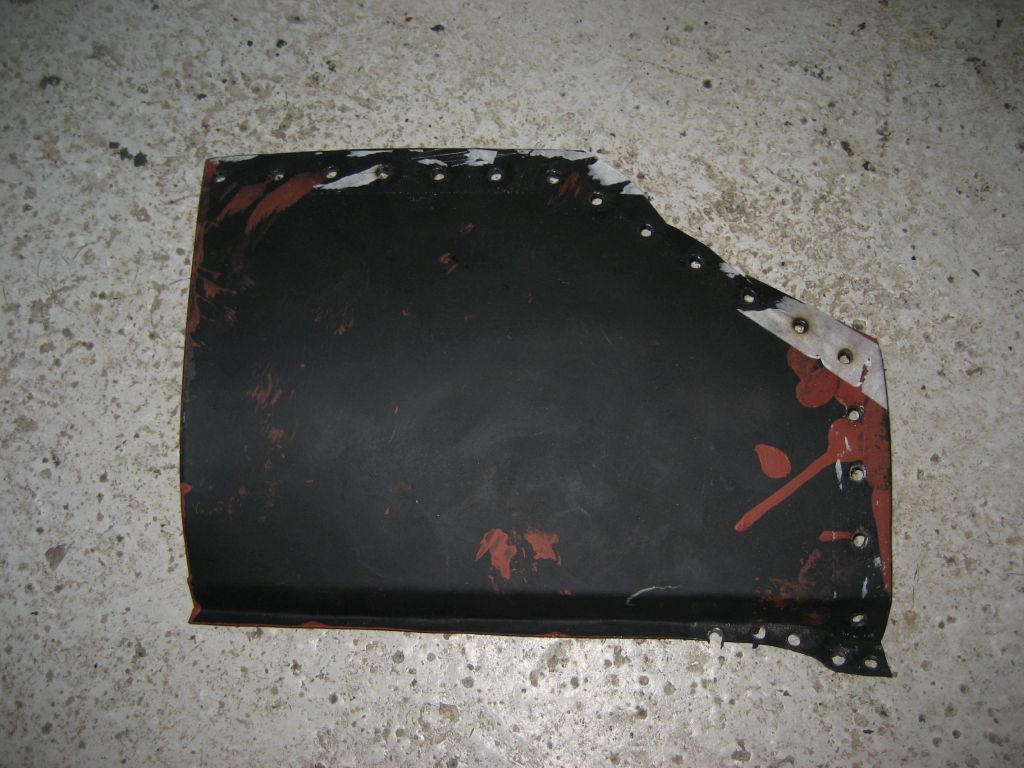
pulling off rearwards. Well done; you just have the plastic cover off! It most
likely be in a real mess behind with tons of old road debris, so give it a good
clean.
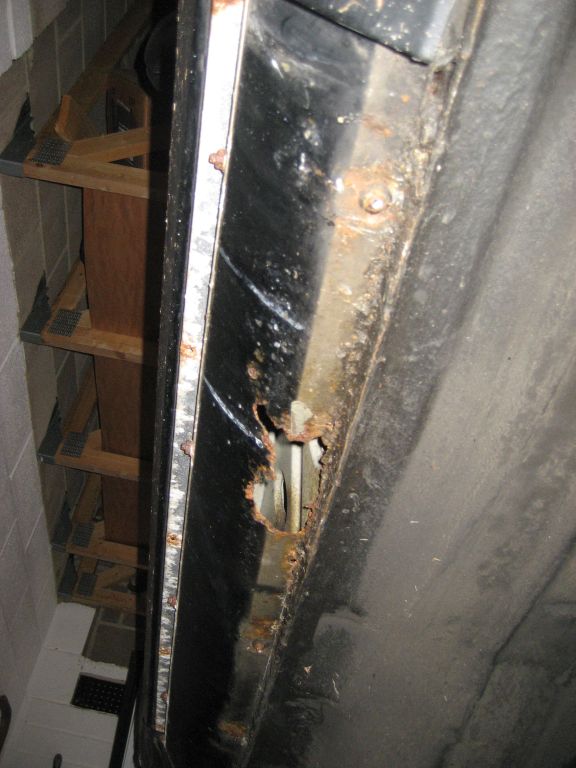
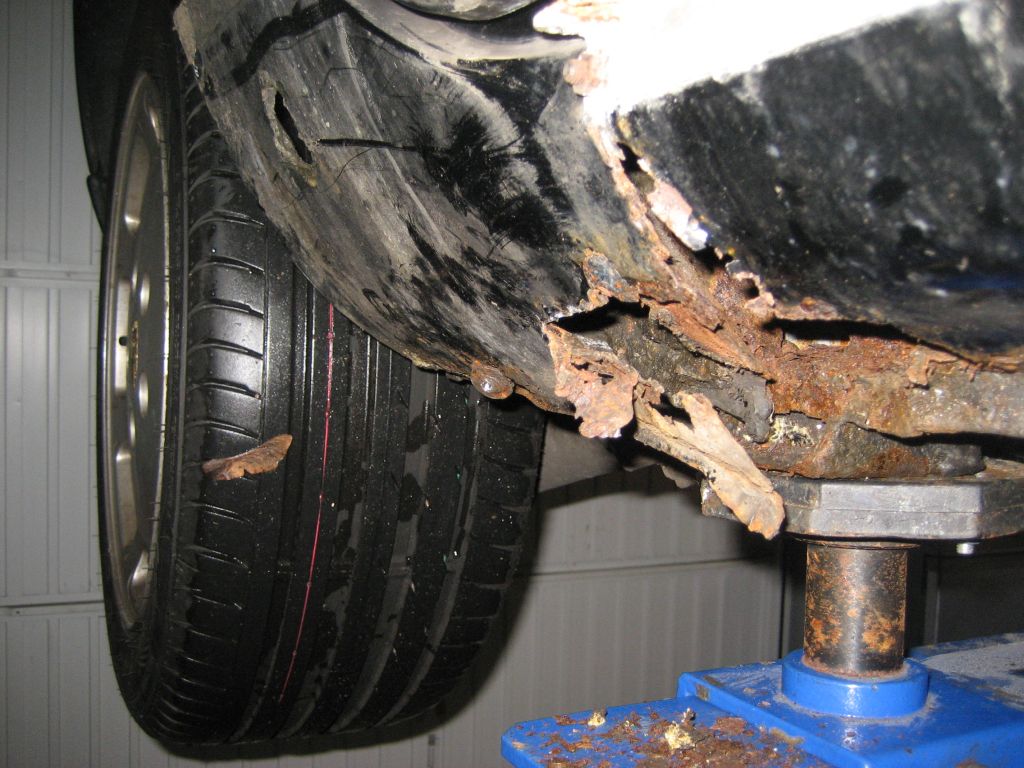
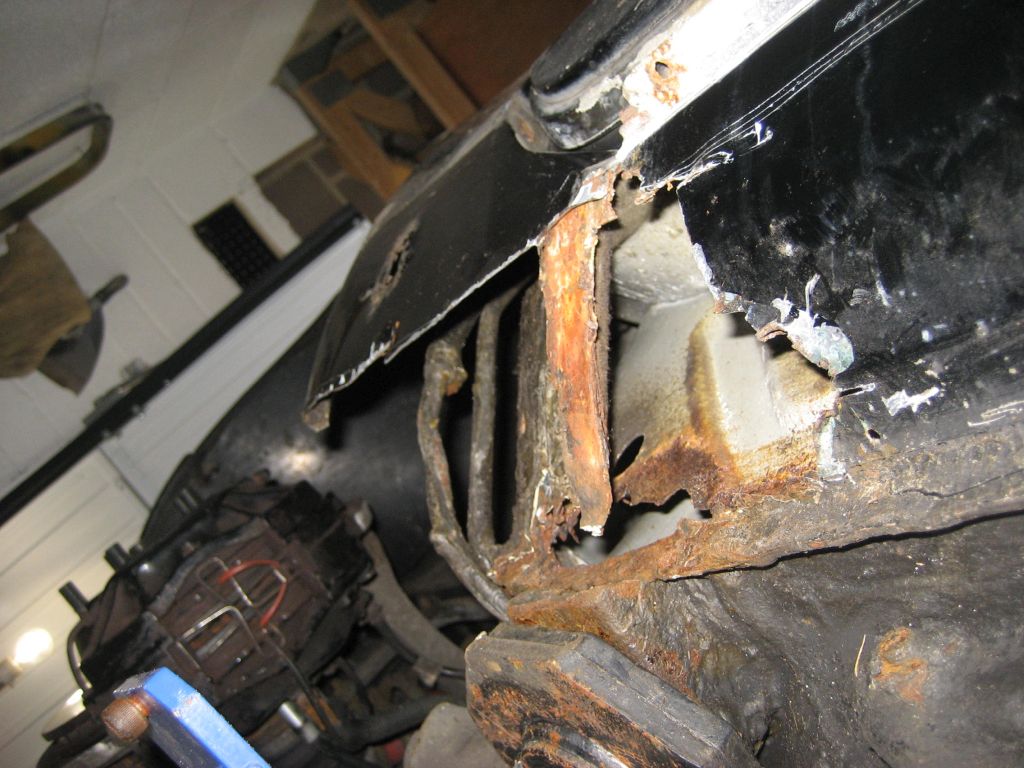
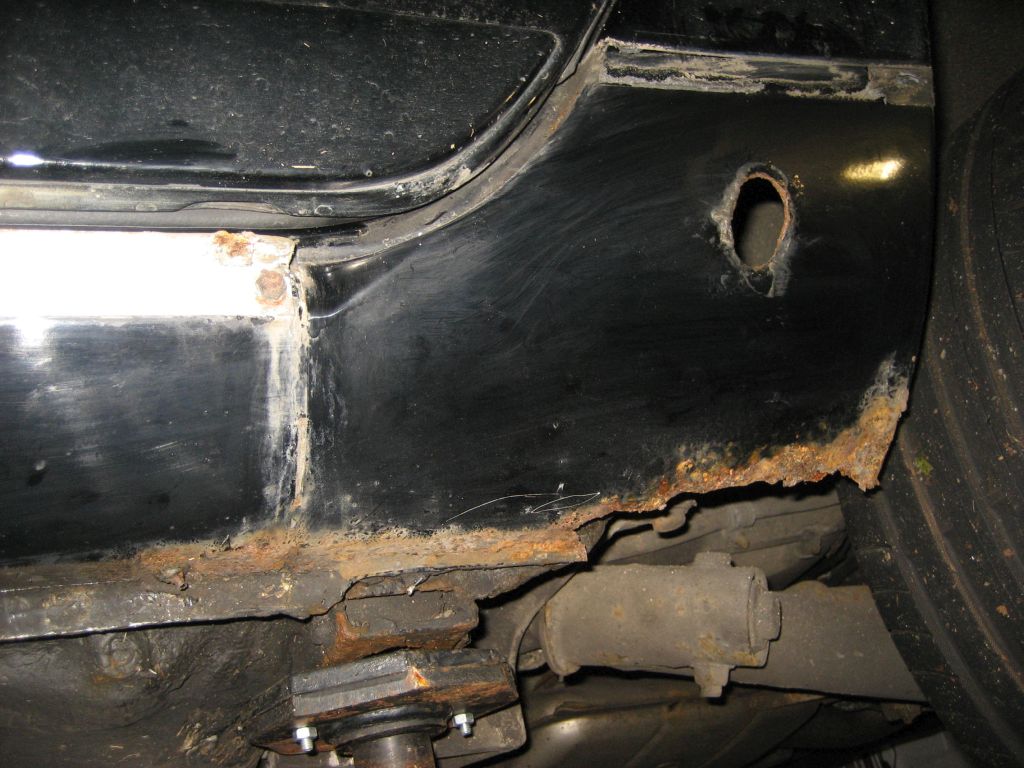
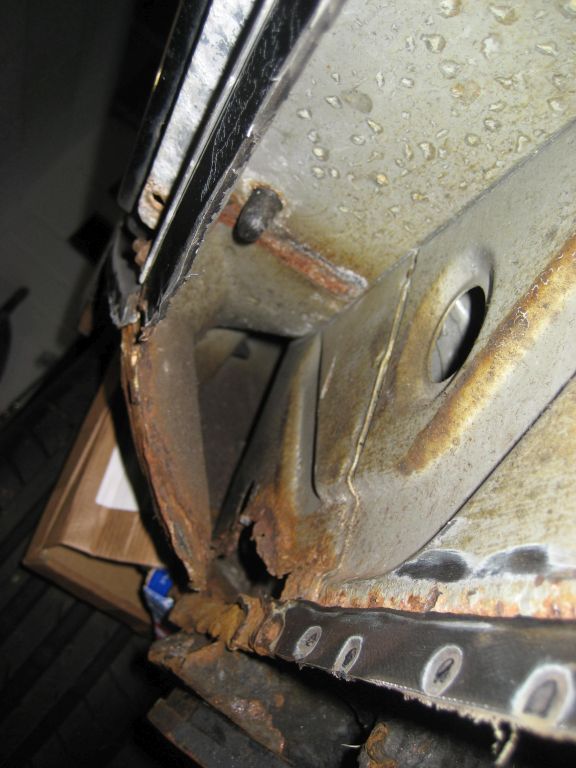
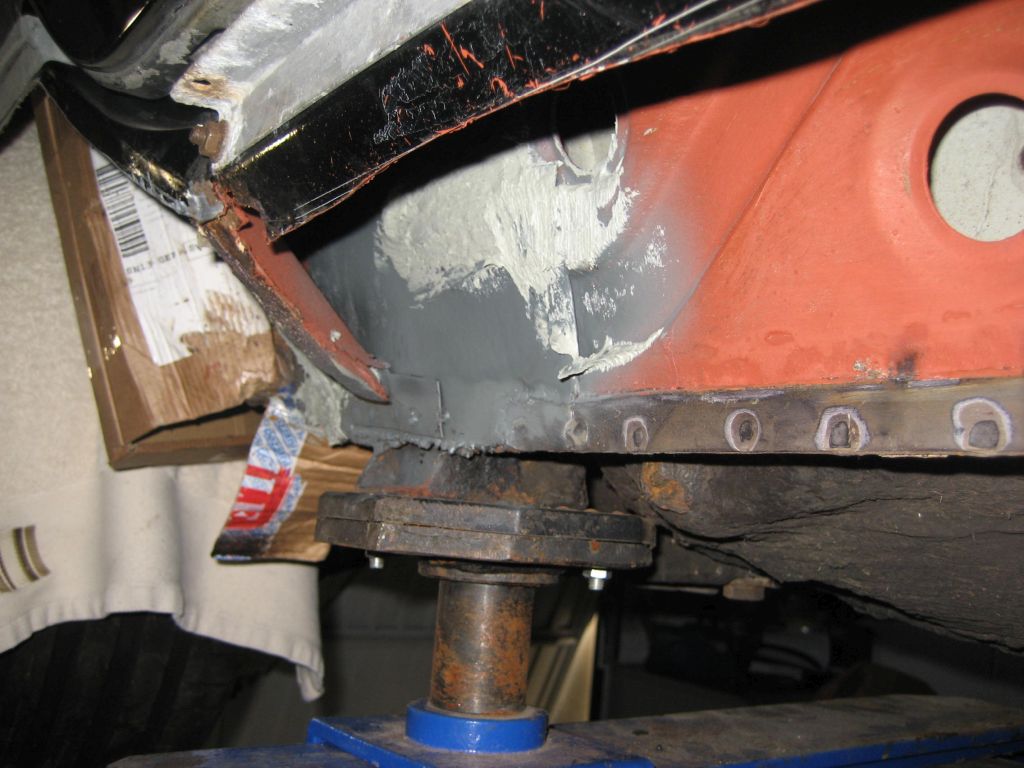
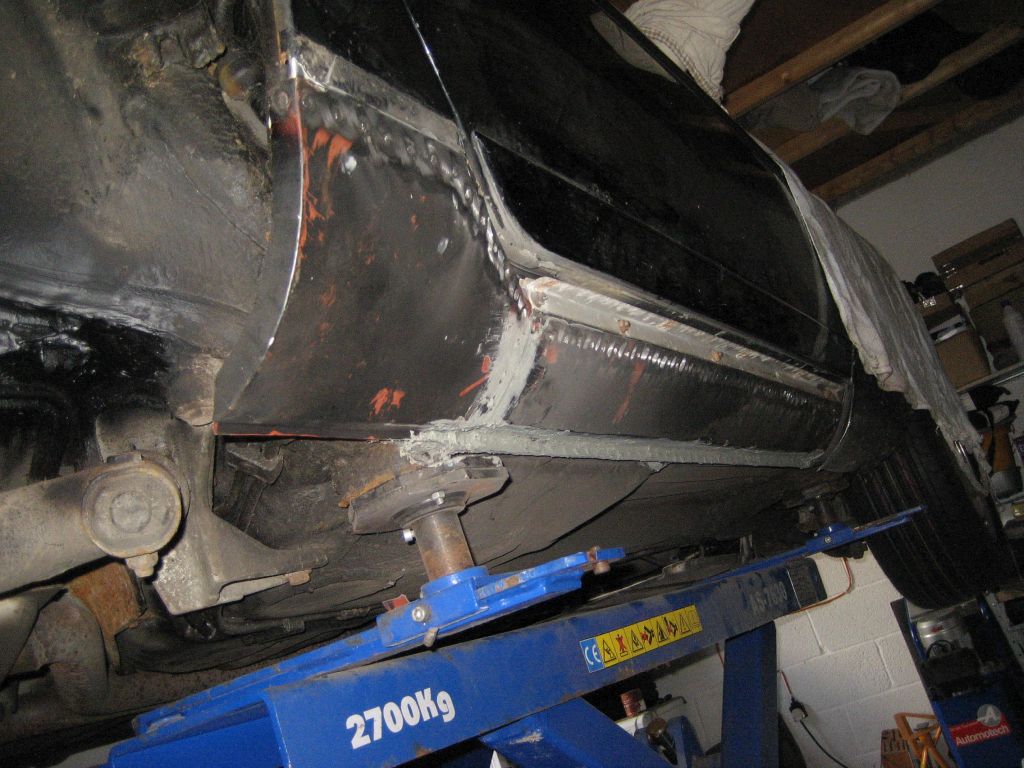
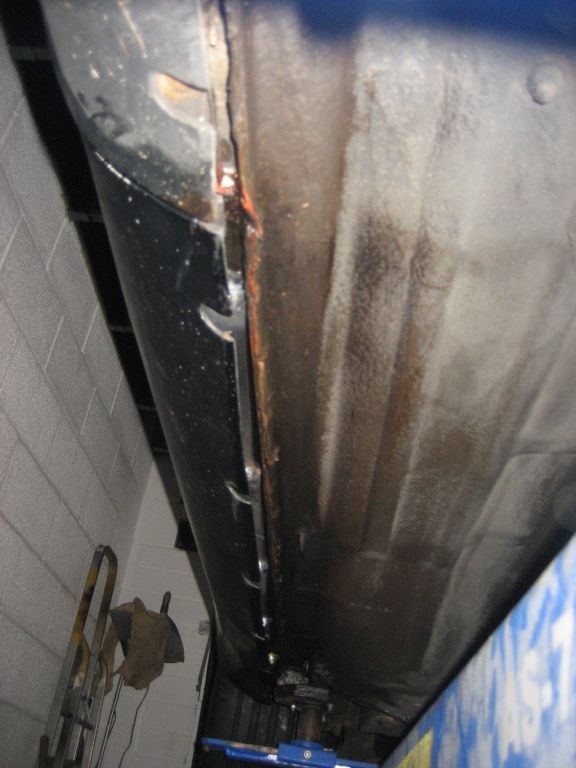
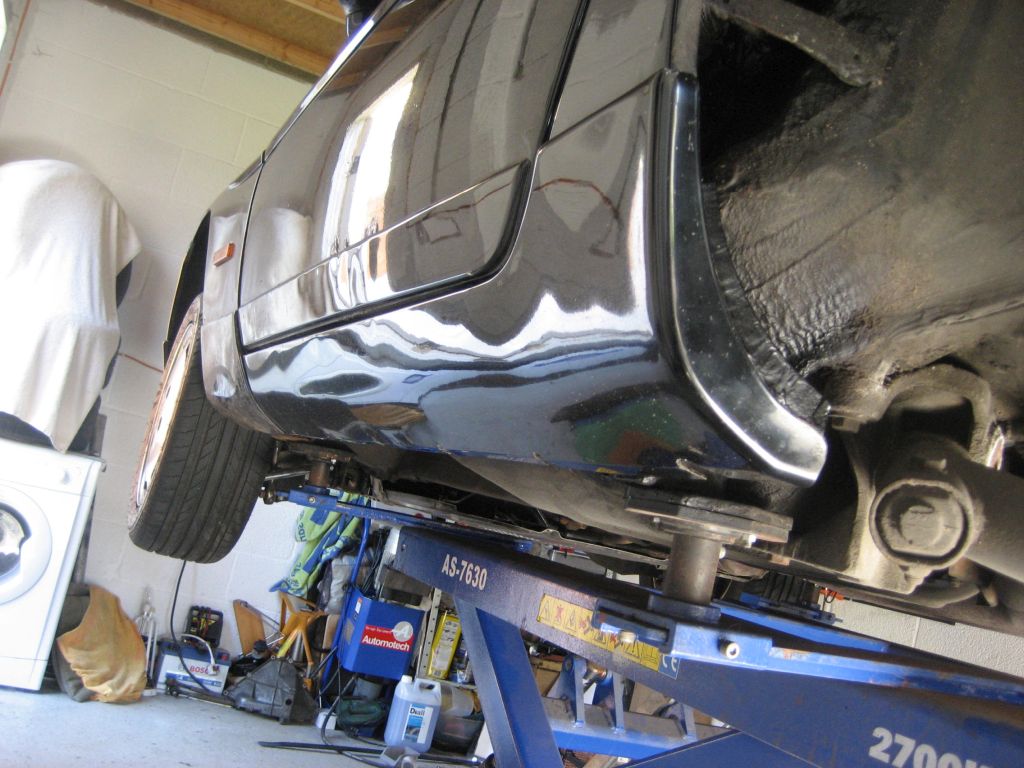
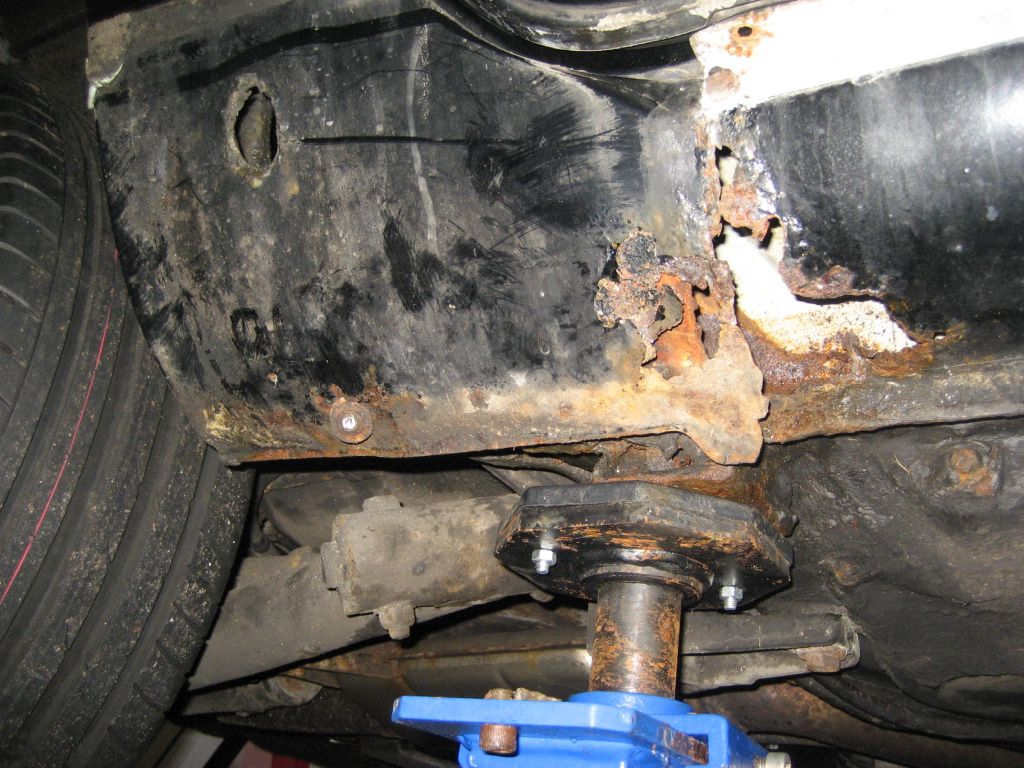
Now you can see the real condition of the outer metal sill panel that was hidden
beneath. It might be a shock to you given the mess it might well have ended up
in after 30 years of rusting away out of sight. See pic's of my S4 that was
bought under the 'a good car' premise. Not for the faint-hearted, as 'once
begun, better finish'! With the plastic cover off you have to make the metal
work good as it is a definite MOT failure and to reinstall the plastic sill
panel the metal work has to be good to drill into for your new afixing screws.
The reason they rot so bad here is that Porsche put an opening slot running
top-bottom, at the very front of the outer sill. I can only imagine they wanted
to get zinc primer in there when dipping the cars, or for it to act as
ventilation to avoid damp in the sill. But guess what; it just lets all the road
debris/salt in there and it rots away unseen behind the plastic cover panel.
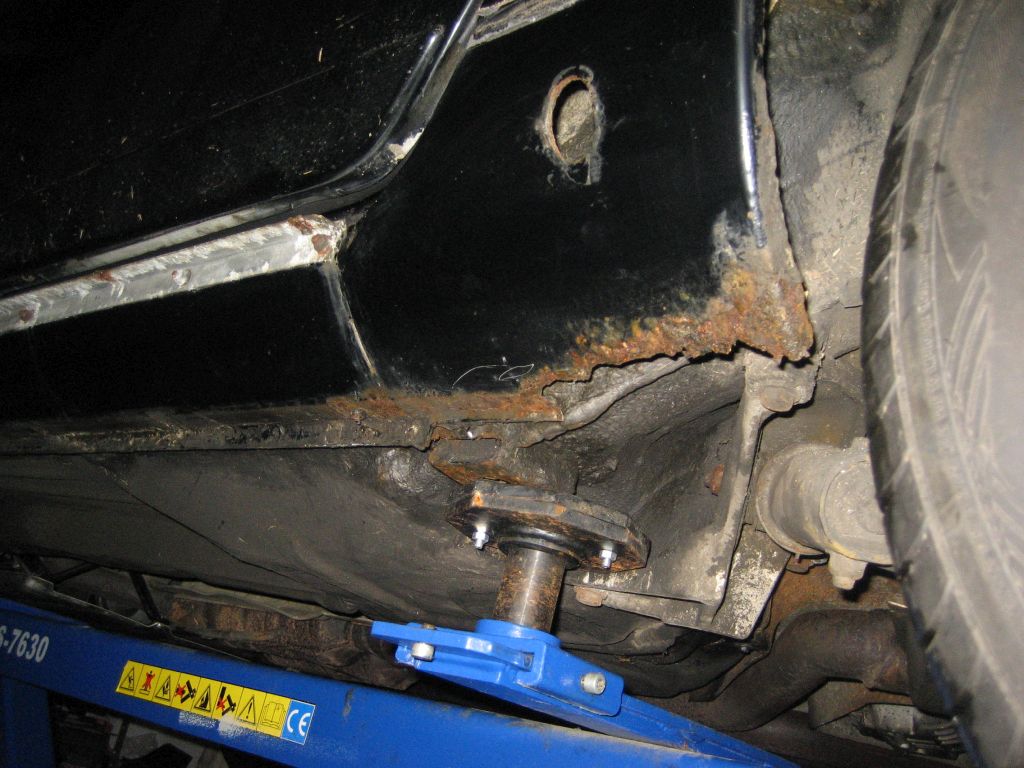
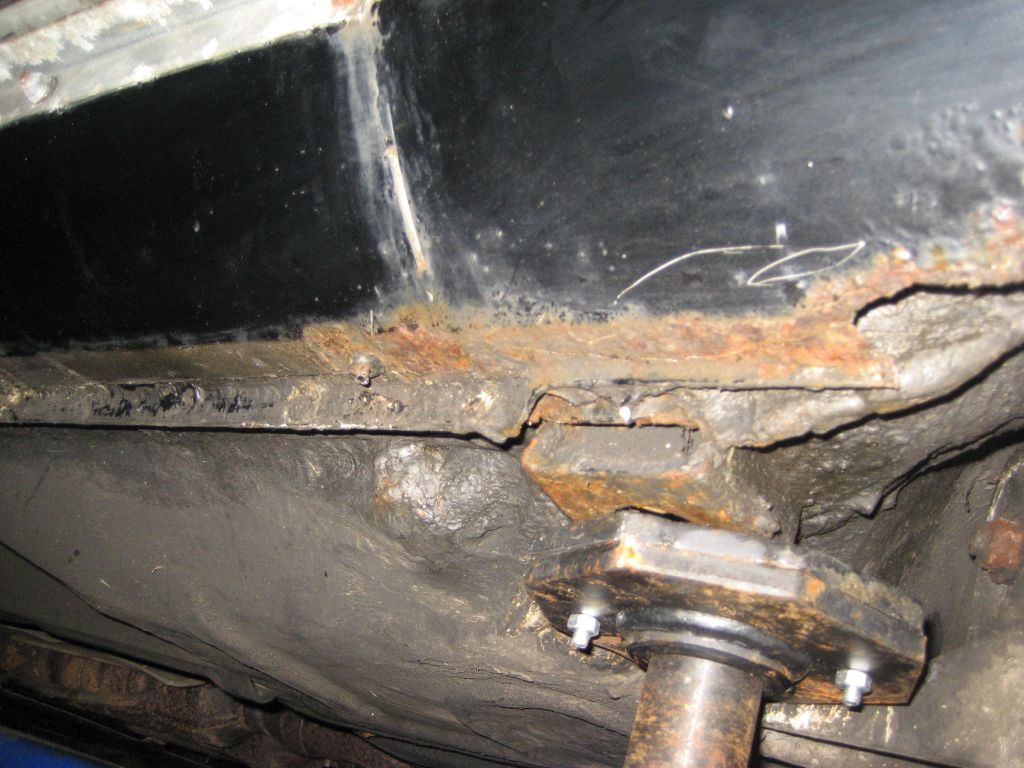
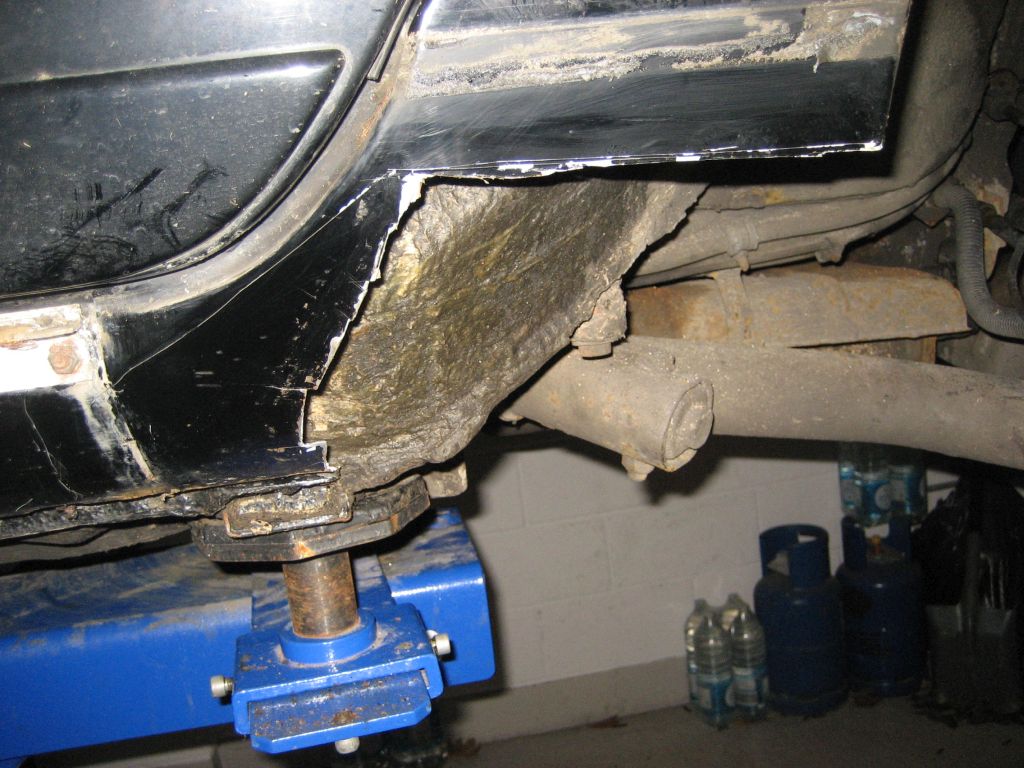
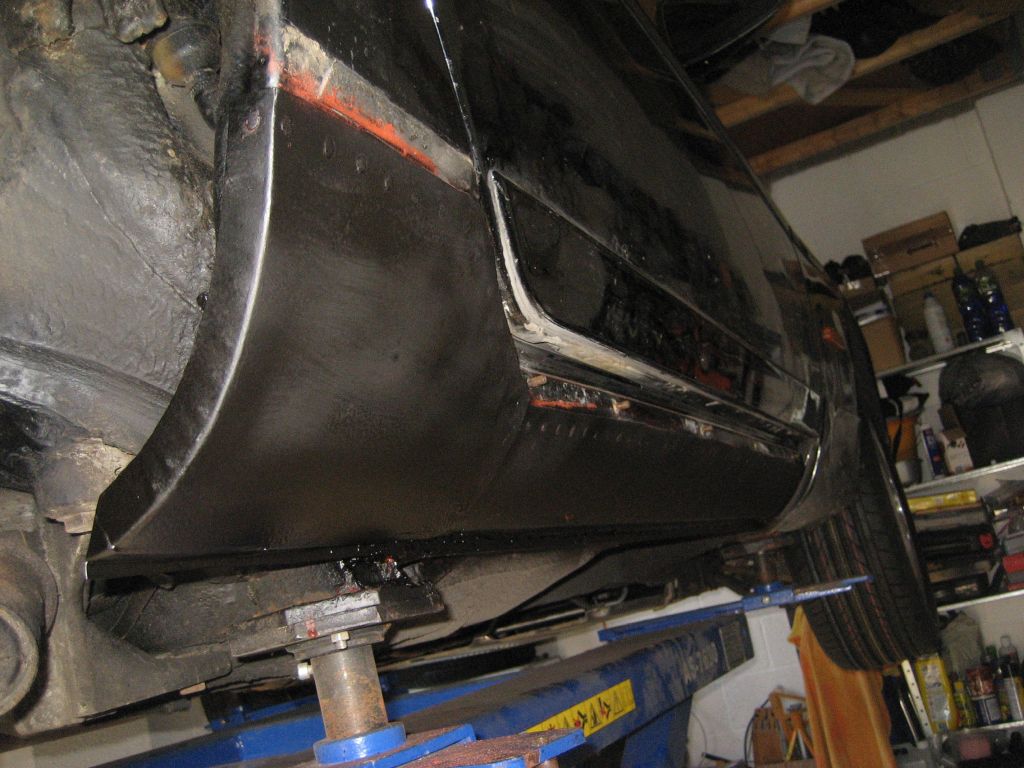
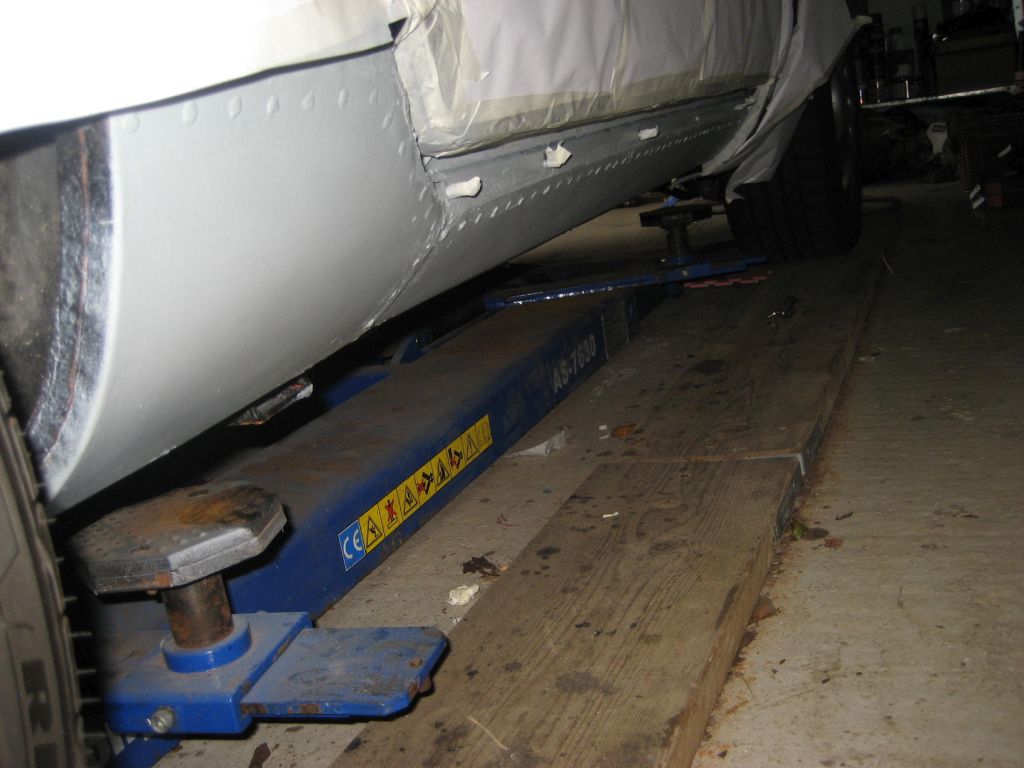
Now the real work begins. Step 1 is removing all that rot. I decided to use the
alluminium panel that attaches the plastic sill cover on the top as my
guide/line to cut out the rot and then weld the new panel back on. So, I left
the alluminium bracket on and then measure an inch below it, drew a straight
line running the whole length of the sill to the rear quarter panel, then cut
out the rot following this line. That got rid of all the rot and left an inch of
good steal below the alluminium bracket to weld the new panel on, and for
strength. I then cut the lower part of the outer sill panel with a grinder along
a straight line at the bottom of the sill. I did a similar thing with the rear
quarter panel. I cut about 1 inch below where the new panel was welded on for
strength.
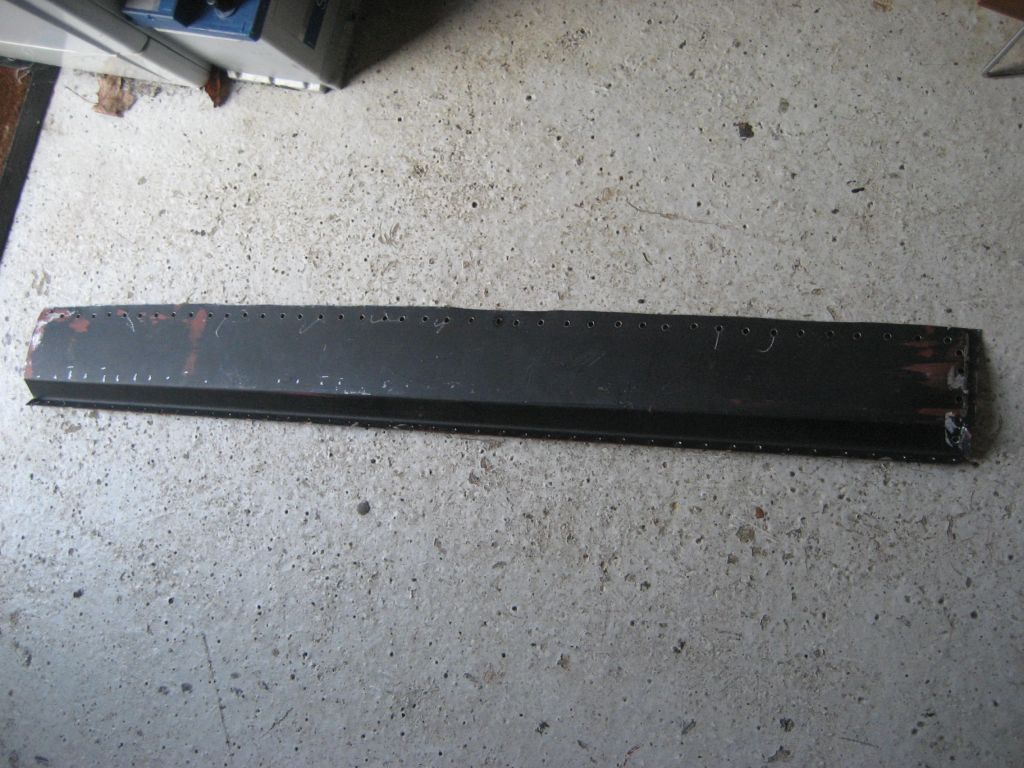
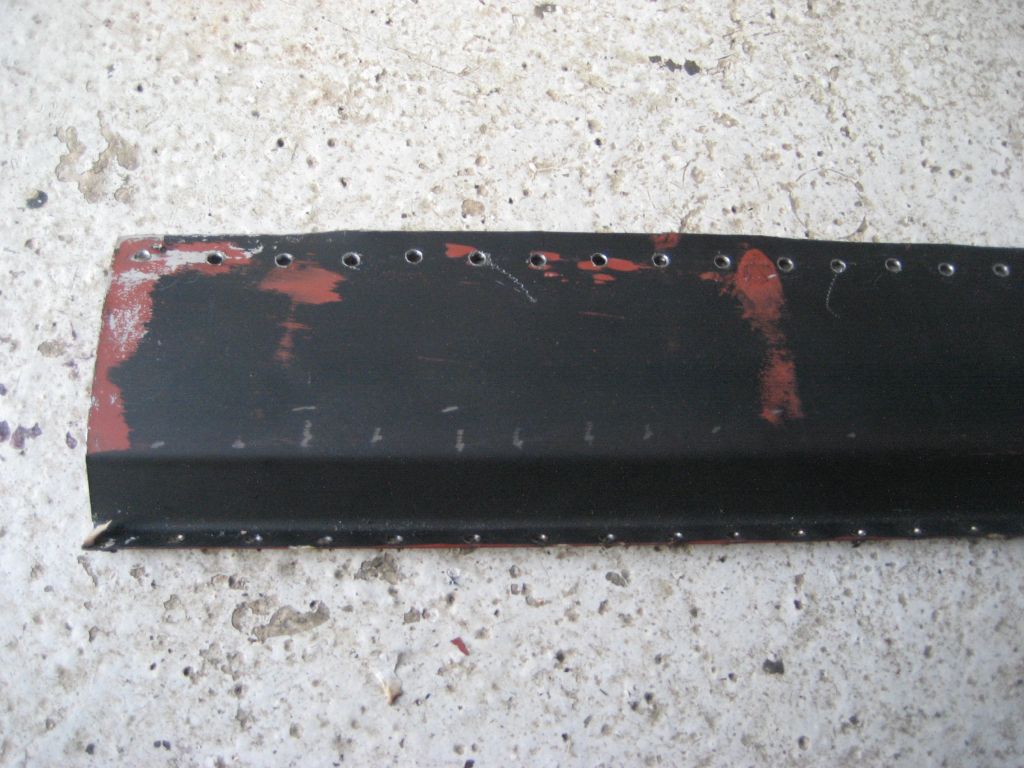
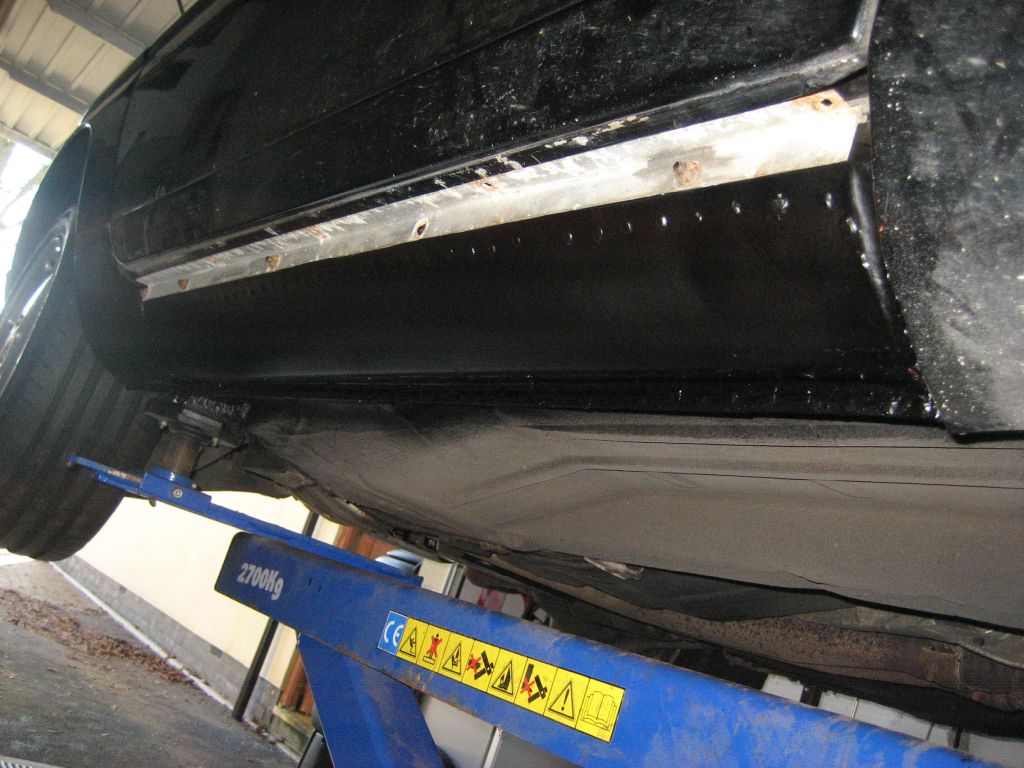
Now you need to prepare your panels. The outer sill panel needs cutting to size
to fit snug below the top alluminium bracket that holds the outer plastic sill
cover on. The new panel must also be fitted where it meets near the front
wing/bottom front edge of the door. Do the same with the new rear quarter panel.
These were handmade panels, so each one is slightly different and each 928 that
requires this work will be slightly different, so you have to work with your own
panels and car, to get it correct.
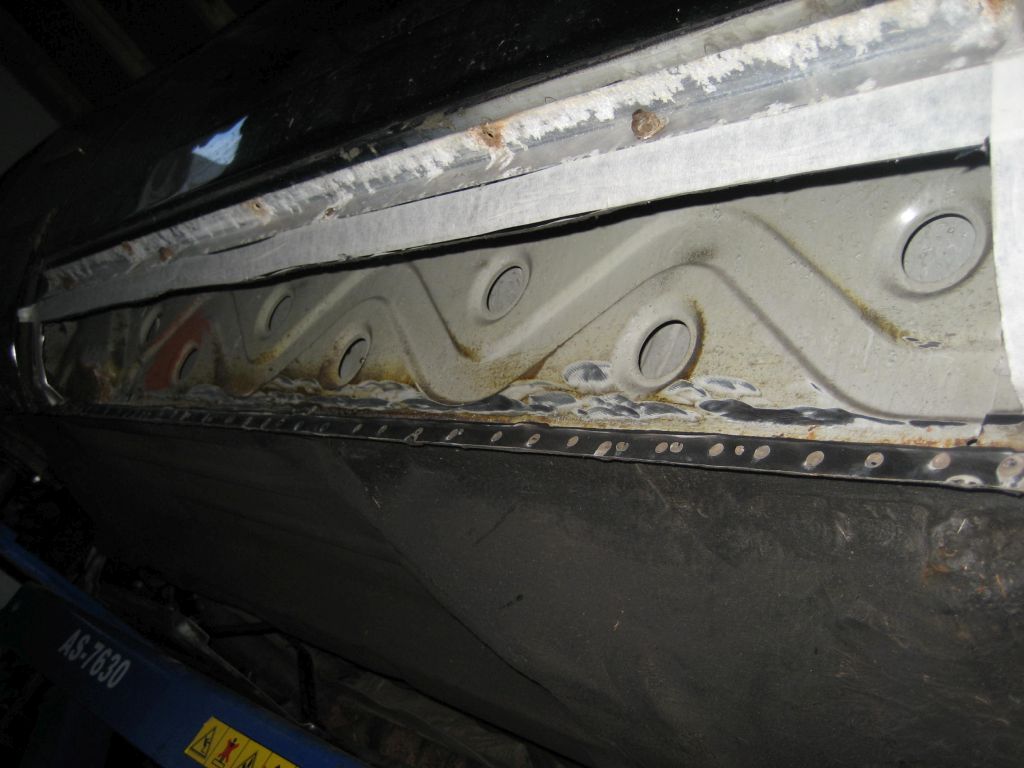
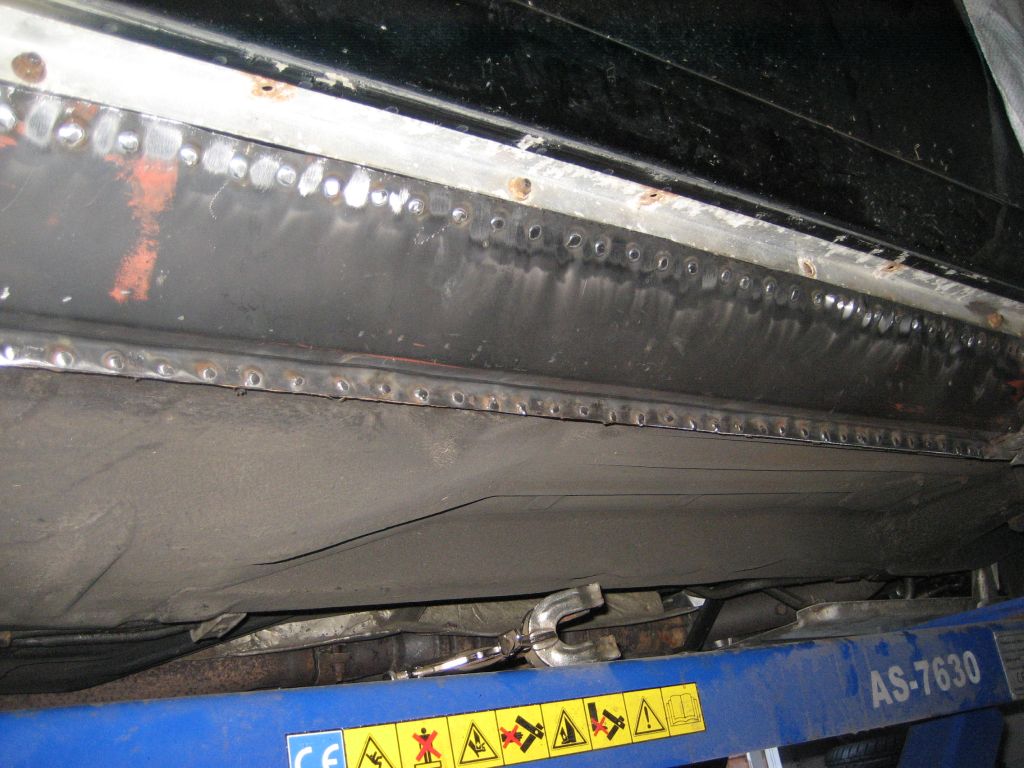
Then you have the labourious task of drilling lots of holes for the plug
welding. I did a hole every 1 inch along at any point I wanted to weld. This was
purely for strength. I think a hole every 2 inches would also be OK. When all
the holes are drilled give the inner sill panels some extra paint now you have
the chance and attend to any corrosion on the inner panels by either cleaning up
surface corrosion and using STOP RUST paint, or cutting out really bad metal and
panel welding new metal in to repair. The inner sill panel is available at
Porsche but is circa Ł400 per side! It also gets A LOT more complicated if the
inner sill panel is bad, as the door frame requires bracing to stop the body
flexing out of line when removing the inner sill.
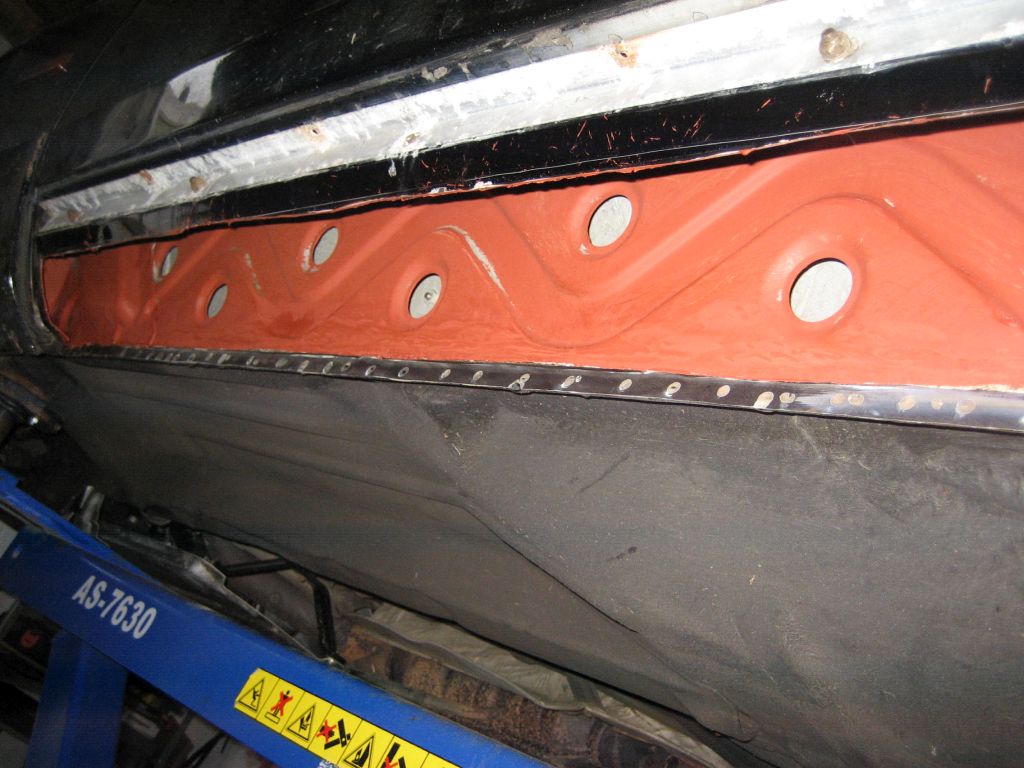
When your new panels are ready and your repair work+painting of the inner sill
is complete, clean off any primer from your new panel and the car where you want
to weld, and then get the new panels aligned where you want them, using the
outer plastic sill also to make sure it fits nicely still, and get them welded
on. Run weld sealer over the welds when finished. Finish by spray painting the
new panels with stone chip, primer and a gloss top coat to seal the new metal
work and protect against corrosion long into the future. If you can, get a
bodyshop to do this for you.
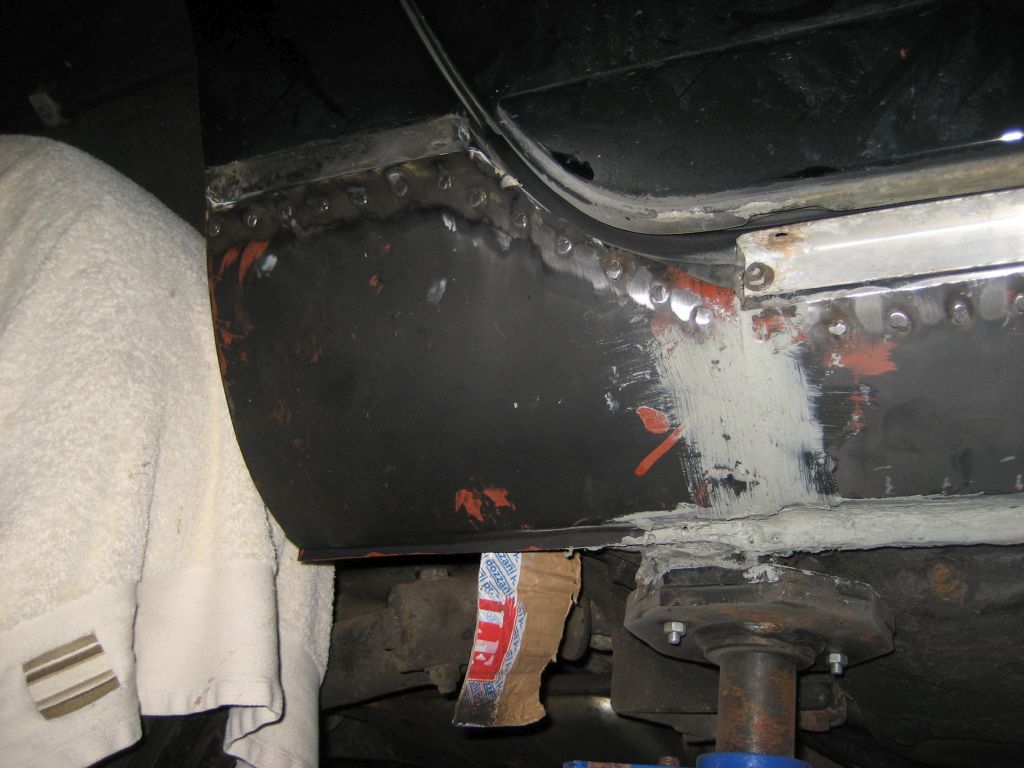
The final task is refitting the outer plastic sill panel. You will need to fit
the panel with the screws on the top first, then push the plastic sill cover
flush to the floor pan underneath and mark+drill small holes for the new
securing screws underneath. I used new 10mm socket head screws with large
washers as they will be be easier to remove well into the future, even if they
rust. Put some grease on them and don't over-tighten them. If your outer plastic
sill cover has some damage where the holes for the screws are, just use a large
washer either side of the plastic panel and then run your new screw through them
toi retain a good fixing/strength. Where the plastic sill cover sticks to the
rear quarter panel, I used some 3m double sided tape at 3mm thick and put a
small screw at the back edge where it runs over the metal panel in0front of the
rear wheel.
Now all you have to do is repeat the same thing on the other side of the car! I
got the quality, handmade panels from here:
www.classiccarpartsandpanels.co.uk
They cost Ł500 for both sides. The screws+threaded washers for the outer sill
covers are available at Porsche. I had no prior experience of doing this work
and did it in the depths of winter at -4 in my garage. Like I say; not for the
faint-hearted. It was either this or scrap the S4. After Ł30,000 already sunk
into this 928 over almost 10 years, I had to bite-the-bullet and go for it.
I imagine lots of later 928s will have similar rot hiding behind those plastic
outer sill covers, so have a good check of your own car, and BUYER BEWARE!
Dave.