Hi Theo, hope you're well.
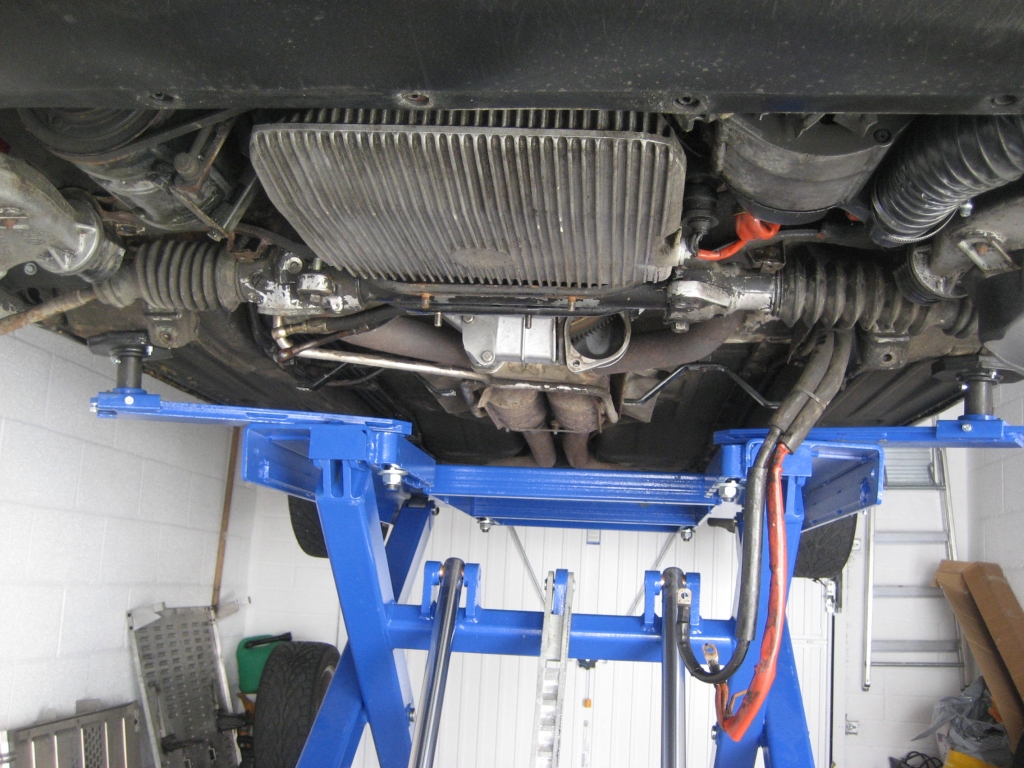
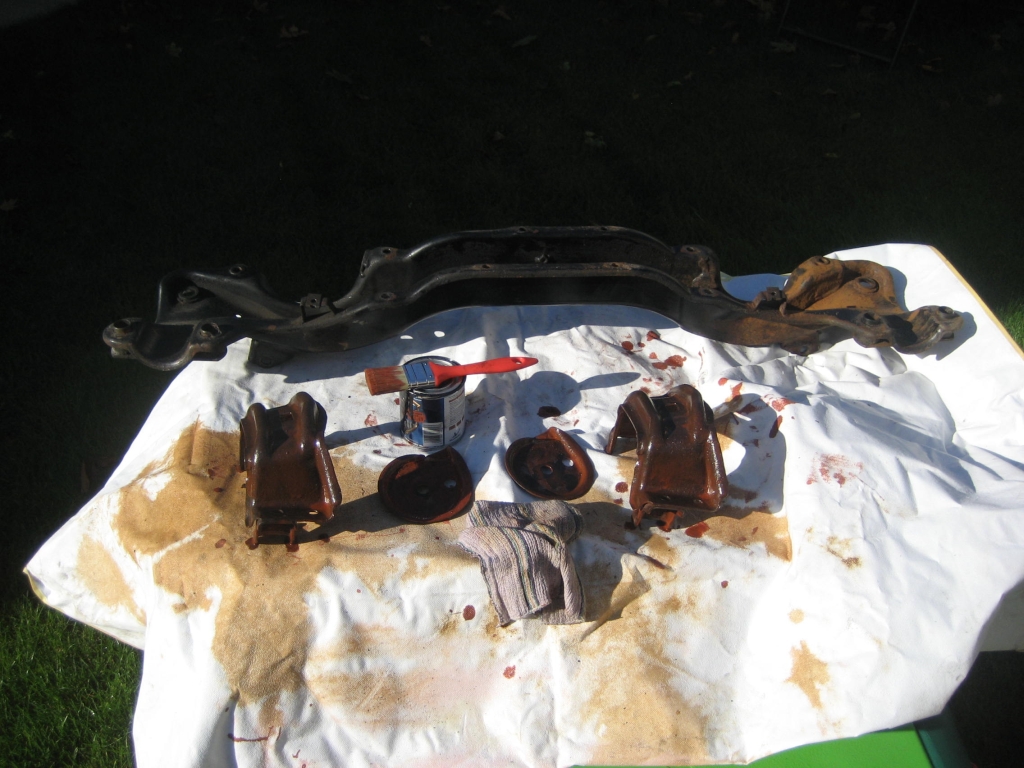
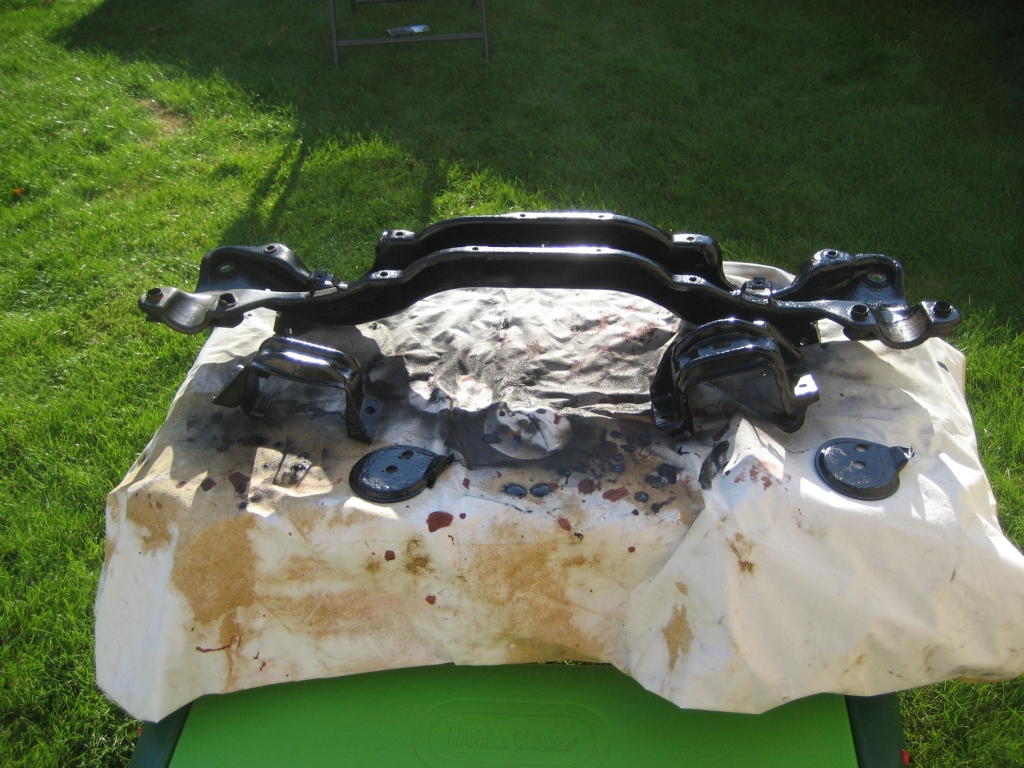
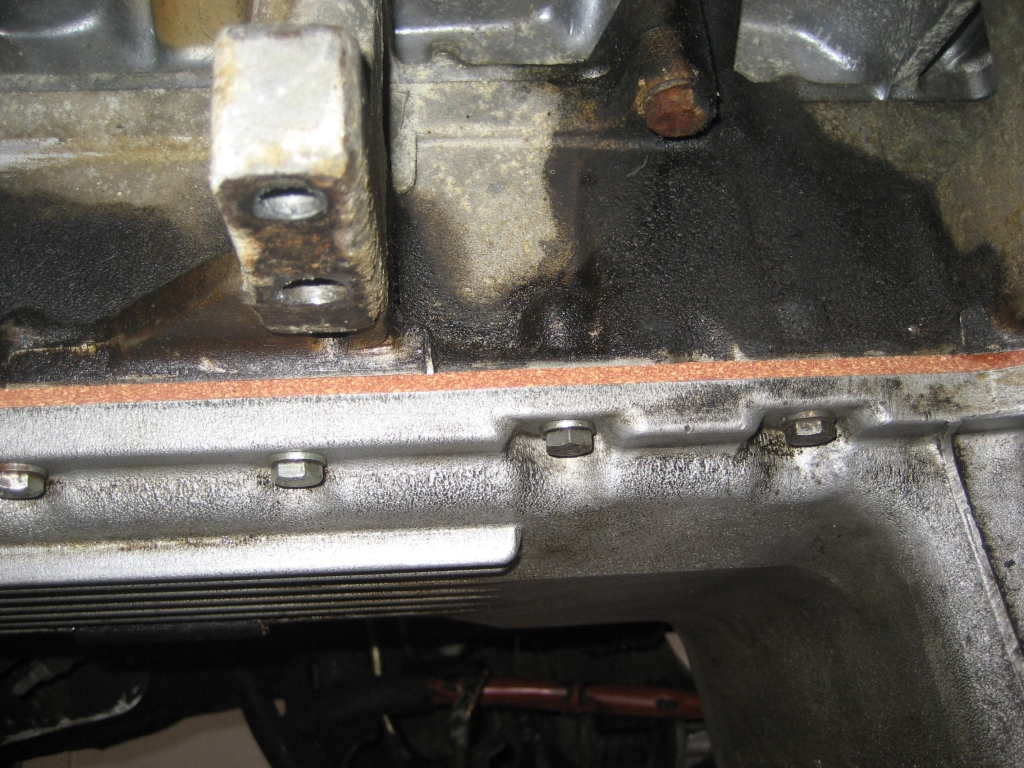
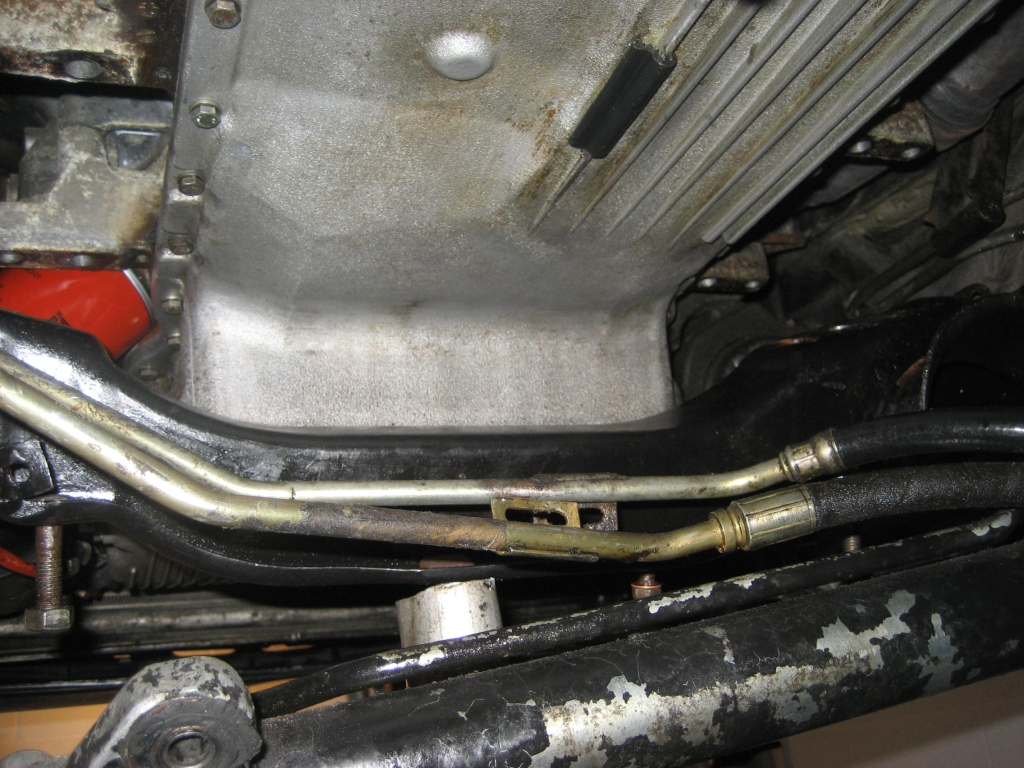
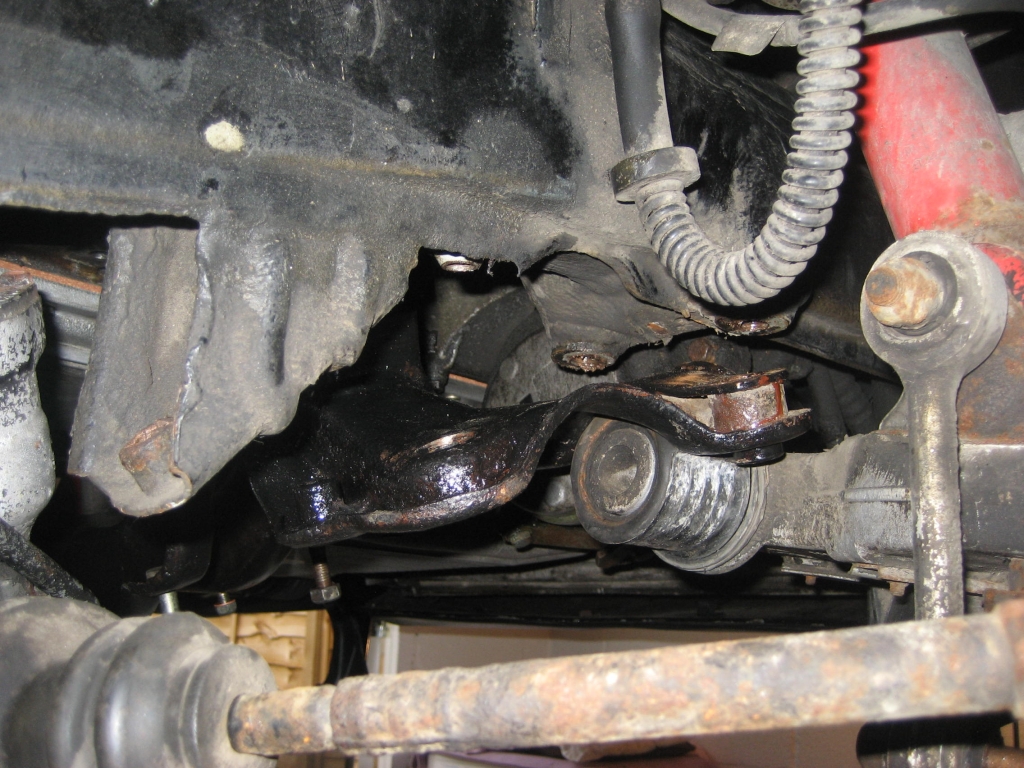
I got the engine mounts/crossmember out. The mounts don't look too bad amazingly
except for being compressed about half an inch. They were compressed about an
inch with the engine weight though. See pic's.
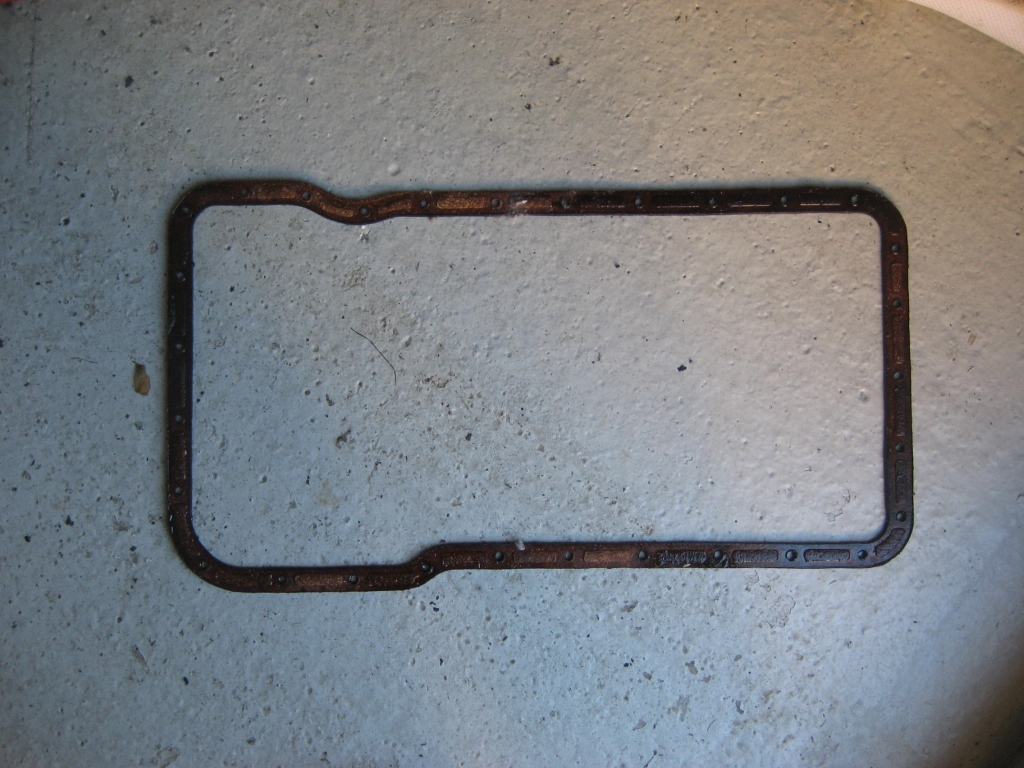
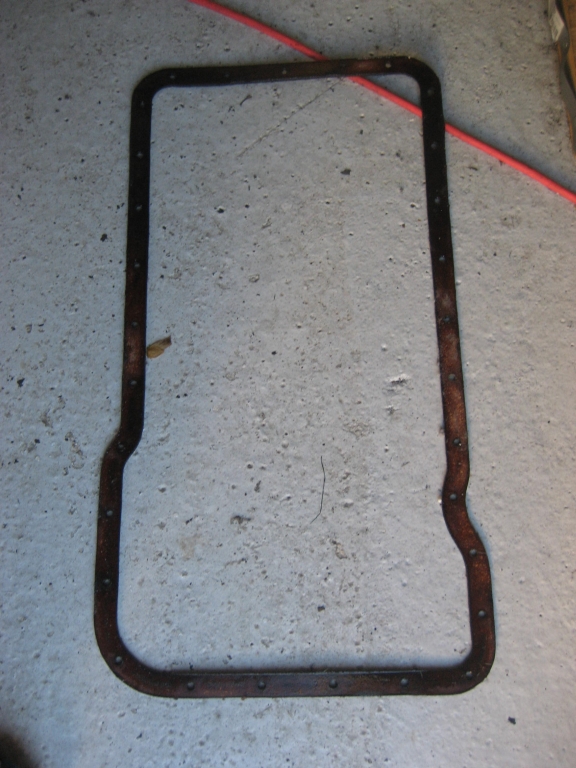
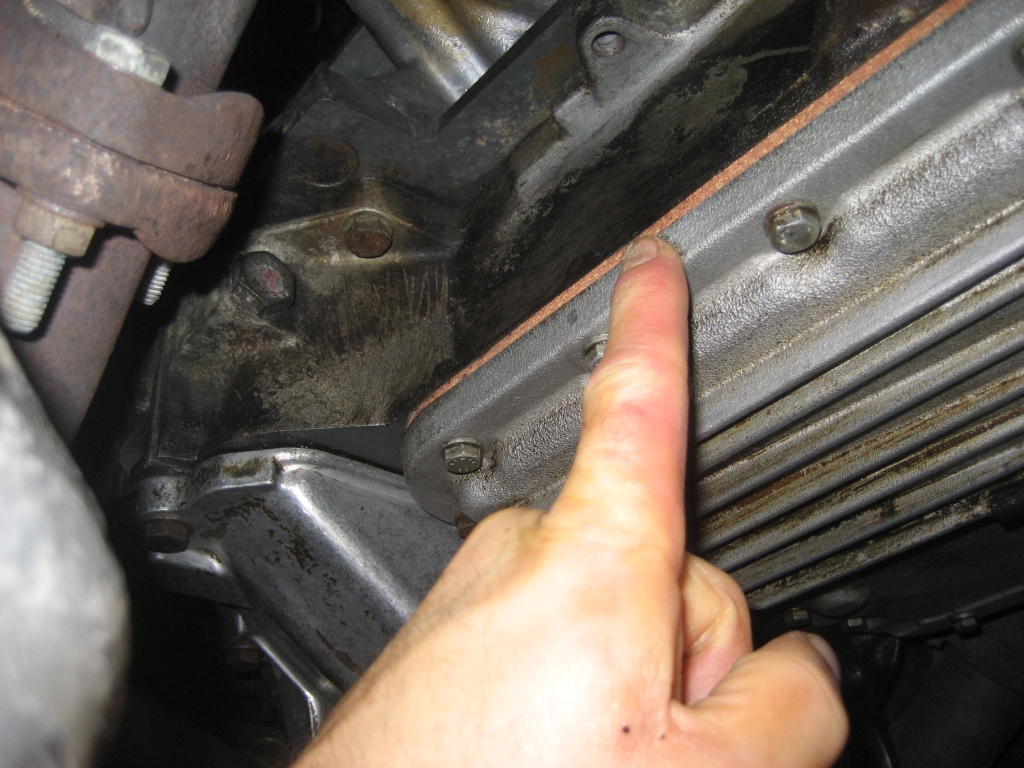
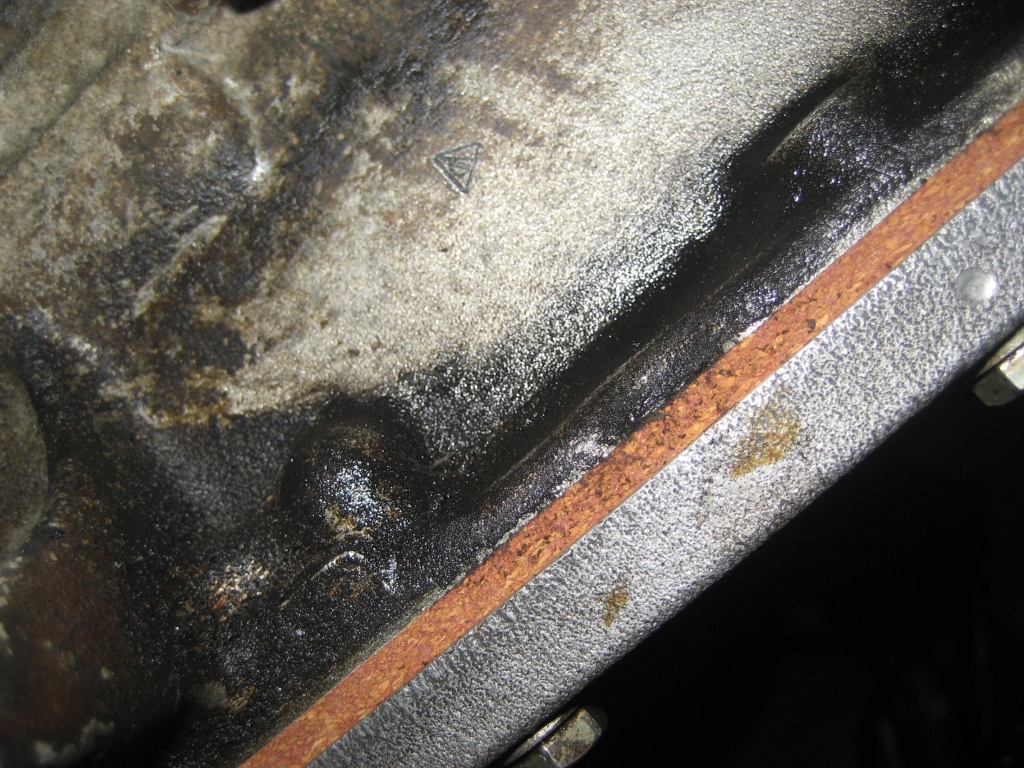
Also dropped the sump pan for a new gasket as the old one was knackered. I
cleaned everything up real good for reinstall.
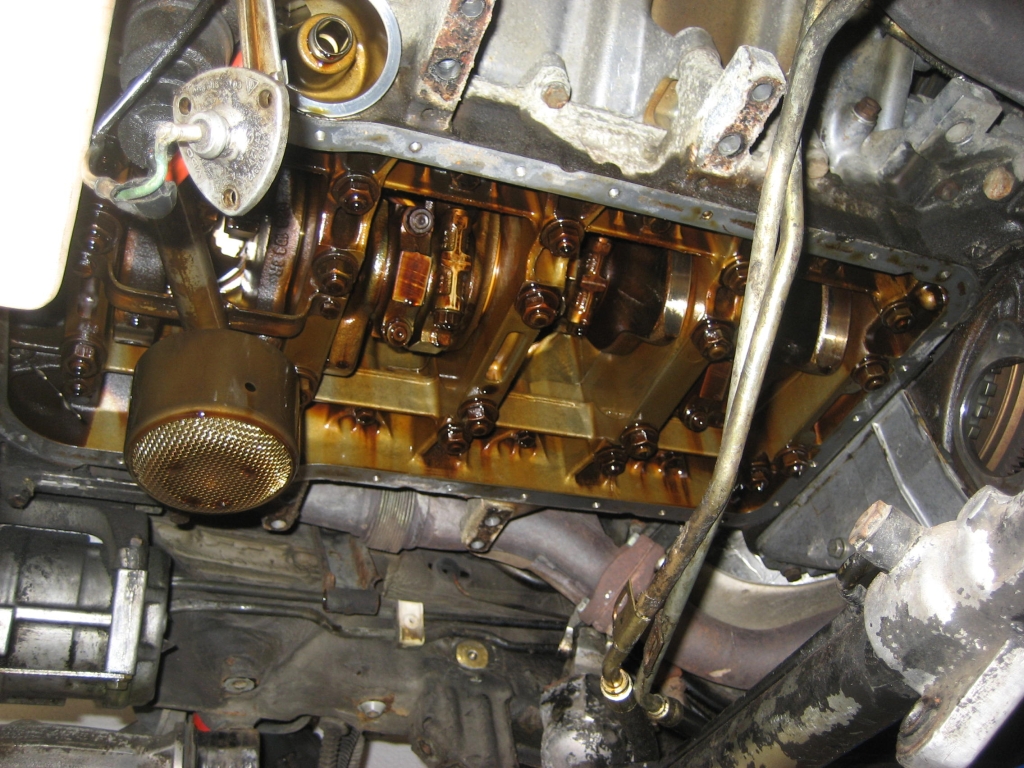
Looking inside the engine now the sump is off; it looks super clean which is
good.
I did notice some circular scoring marks about 1-2mm deep on the block where the
crank rotates the pistons; is this evidence of where there's been forward
pressure on the flexplate in the past? Not a sign of anything terminal unfolding
I hope!
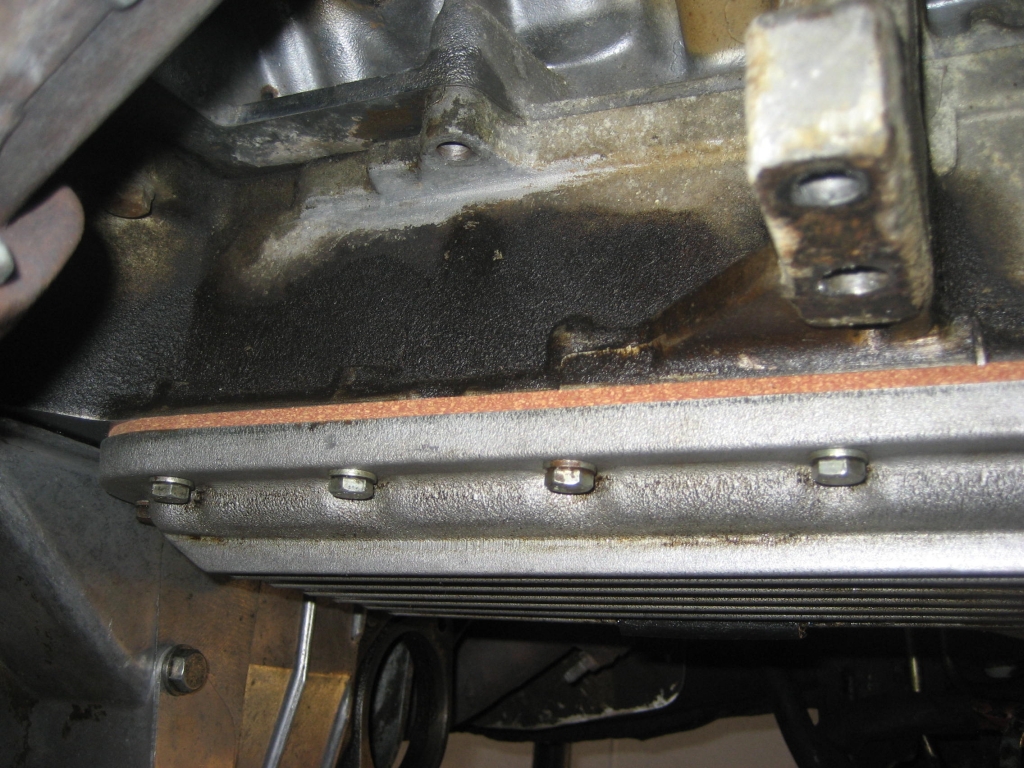
I should have the new mounts soon and the new Porsche OEM sump gasket is here
tomorrow. I've cleaned the sump pan/block meticulously clean ready for the new
gasket. After reading on the rennlist forums I'm not going to use any gasket
sealer as the consensus seems to be a cork gasket does not need any.
Some of those front sump pan bolts are tough to get at!
best, Dave.
=======
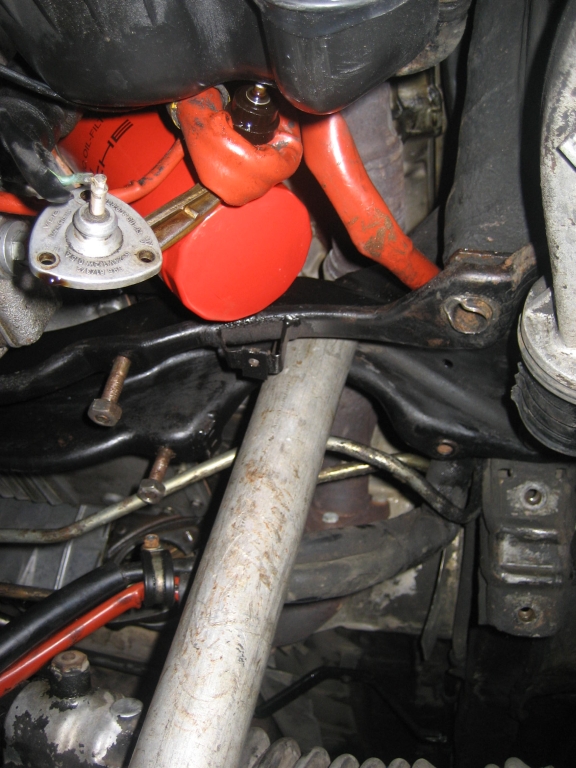
With the crossmember removed for the new motor mounts I figured renewing the
sump gasket was a good idea as the old one was knackered. I did a write-up with
pic's as I notice there's a lot of discussion about the sump gasket but no
step-by-step write-up.
Sump gasket renewal 1989 Porsche 928 S4 Rhd.
1) A leaking sump gasket seems to be common place on 928s. Many reasons
suggested for this and alternative replacements available. I believe that the
main reason for leaking sump gaskets are age and over-tightening. I did a
straight swap for an OEM Porsche gasket WITHOUT SEALANT. Personally, I avoid
aftermarket cork/paper sump gaskets as I've read bad reports about them in terms
of fit/quality. To remove the sump gasket you have 2 choices to access it: drop
the front crossmember (see John Pirtie's and Dwayne's awesome write-ups for the
steps to follow) or remove the engine with a hoist (see WSM for engine removal
process). Personally, I dropped the cross-member as I had to do the motor mounts
anyway. Which ever method you choose you must drain the oil and remove the
filter.
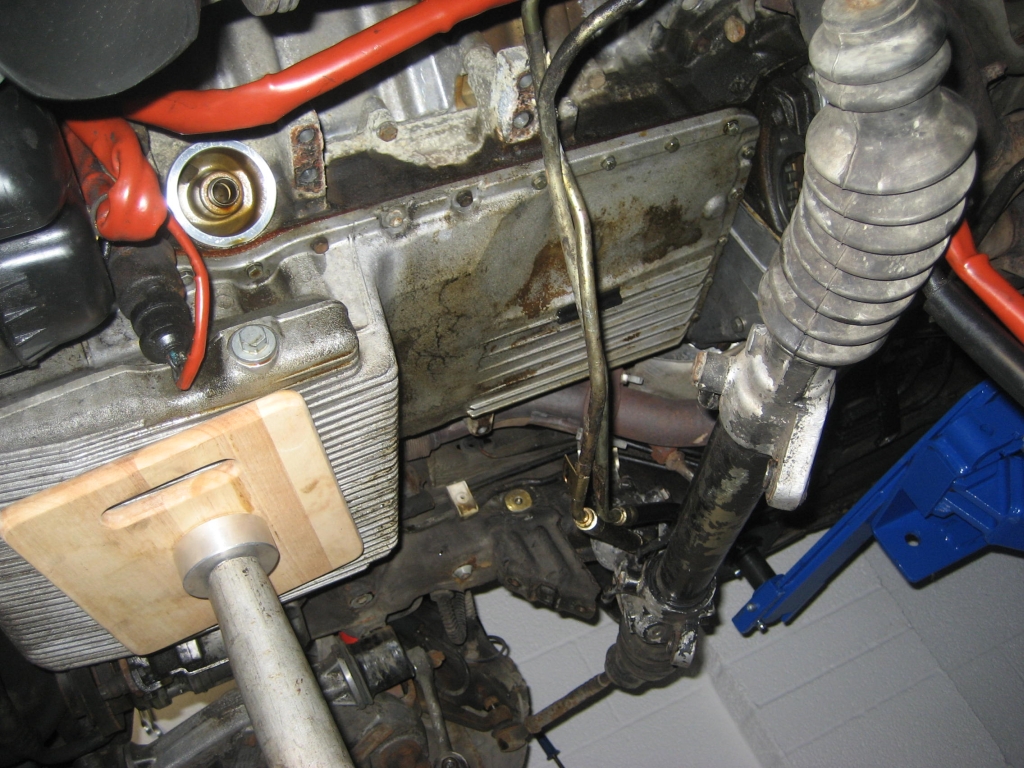
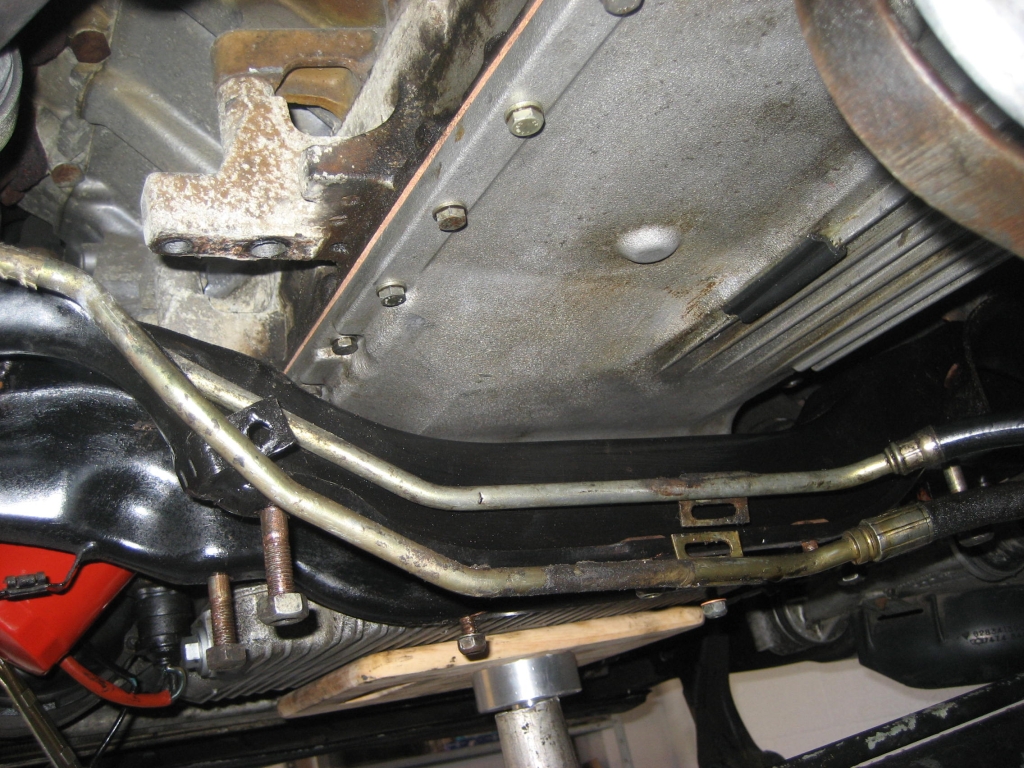
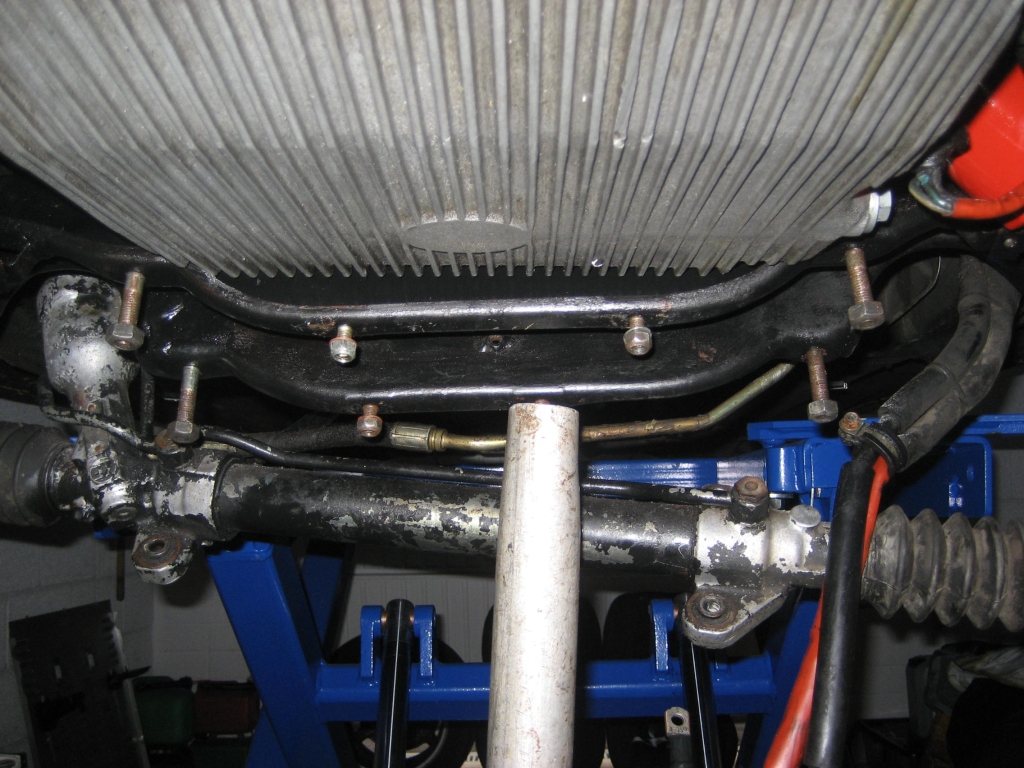
2) Once the crossmember is removed you have the access you require for most of
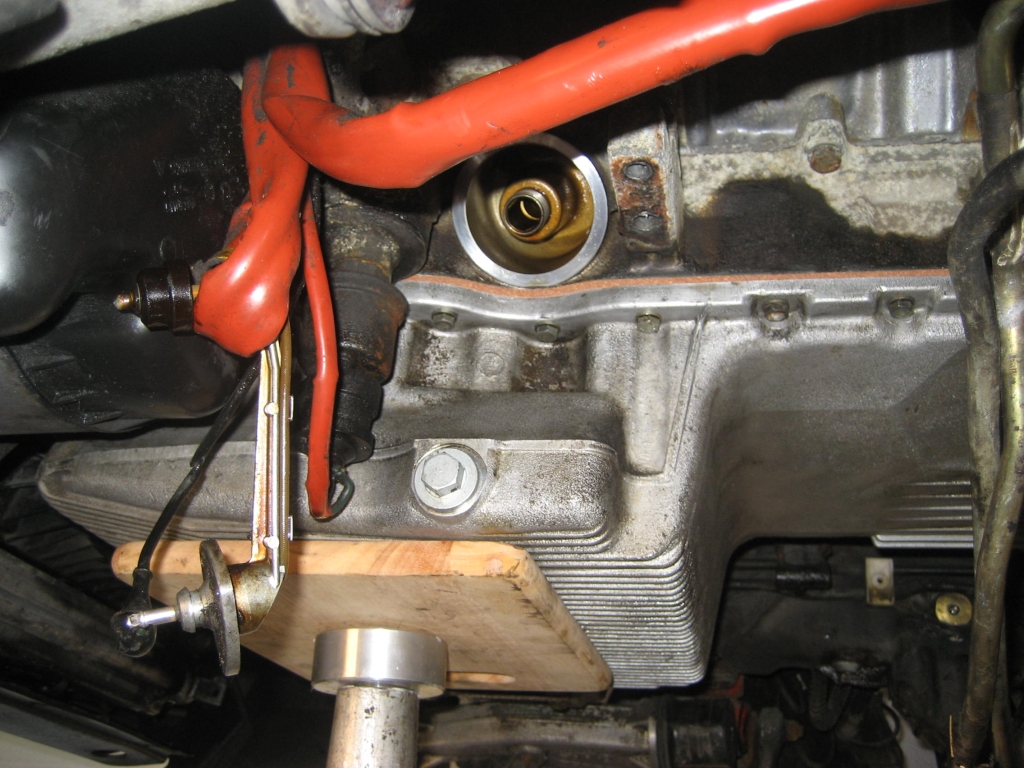
the bolts. You need to remove the starter motor ( and most likely clean it as it
will be covered in oil!) to access the one behind it and the oil pressure sender
at the front of the sump near the alternator. Find the front of the sump near
the alternator, put your hand/fingers up above on the ledge protruding at the
front of the sump and you'll be able to feel the oil pressure/level sender.
Carefully remove the electrical connector on the top and move it away. The oil
level/pressure sender is bolted on with 3, 8mm bolts. You can remove these with
a spanner and carefully pull the sender unit up and gently wriggle the sender
out of the sump. The sender has a long arm that protrudes into the sump, so it
takes some careful wriggling to remove it. The reason for removing it now is
because it gives access to a really tricky sump bolt situated right above the
oil pressure/level sender.
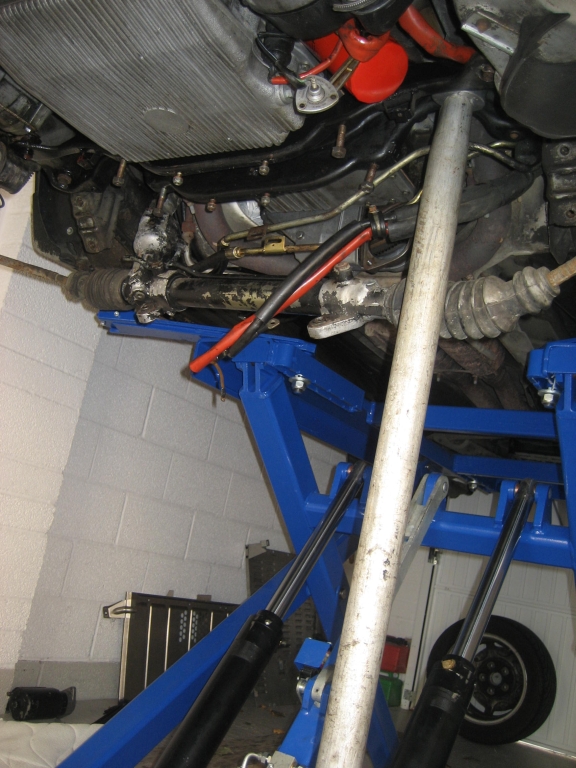
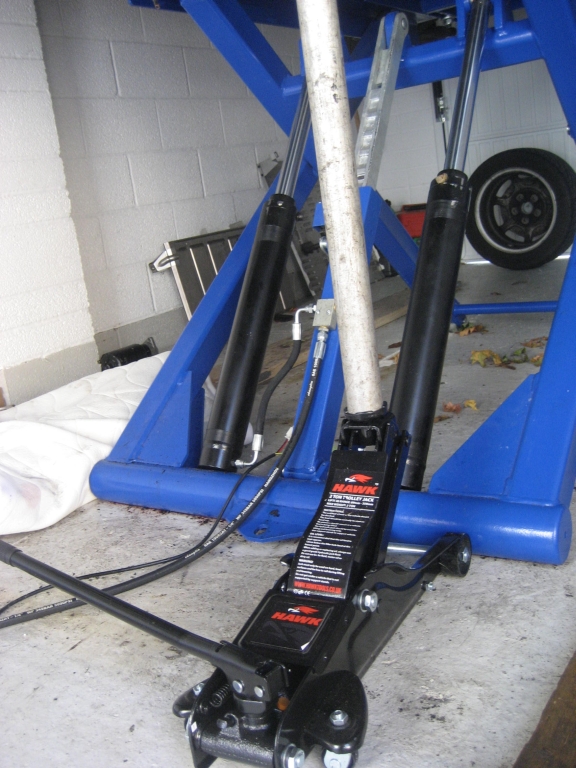
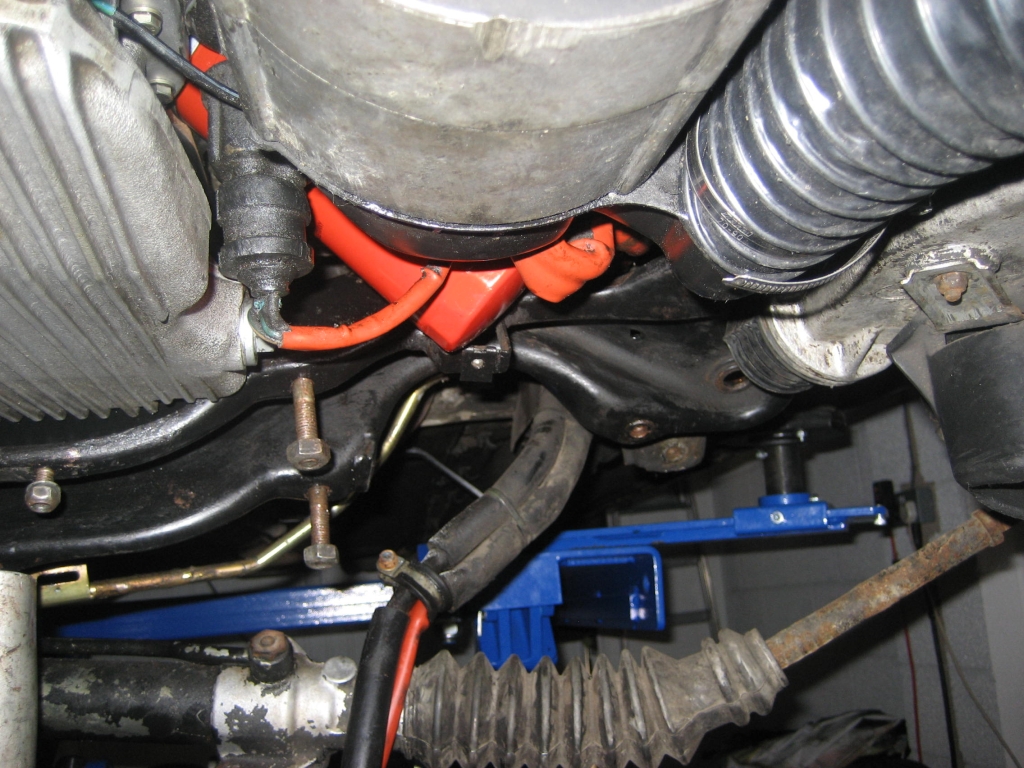
3) Support your sump pan in a secure way using a jack and piece of wood. Use
only enough pressure to hold it still but not so much you jack the engine
upwards. Unscrew your sump pan bolts leaving 2 half screwed in at either side of
the sump pan in the middle. The front sump pan bolts are killer to get into to
for removal due to the overhang at the front. No easy way to do them; use a
small 8mm spanner and be patient; you'll get them out eventually; took me about
an hour!
4) With all the bolts removed bar the 2 in the middle either side, support the
pan and make sure you have something soft (like an old duvet) on the floor
underneath in case the pan falls out of your hand. Now you need to separate the
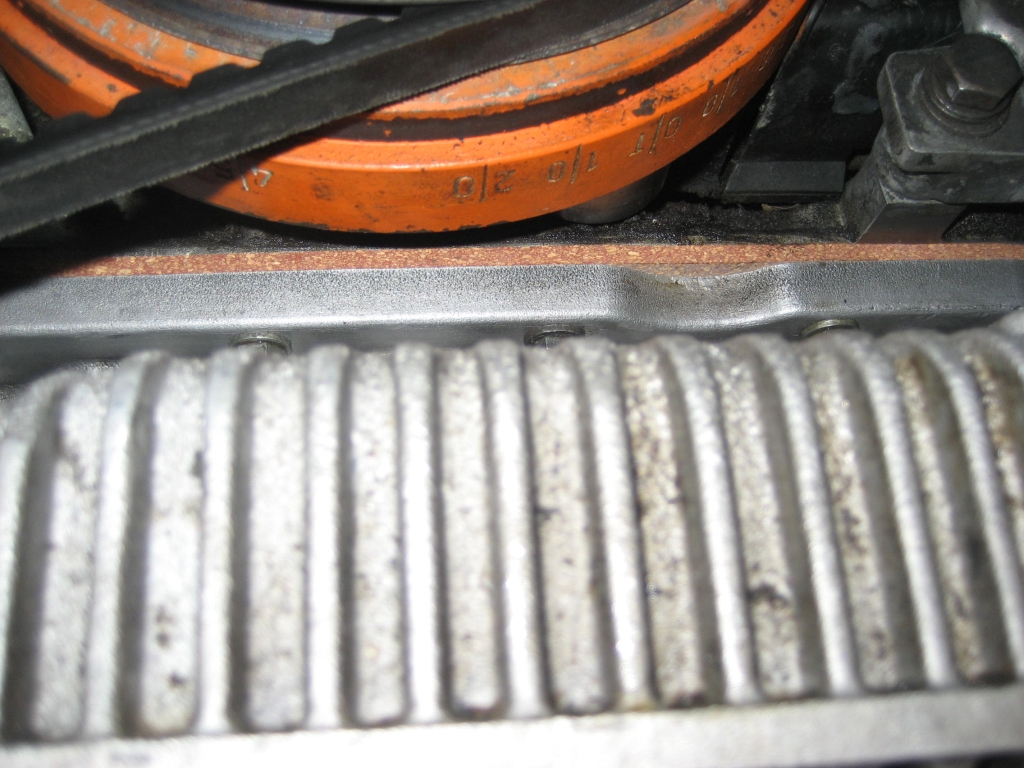
pan and gasket from the block CAREFULLY! On either side of the block near the
back of the sump pan (towards the flywheel direction) you will find a type of
indentation cut into the block. This means the sump pan protrudes out from the
cut-out in the block. Use this protruding ledge to use a flat blade screwdriver
to loosen the old sump gasket/pan from the block. Don't bang like a mad man;
just slow firm taps. Once the pan/gasket starts to separate, hold the pan
underneath and pull it free with other hand and remove the last 2 screws. Lower
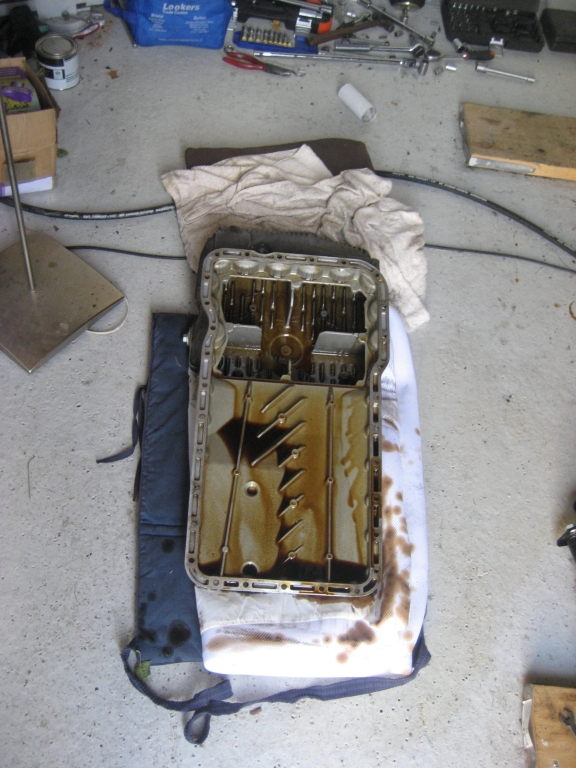
the sump pan slowly. You will find some residual oil in there.
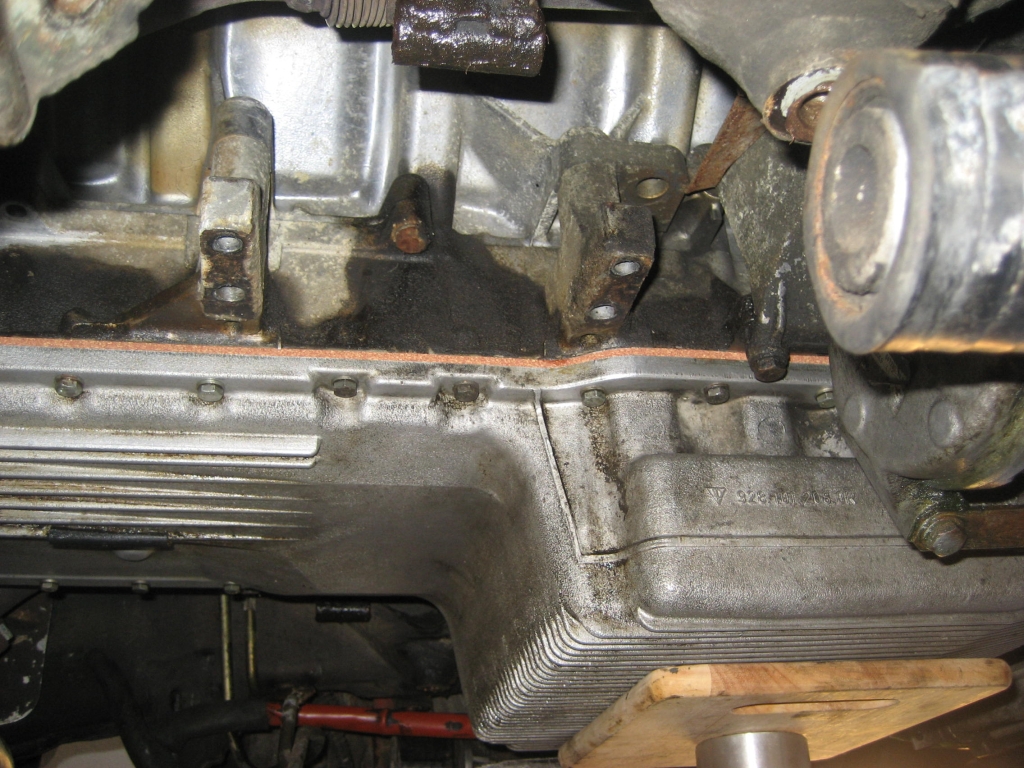
5) You'll probably have a mess in front of you! My old sump gasket was
knackered; saturated in oil and badly compressed/as hard as stone. Given your
sump gasket has probably been leaking ages no doubt most things will be covered
in oil. Give everything you can a good clean-up and do your sump pan as well.
Pay particular attention to the recesses on the side of the sump pan as this is
used to grip/seal your new gasket when refitting. Use a stanley knife blade to
carefully remove any left-over parts of gasket on the sump pan/block. Keep the
blade flat as you don't want any deep gouges anywhere. Then to finish, use a
scouring pad to clean to a fine/spottless finish. I then used some fuel and a
clean cotton rag to clean the sides of the sump pan and where the pan attaches
to the block. YOU MUST REMOVE ALL TRACES OF OIL FROM THE SUMP/BLOCK BEFORE
INSTALLING YOUR NEW GASKET.
6) Once your decided upon the type of gasket you want to use for install, you
now have 2 choices on reinstalling the oil pressure/level sender. You can
install it now with the sump pan removed or install it when you have reinstalled
the sump pan. I do it the latter way as this makes installing the front sump
bolts easier due to better access. The only danger to be aware of is to NOT drop
anything into the cut-out for the sender unit whilst reinstalling the sump pan,
otherwise you'll have to remove the sump pan again to retrieve whatever you
dropped in there!
7) After reading the debates on Rennlist, I decided upon an OEM cork gasket
WITHOUT sealant. If you decide to use an alternative and sealant now is the time
to apply your sealant and new gasket TO THE SUMP PAN NOT THE BLOCK.
8) Give your sump bolts and washers a super meticulous clean. Get ALL the oil
off them. DO NOT USE ANY LUBRICANT to reinstall. You can use a thread locker if
you want. I decided not to and just check my sump bolts regular for tightness.
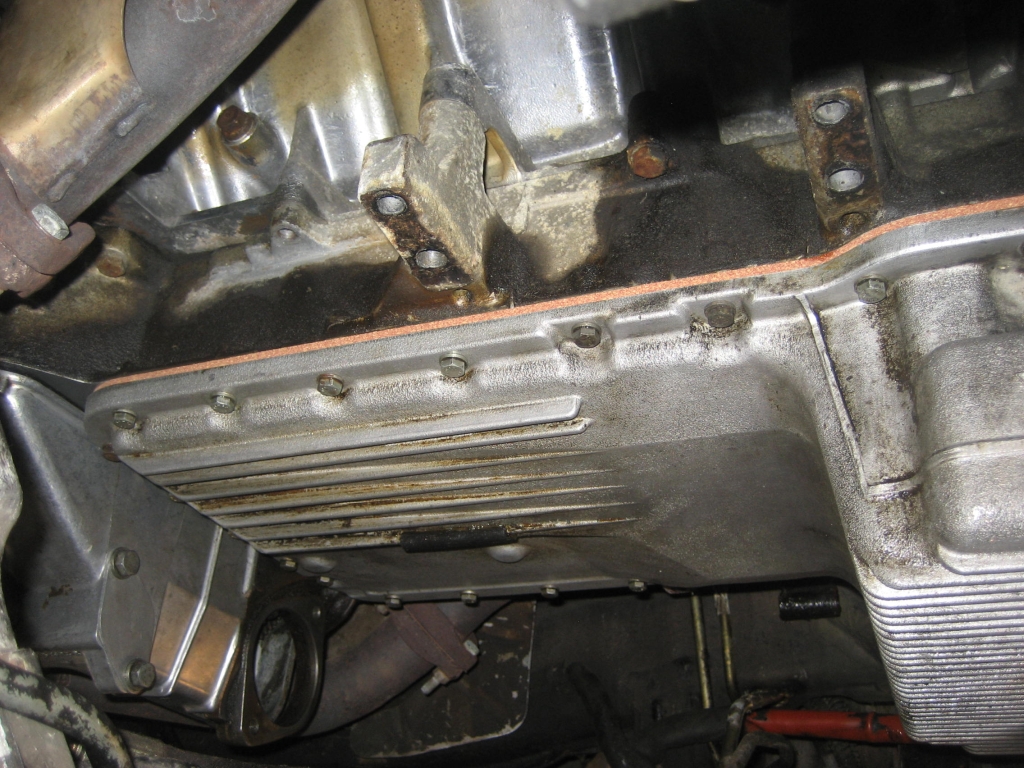
9) With your clean sump and new gasket on top of it nicely aligned, support the
pan in the middle and slowly manoeuver into place. Again, start by hand screwing
the 2 middle bolts on either side of the pan half way in. These will now hold
the pan for you. DO NOT TIGHTEN THEM IN YET. Now go to the front of the sump pan
where it overhangs and with the pan hanging loose access to reinstall these
tricky front bolts is better. Get these front sump bolts in by hand half-way
tight. It won't be easy but be patient and try not to get frustrated (this
coming from the world's most impatient person!). Once you have these tricky
bolts screwed in about half way go and screw all the other bolts in half way.
The reason for doing this is you need to use the bolts to align the pan gasket
BEFORE screwing any bolt in tight.
10) With pan/gasket now aligned with all sump bolts screwed in half way begin
screwing the bolts in one-after-another, to the point you feel the gasket begin
to compress on each bolt. As soon as feel them start to compressed, STOP
tightening and move to the next loose bolt. Go around the pan one bolt at a time
like this until the ALL the bolts are holding the pan/gasket in a gentle
compressed state. The beginning of the compressed state is where the sump pan
recesses are starting to grip the gasket to hold it still/aligned.
It's OK to use a 10mm socket on a ratchet here.
11) Now ditch the ratchet and use a 10mm spanner so you can feel the tension
your applying. Now go around the pan one bolt after another tightening each one
until you feel the gasket initial compressing stage, firming up. As soon as you
feel this happening STOP tightening and move to the next bolt. Go around the pan
until all the bolts are tight but NOT OVER-TIGHTENED.
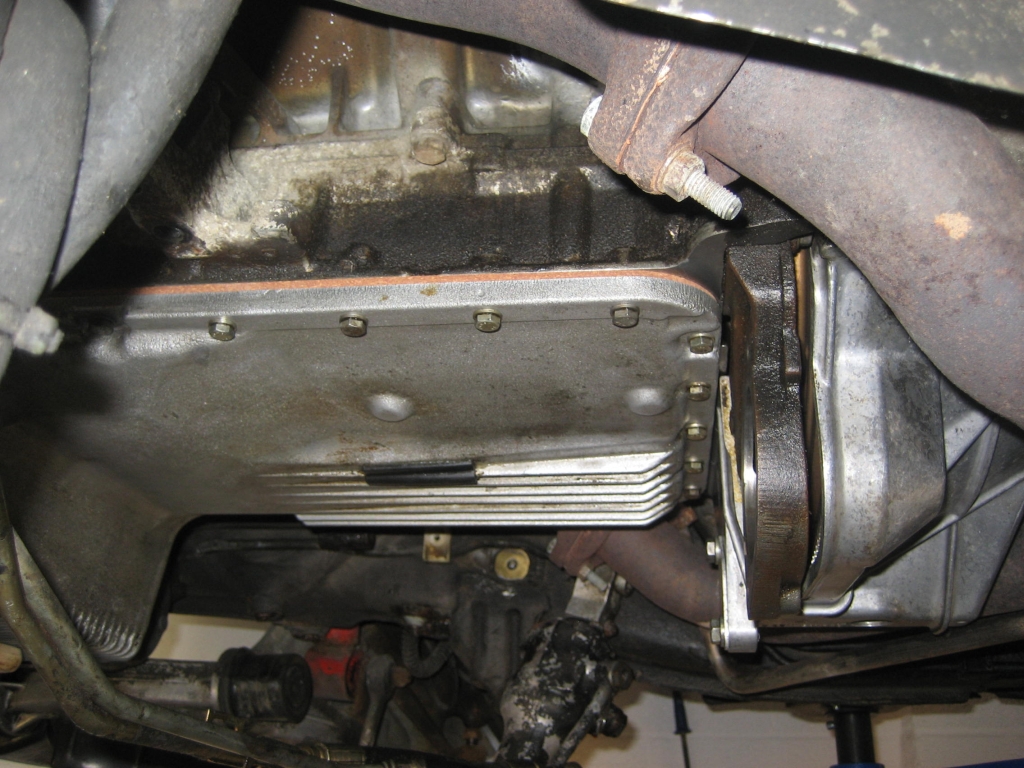
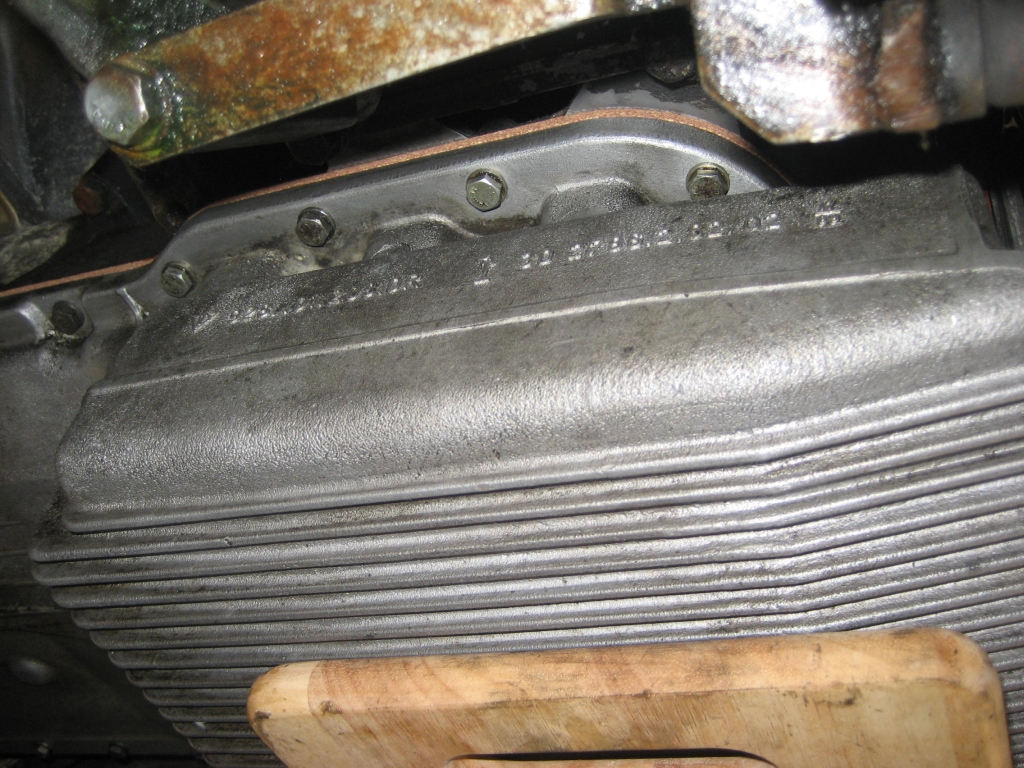
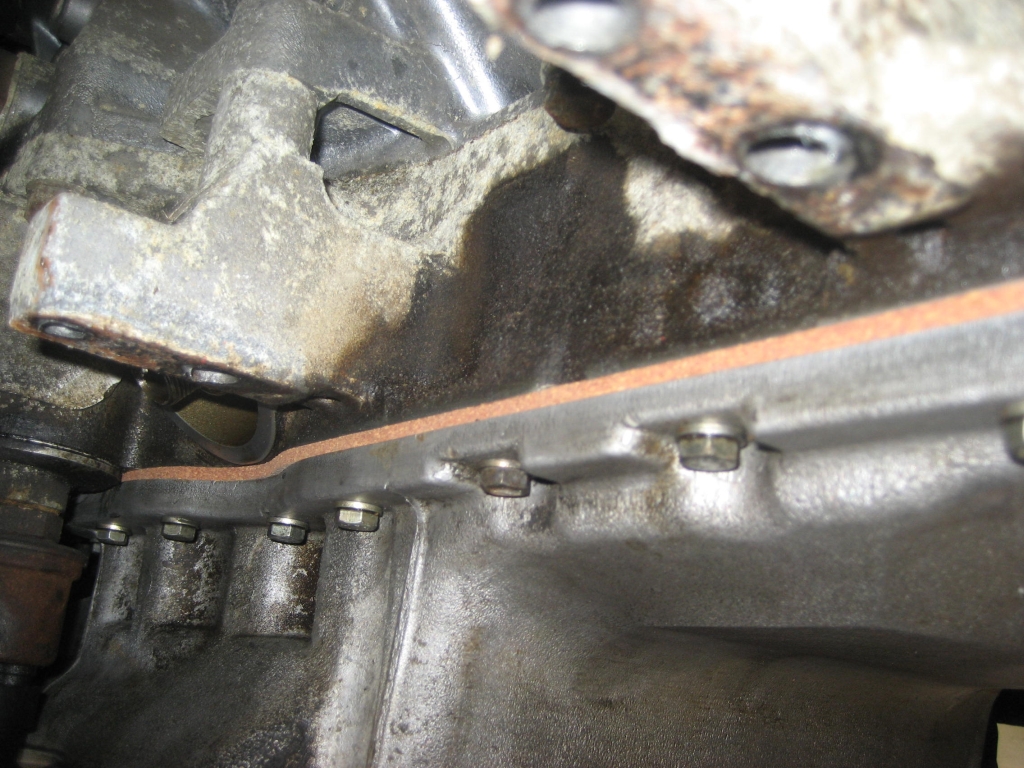
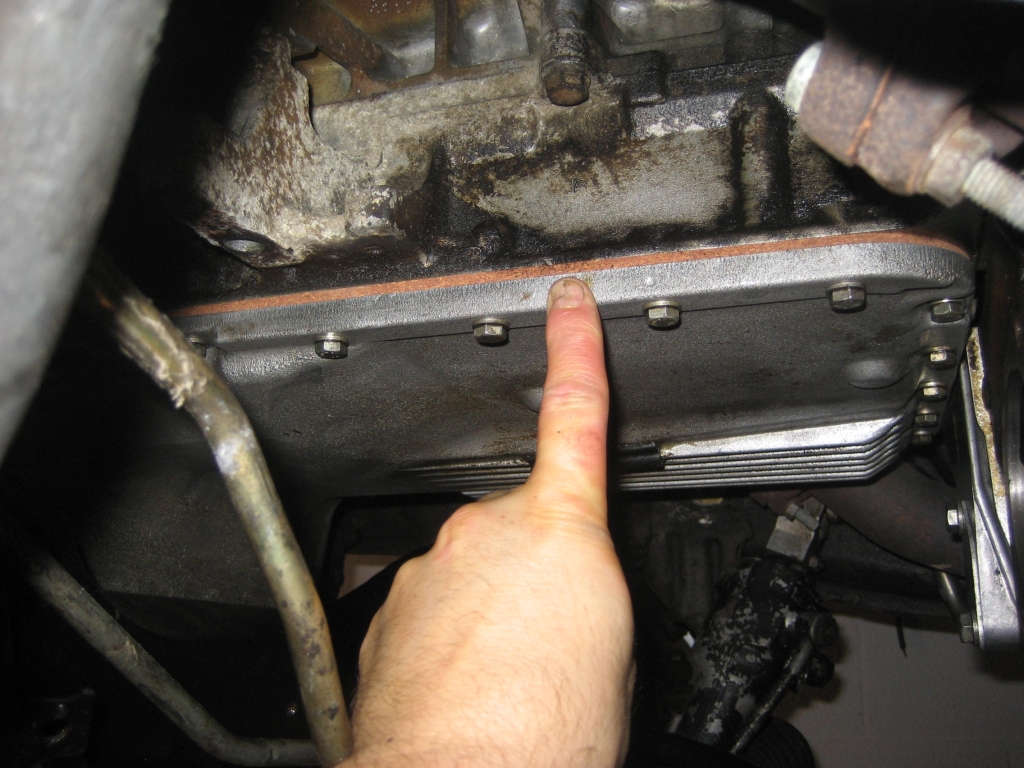
12) Now with the pan/gasket up to near correct tension, use your 10mm spanner
and give each bolt in sequence a quarter of a turn to fully tighten. See pic's
for what the gasket should look like in terms of thickness. Leave the gasket
overnight to settle and check them again in the morning. All should be well. If
you haven't installed the oil pressure/level sender now do so. BE VERY careful
not to drop anything into the pan through the sender units cut-out hole! Put the
sender unit into the hole first before getting any bolts anywhere near it. This
ensures you can't drop one into the pan. Replace electrical connector.
13) Replace oil filter and oil and leave for a few hours to check for any leaks.
If you find any, just nip up the bolt/bolts around the offending place.
14) When you drive the car for the first time, go for a short trip up to
temperature, then go check for leaks. If you've done the job properly, all
should be well. Thereafter, keep an eye on your sump bolts for tension if you
haven't used any thread locker.
Like many jobs on 928s, a new sump gasket is rather more time consuming and
tricky than one might imagine!
=====
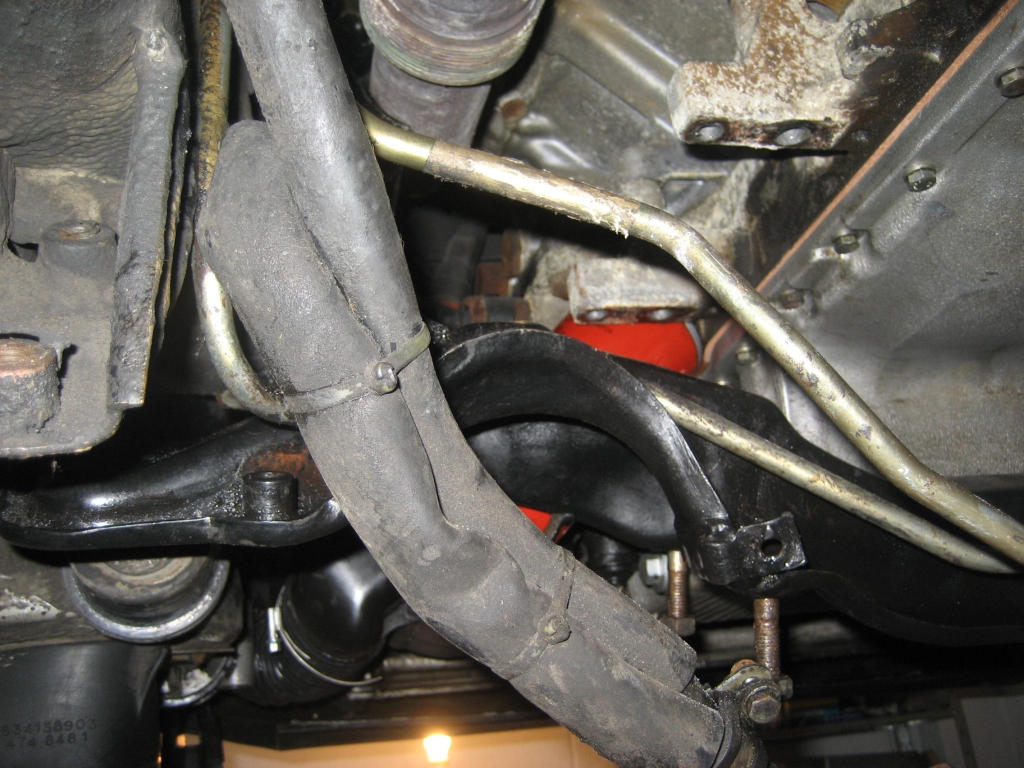
Motor mount reinstalling on a 1989 928 S4 Rhd.
1) There's lots been said/shown on the work required for renewing the motor
mounts. See John Pirtie's excellent post and Dwayne's.
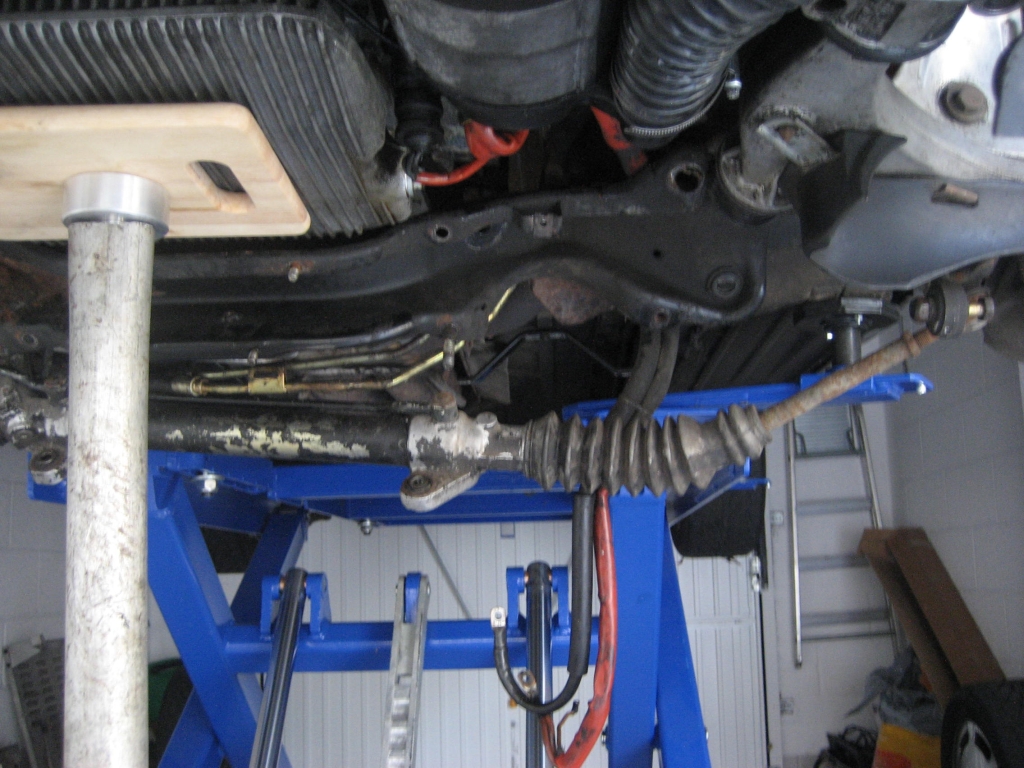
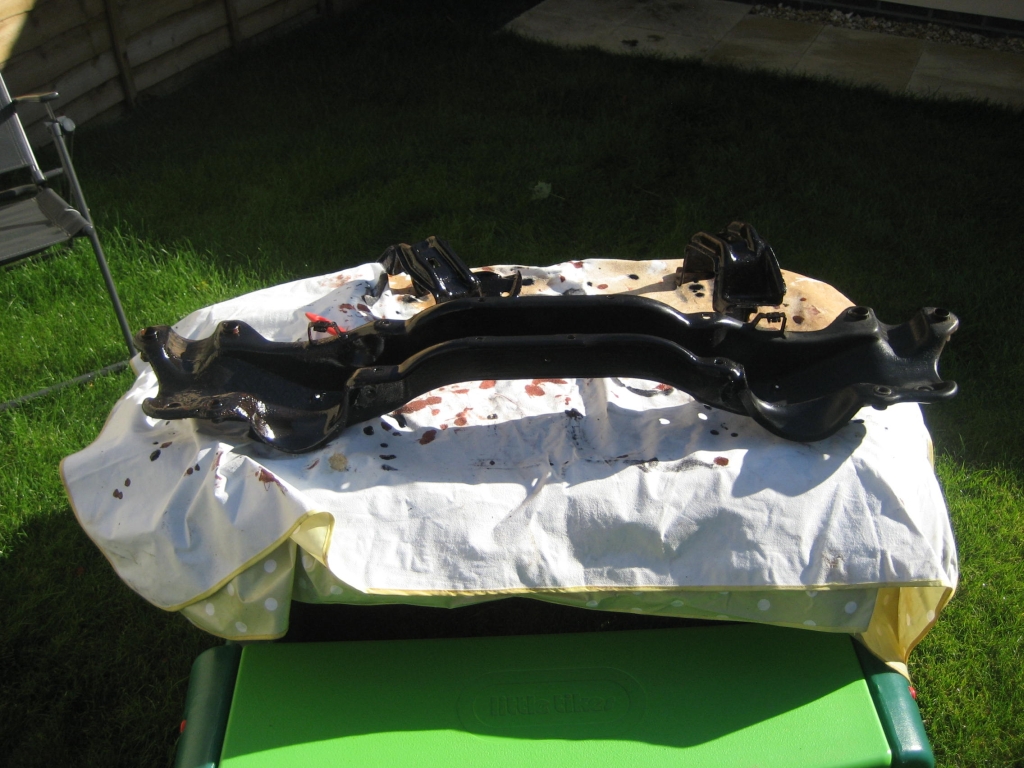
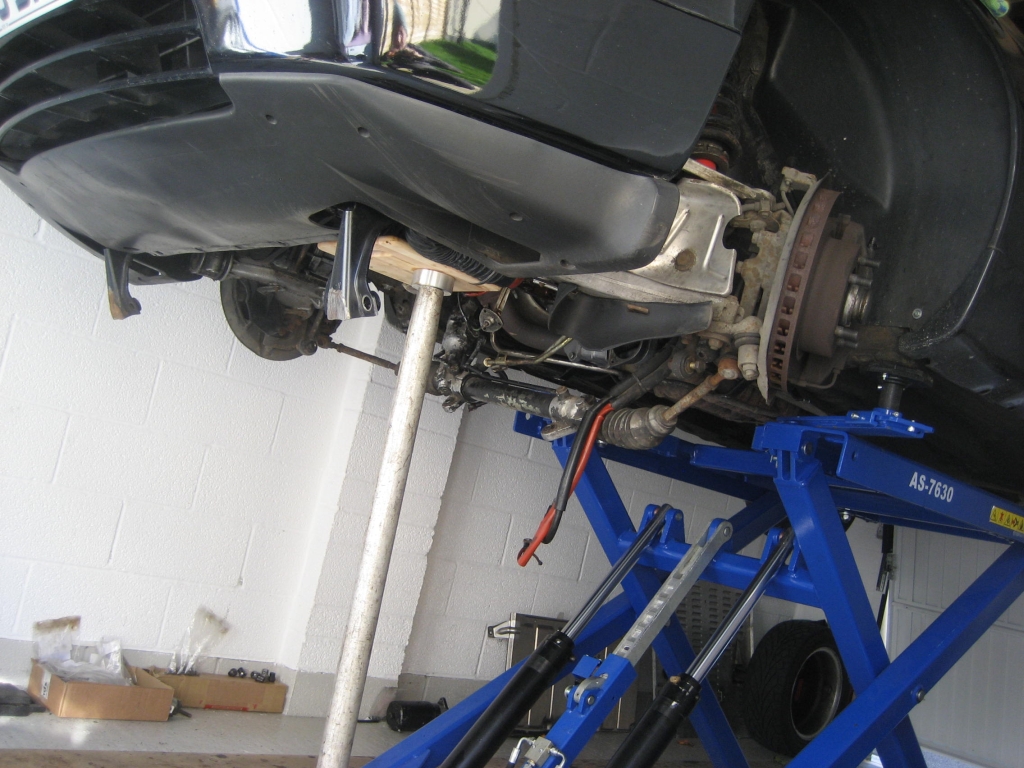
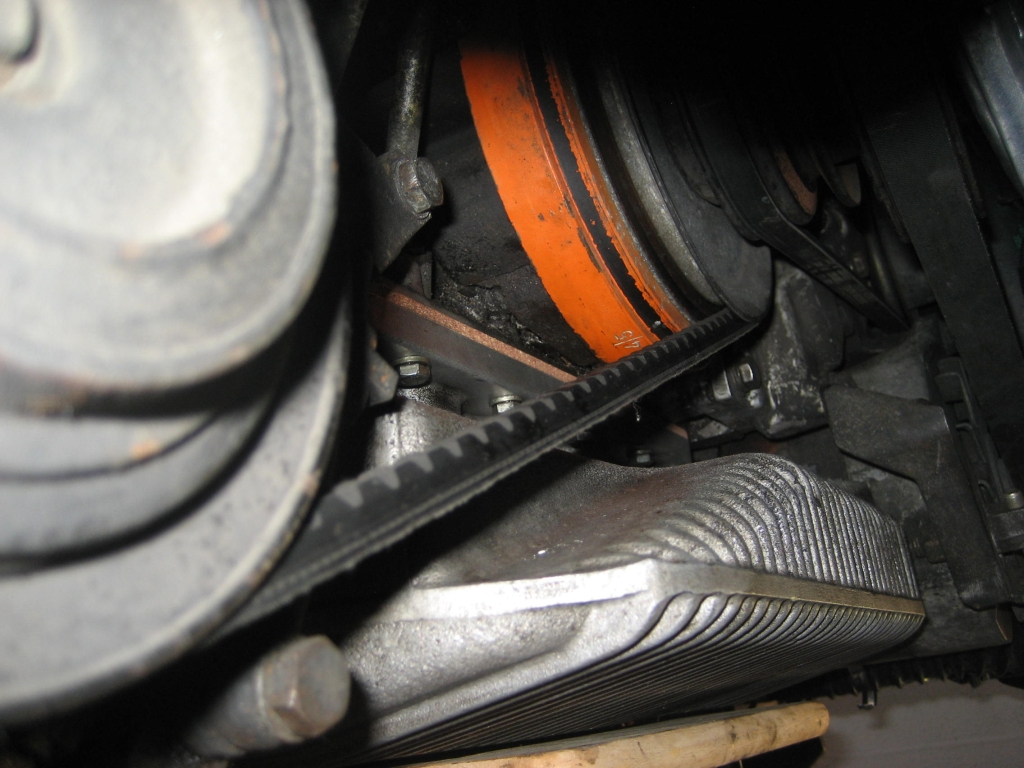
2) Added information here is to show pic's of the angle you need the crossmember
at to remove and then reinstall the motor mounts. See pic's. I know there's
other methods people have used, this is just how I did it.
3) You have to get the crossmember back in loose and tipped back at the shown
angle. Then you have to wriggle the motor mounts with casings attached back into
the gap between the where the motor mounting brackets attach to the engine. Then
bolt them on loosely and tip the crossmember forwards to get it level and then
hand tighten the lower motor mounting bolt that goes through the crossmember.
Reassembly is then following the steps shown on John's and Dwayne's write-ups.
4) One thing I can add as help. My upper cross-member support bolts were VERY
tight to get out and aligning the holes again was a challenge to say the least.
I did so by first jacking the driver's side hub and aligning/bolting on the
control arm, hand tightening the lower cross member bolt. Then using my jack and
bar I jacked under the cross member on the passenger side to get it held in
place which then aligned the upper cross member support bracket into which I
wound the bolt. In doing this, the driver's then aligned to allow the bolt to
wind back in. USE LOTS OF GREASE ON THE UPPER CROSS MEMBER SUPPORT BOLTS!
5) I'd say the hardest parts of motor mount renewal is getting the bolts undone
initially; a BIG bar is necessary for sure. Then realigning everything to
reassemble. A spare jack is a must I'd say. The work seems daunting on first
glance, but once you've stripped everything off, cleaned it all up and take some
time to think about how to best approach reassembly, it's not so bad. If you can
tackle this work on a 928, you can do pretty much everything else on them.