
I had to lower the driver seat to get access to the screw that holds the side
panel of the middle console. But the seat did not lower. It went up, forward,
backwards but not down. My car has seat memory and the seat memory also moved
the seat down in position when I moved up. So the 12v, the motor, the seat
controller all worked. Maybe the switch is faulty?
The switches are very simple, and their failure to move in certain directions is
due to arcing inside the switch that leaves crud (yes, the technical term) on
the contacts. Because the motors pull nearly 20 amps at full voltage, they arc a
lot. The disassembly process is quite simple. The seat doesn't need to be
removed, although it is recommended as one way to get at the power plug so you
can work on non-"live" switches. Also, I cut the zip-ties on the underside of
the seat to allow me to pull the switches out from the seats further to
manipulate them.
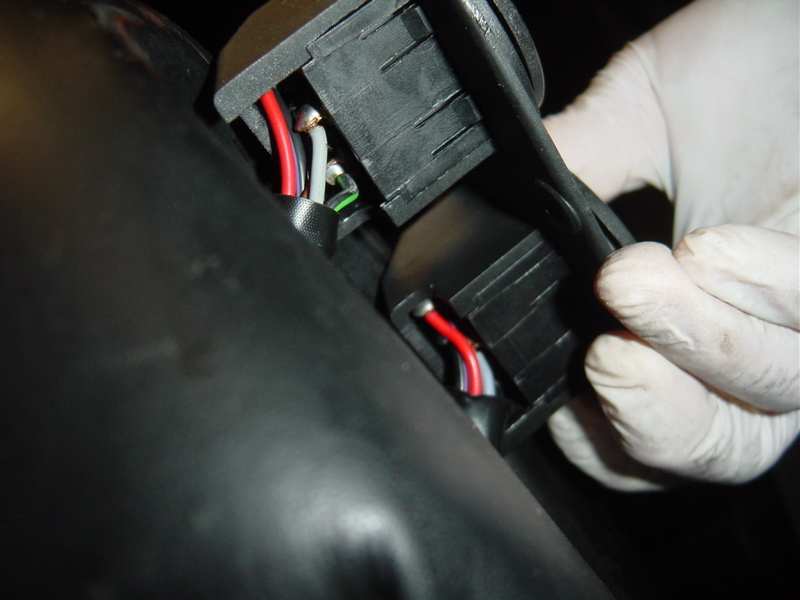
Removal of the switches involves removing the two face plates. The switches are
popped out from the bottom - you can see the two tabs that permit the switches
to be extracted from the front.
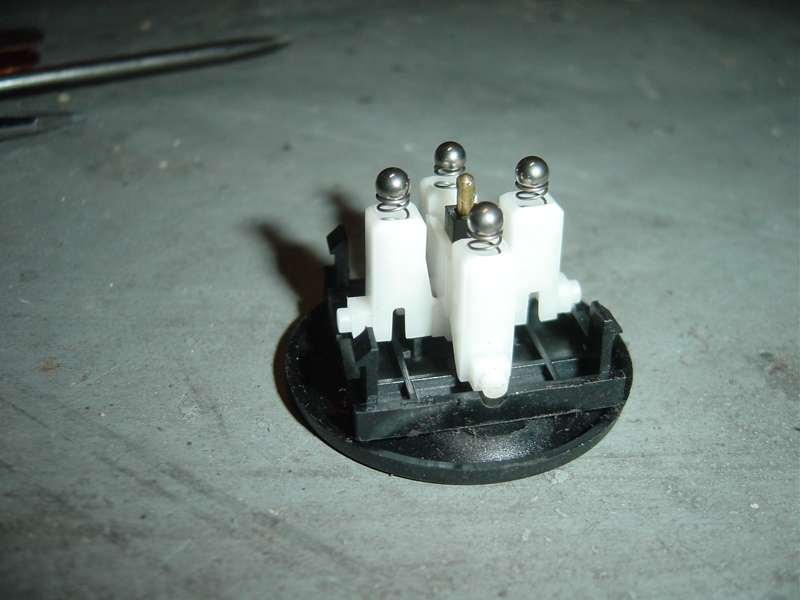
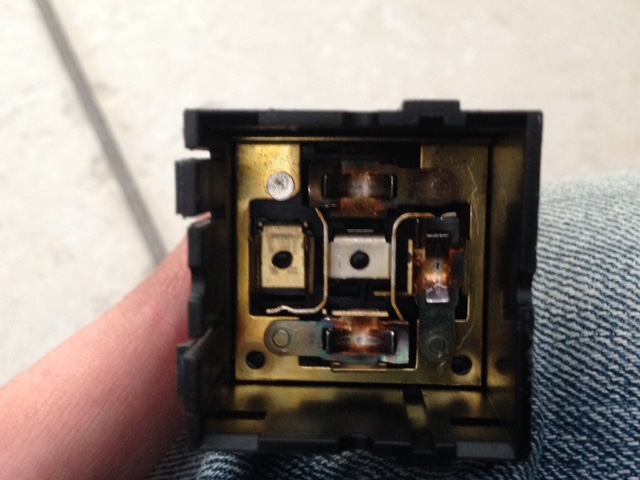
Careful! After the switches are popped out, they are popped apart. There are
four tabs that will release the rocker cover. Be careful that you open it up
with the rocker facing down, because as you can see, there are four little
balls, and four springs that are really easy to lose.
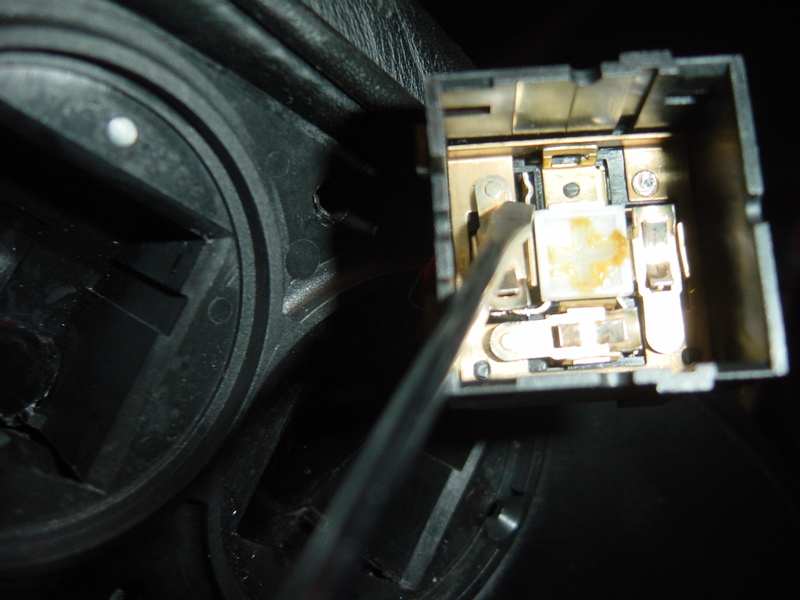
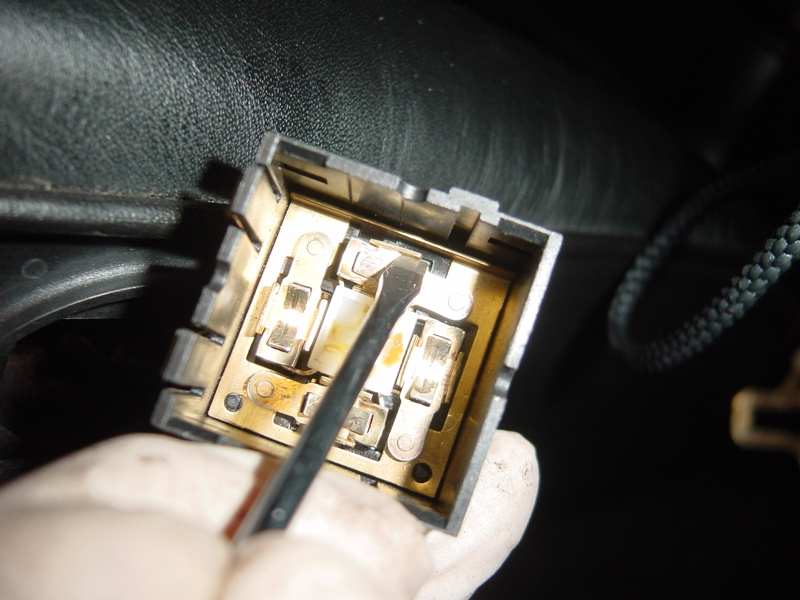
The crucial part, now, of the operation is the contacts inside of the switch
body that is still attached to the wires. Be sure you have disconnected the
battery, or removed the seat switch plug since it's easy to break a 30amp fuse!
Removal of the rocker switch arms is not difficult: bend the outer retaining tab
and the rocker arm can be removed. The rocker arm itself has two spots to clean
off the arcing, and in the switch case there are two spots to clear off....
When I inspected the contacts they were really not bad at all. Some crud existed but I'd
say this is not causing the problem.
So I took the 6 hex key bolts out from the seat lower rail and moved the seat 45
degrees up so that I can work underneath. I undid the tiewraps that hold the
cables to the seat, loosened the 4 screws that hold de seat controller, and
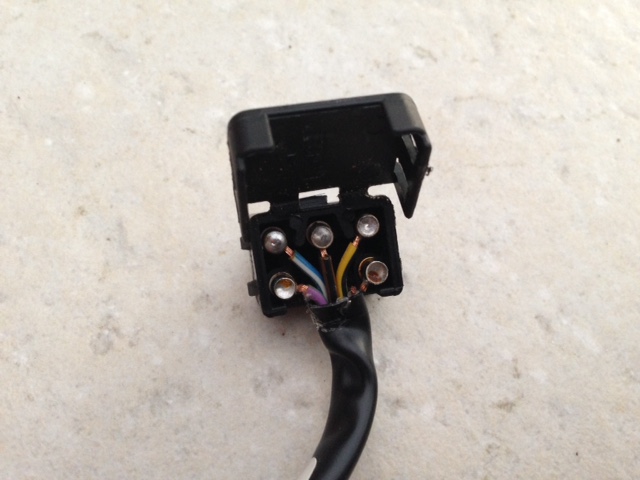
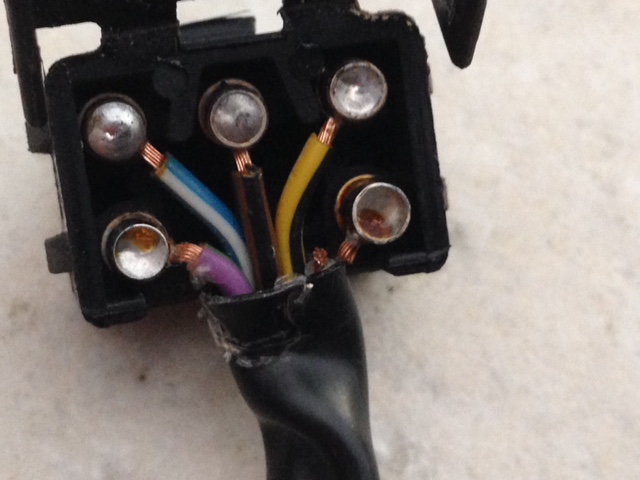
undid the #10 connector which is related to my trouble switch. (did you know
that these connectors are really -really- hard to get off?) With an ohm meter I figured out
that one connection was missing. Yes, hard to imagine, but it must be a broken wire somewhere.
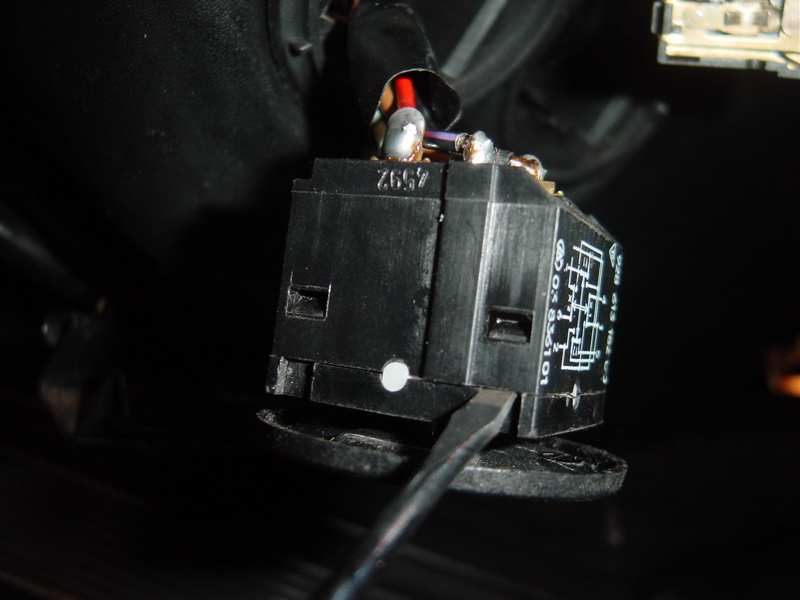
I decided to take the switch assembly and wire out of the seat to ease working
on it. With some fiddling you can
take take the switch out from the housing. It has two tabs at the lower side.
Take the cable through the opening so that the switch and cable can easily be
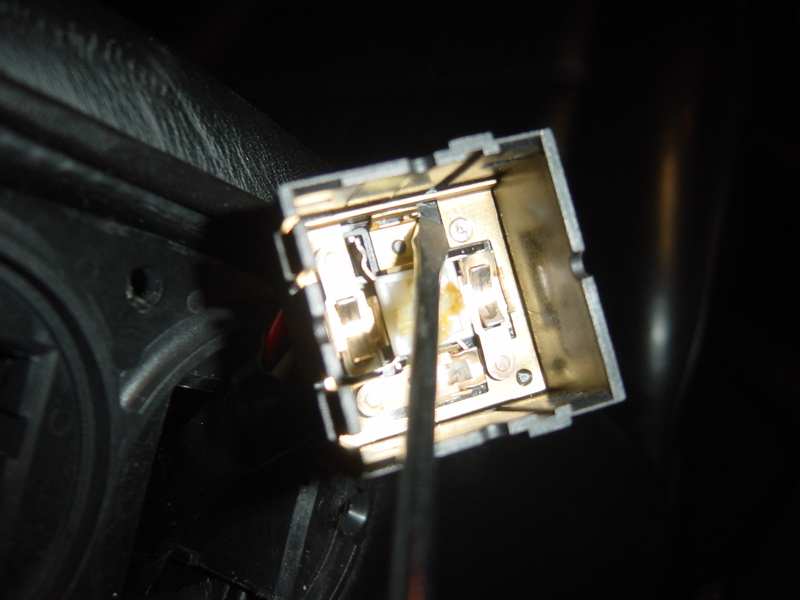
worked on. The connector piece can also be opened. 2 tabs on each side. Yes. A
broken wire. Phew. This is the root cause. I cut all 5 wires and completely
re-soldered the wires to the connector pins so that it can be fitted without any
strain and the risk of another break is minimal.
Reassembling the switch can be tricky and it is a lot easier when the switch is
not in the car. But still it needs practicing. Work upside down, so the rocker assembly lies face down and the
receiver part goes over it until it latches. Make sure the 4 springs are in
place and the 4 balls rest on top of the springs. Do not shake or move. Work on a desk where you can
make sure you don't loose the balls because fitting the assembly will fail a few
times. I found that wedging my 6/7 and 8/9 open wrench between the circular
switch plate and the front of the housing part helped a lot. It stabilizes the
movement so that the cross hair with the springs and balls remains fixed. It takes some
patience to do it right. Mind the orientation of the switch receiver assembly, it fits just one way and not two ways.
Now putting all back in the car, fix the wires to the lower seat and make sure
there is no strain on them, put the controller box back where it belongs, test
all seat adjusters and see if memory also works (you did not break another
wire?). Then put the seat back to the floor and fit the 6 hex-key bolts. Apply
some lubrication to avoid them getting stuck.
The front receivers (nuts) for the bolts are like threaded strips that can move
around, so use your finger to move them in place aligned with the hole. Then
insert the bolt and tighten.
Done. Now back to removing that side panel for which this all started :)
some pictures:


regards,
Theo
1992 Porsche 928 GTS Midnight Blue
The Netherlands