Steering rack axial play update =RADIAL play
Just did the steering rack rebuild. On the passenger side I only did the oil
seal,
*not the plastic washer* because it did not came with the seal kit
The one in the picture is my second rack, and it has the same play as the one
that's on my car
Do I have to worry about this?????
thanks in advance
Patrick.
-----
I think so. It's too bad the internal bushing is not part of the rebuild kit.
If you had the rack apart you could machine a new bushing.
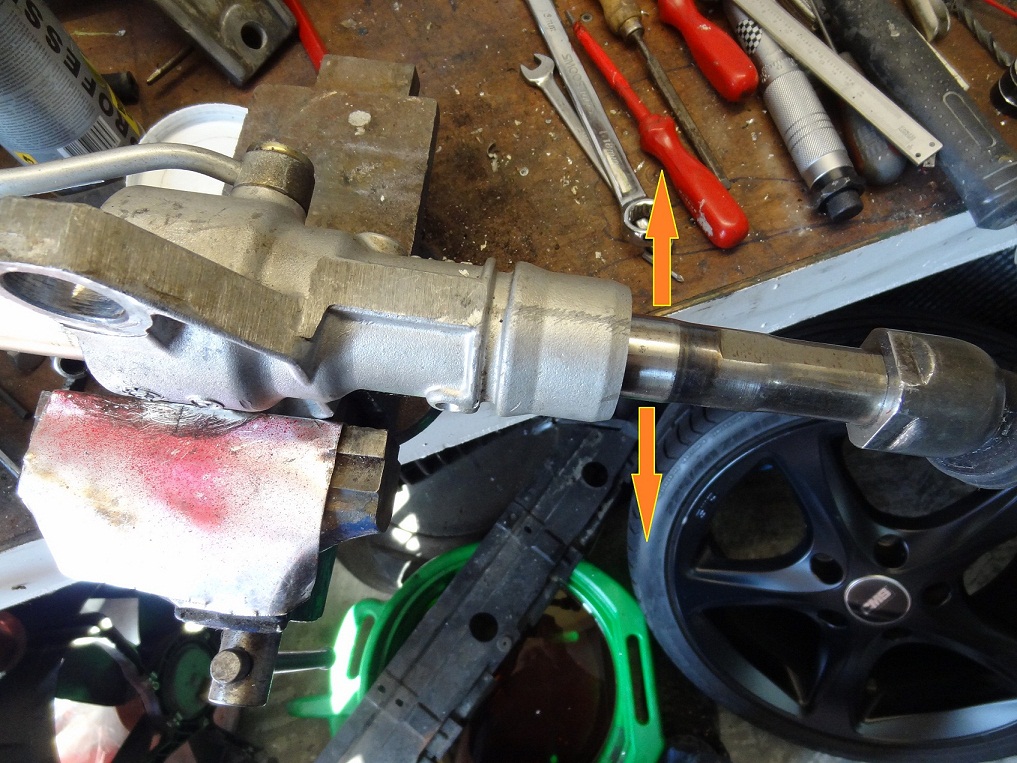
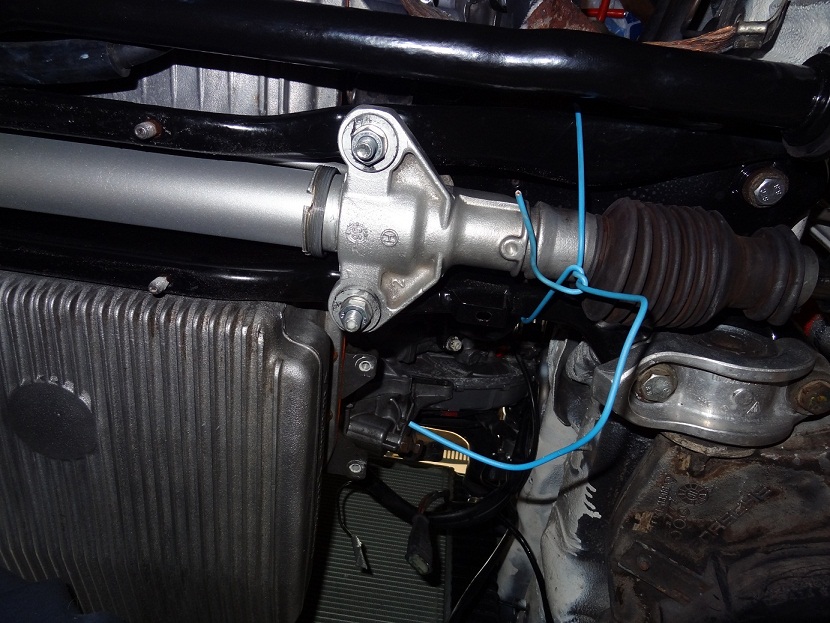
Lock the steering wheel and raise one front tire off the ground, grab the tire
at 3 and 9 o'clock and see how much you can change the toe, and have someone
watch the rack shaft move fore and aft. The amount of axial [er, make that
"radial"] play and toe change could be significant and related. One of my 928
buddies machined an external bushing from Delrin to fit inside the end of the
rack housing and we staked it with a small screw through the rack housing. The
external bushing reduced the axial play down to a small amount and has held up
well - probably 70K miles so far.
The passenger (long side) of the rack is the side with the problem. So,
Patrick, yes, my bushing went in the end space as you show, but the other end.
__________________
Bill
-------
The steering tie-rod is not in line with the rack rod. So as the rack rod
moves back and forth (i.e. at right angles to its axis), the tie rod end at the
wheel moves in and out a bit, and changing what direction the tire is pointing.
It does not seem like much but the steering arm is short, and a little movement
has a big effect on toe.
BTW, I've always called that "radial" play-- axial would be in line with the rod
axis... or am I wrong?
A proper fix would be new internal bushings, but they are not readily available
and I don't think the rebuilders pay much attention-- the focus is on hydraulic
leaks (not unrelated of course). The pool of rebuildable racks is not growing,
and fitting new bushings-- and then properly shimming the pinion against the
rack-- is a nuisance.
The external bushings are a good retrofit I think. But they do need to be
hand-fit, the internal bore at either end is not machined-- it may be cleaned up
but it is not a precise dimension.
What about making the bushings a little undersized, with some locking grooves on
the outside, and then boding them in with something like JB-Weld? That would
locate the bushings properly without stressing the internal parts (e.g. the
pinion gear) and provide a nice large bearing surface.
__________________
Jim & Sue Corenman
======
Be aware that there are three different diameters for steering rack ends,
26mm, 25mm & 23mm. Only the latest rack (-24,-26 and -27) has both ends the same
at 23mm.
So, the -22 rack is 26mm on the driver side and either 25mm or 23mm on the pass
side.
No idea what the od might be on any of these.
One of the reasons I buy rebuilt from 928 Intl.
=====
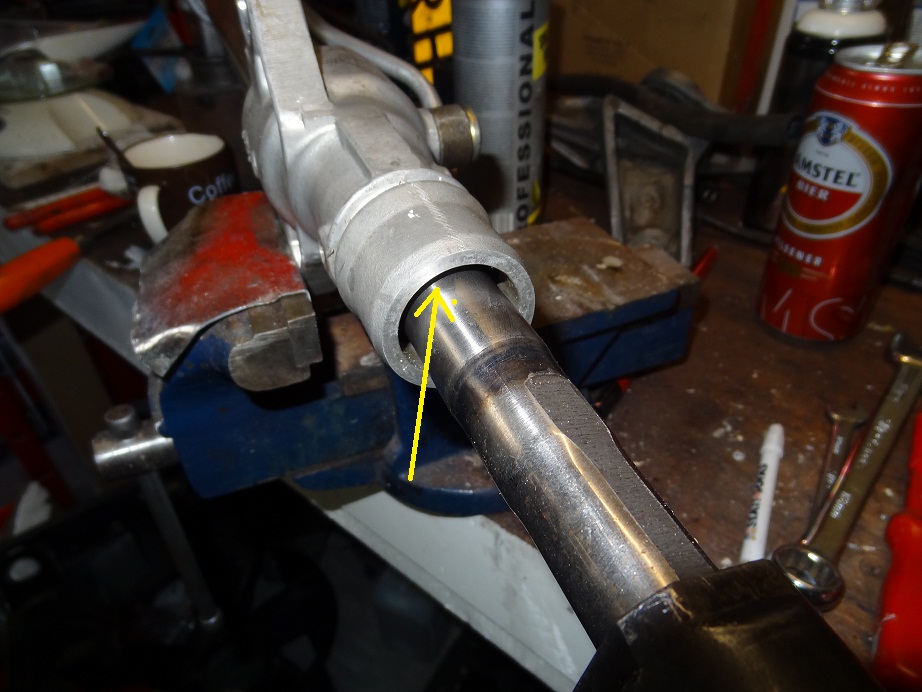
You can see the head of the screw in the 2nd pic. With the bushing installed drilled a small hole in the rack snout just deep enough to enter the bushing. Tapped the hole in the snout and put in a machine screw cut to just the right length.
__________________
Bill
======
Steering rack may have some radial play. a few ten's of a mm is ok (0,2-0,5mm) but sometimes it is considerably more. This shows a possible fix.
Problem reduced to a minimum.
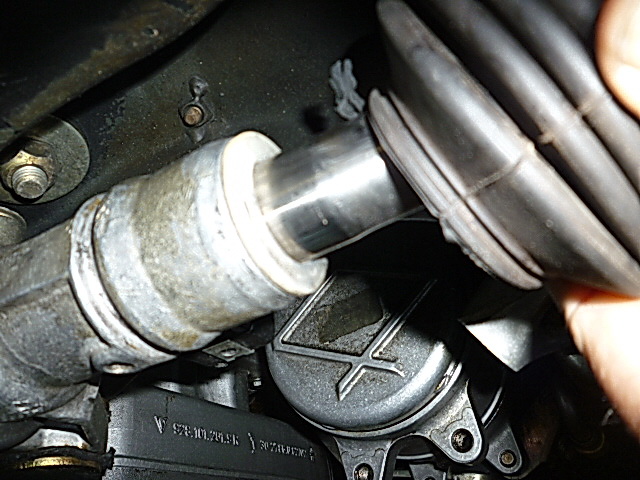
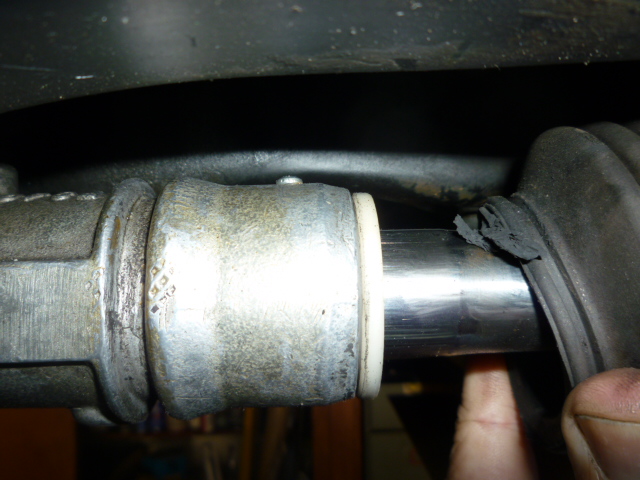
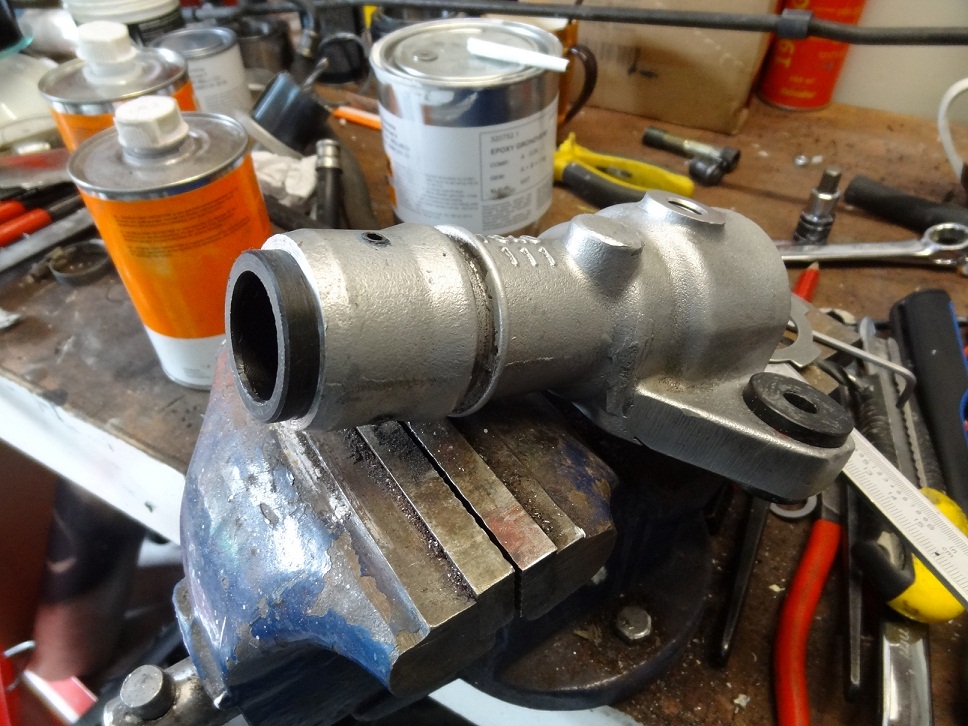
I've done this with the steering rack under the car. Loose the big nut
with a hammer and pin punch. Make sure you tighten the two 17mm nuts.
pull rack down and loosen the oil line nut on top of rack, with a long Hexagonal
Key 6 (those can be tight)
Not a big job, just have patience.
First we had to center the bushing because the internal bore at the end is not machined, so the steering shaft would not be in line with the end.
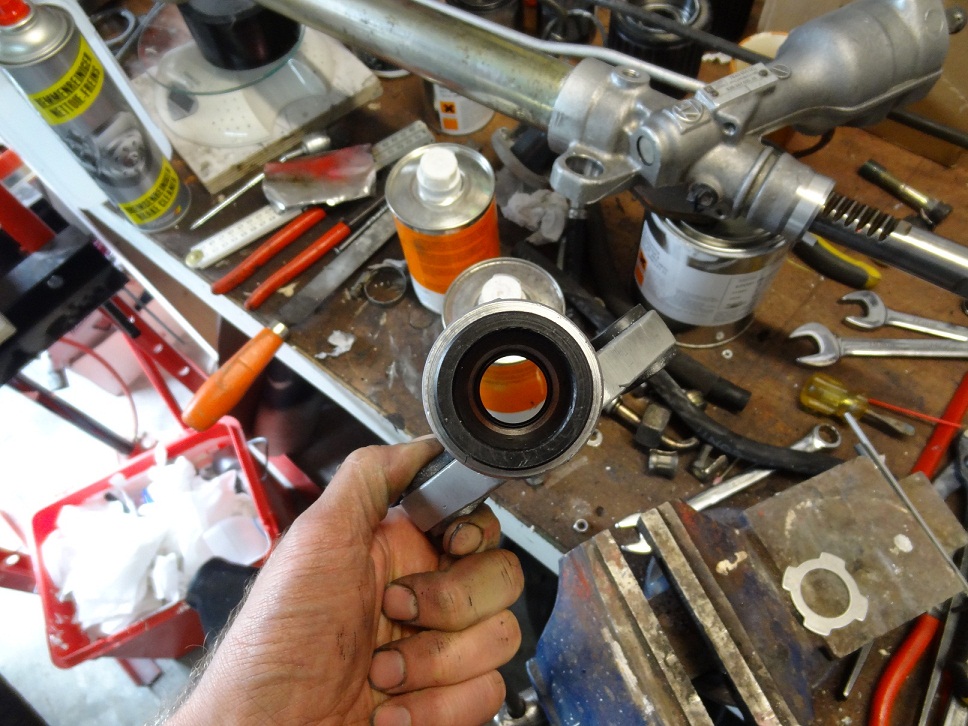
Delrin bushing with 3 screw
Patrick
====
Patrick: Can you describe how you went about "centering" the bushing to take into account the unmachined end. I was there when my machinist buddy, Jim Morton, lathed this bushing for me, but I don't recall the whole process. We did not disassemble the rack. There was a little trial and error to get the final fit. In the end, the amount of radial play was reduced to less than 10% of what it was originally in this freshly rebuilt rack. Everything still looks good 70 or 80K miles later.
__________________
Bill
====
Bill, I'll try to explain with this picture from the other end. Shaft is not centered at the end. If you put in the bushing without machining the shaft would be under tension.
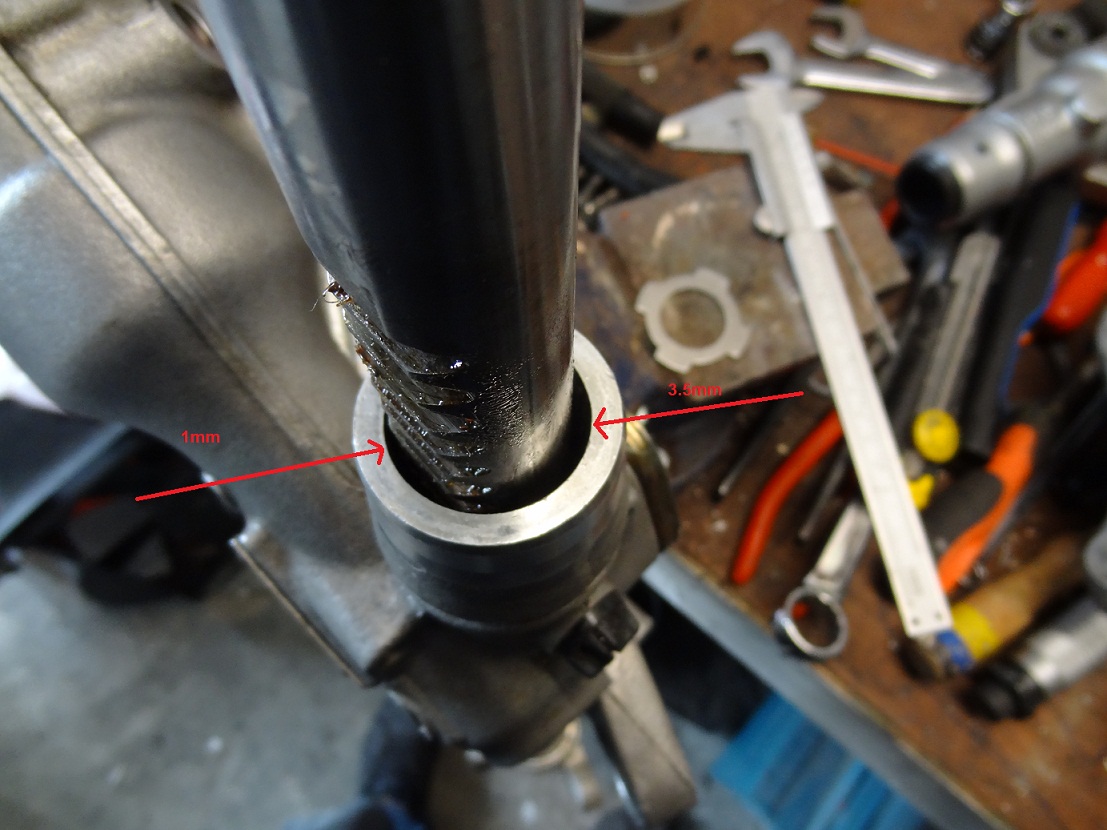
Patrick
=====
Is the radial play in your rack at the driver's end, or the passenger? (Or
both?)
The passenger end of the rod is controlled by an internal plastic bushing, item
#24 in the drawing below. Those do wear but I presume it was replaced-- this
part seems to be part of the rack refresh kits sold in Europe but not in the
states. If there is still play at the passenger side then either the rod is
worn, or the ID of the plastic bushing is not right. In either case it would be
a simple matter to make a new bushing with proper clearance on your lathe.
The driver's side is a little more tricky, because of the rack teeth. The
bearing on that side consists of a "saddle" (item #30.1 below) on one side and
the pinion-gear on the other side. In other words, the rack rod at the driver's
end is located between the u-shaped saddle and the mesh of the gear teeth.
Normally the piston (part #30) for this type of rack is adjustable, to set the
gear lash (clearance) to near-zero which also eliminates any radial play.
Instead, on the 928 racks, a shim-washer (item #33) sets the clearance-- I
believe these are selected at the factory, and the shim thickness will depend on
the machining tolerances as well as the thickness of saddle 30.1. As the saddle
wears, or is replaced, the shim needs to be replaced-- but rarely is.
Again, your lathe can be a great help here. Assemble the rack, make a simple
fixture to push the piston #30 firmly against the rod (and fully meshing with
the pinion gear), then measure the clearance that will need to be taken up by
shim-washer #33. Subtract something for clearance (I found 0.1mm for a similar
Volvo rack) and machine a new shim. The material is not critical, it is only in
static compression-- aluminum or brass or bronze would be fine.
Assemble it and check it-- it is possible that the rack teeth are worn in the
center, and some additional clearance may needed to prevent binding at full
travel. Don't forget this step.

Cheers, Jim
=====