Handbrake cable replacement.
the handbrake cable had a crack so it had to be
replaced prior to annual inspection if I'd like to keep the permit.
So in October 2013 I bought a new cable for $$ but to be honest... this cable is
special and not easy to fabricate yourself.
This is how to do it on a GTS (S4 is very similar):
Now fitting, and this is all in reverse order.
Not so hard. Use copper paste on the bolts to prevent them from getting stuck.
Then brake testing is due. Do some first brake tests and adjust the cable. It is
normal that things settle at first. Next find yourself a stretch of gravel or
dirt road, and test the handbrake for evenly braking. Watch the tracks you make.
If they look identical left to right, you're done.
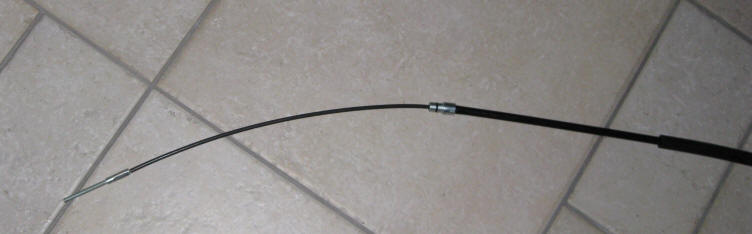
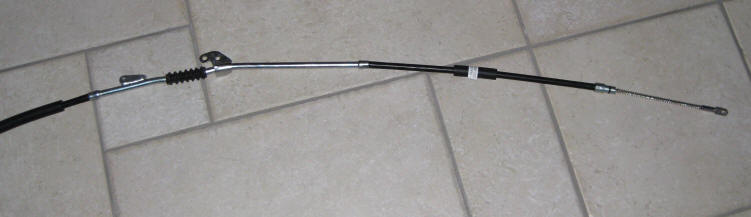
Some pictures of the new cable:
regards
Theo
1992 Porsche 28 GTS midnight blue
http://928gts.jenniskens.eu
======
Emergency Brake Cable / Handbrake
Cable Removal
--------------------------------------------------------------------------------
Note the pics are of a RHD car - look at them in a mirror to apply to a LHD (US)
car.
About 5 years ago doing an AT box and TT removal I got completely stumped by the
necessity to remove the E brake cable from the lever in the car. Well
disconnecting from the lever is easy but doing the research for the later part
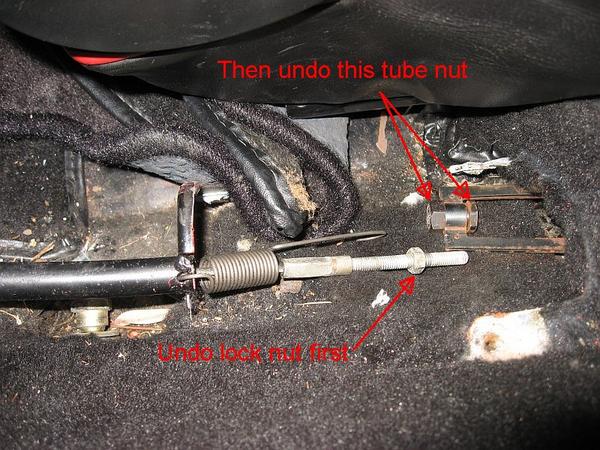
of the job it seems some folk didn't get it . Release the Ebrake lever (like you
were driving away) remove the cover from the rear of the Ebrake - 3 Phillips
screws then remove the spring then the lock nut and then the adjuster tube nut.
Then came the part that got me and Eric (in NZ) completely stumped 5 years ago.
So stumped in fact that we removed the rear X member/ suspension etc. but left
the E brake cable connected and just swung the X member out of the way. We just
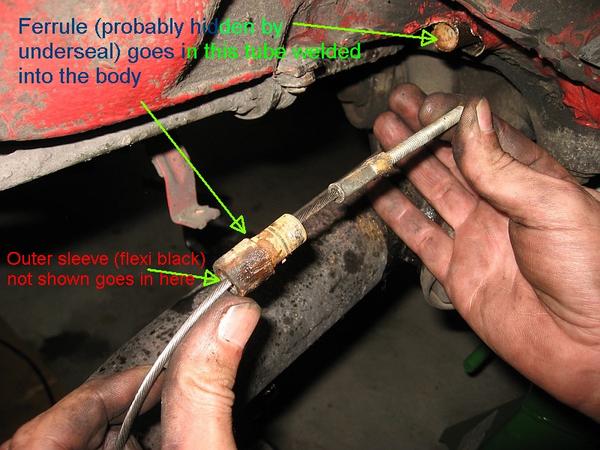
could not figure out exactly how the outer of the cable terminated where it went
through the body. Because the ferrule in the pic below looks like it is part of
the body whereas in fact it is part of the cable and just slots into the tube
welded into the body. You'll have to probably scrape back some of the underseal
to see the ferrule and it's joint to where it goes in to the tube.
However doing the X member TT and 5spd removal with Hilton at the weekend we
figured it out with the help of an obscure comment from Dan Brindle on Nichols
tips. Easiest way to get the rusted in ferrule out is to grip it with Vice grips
and twist like you were unscrewing it - once it rotates a bit squirt in your favorite
penetrating oil and get it loose then continue rotating and pry with a pry bar
towards the rear of the car and it comes out.
__________________
Jon in OZ