Home made luggage cover
--------------------------------------------------------------------------------
There’s been some questions lately about luggage covers, this is what I did, if
you decide to make one I hope the following is of some help to you and give you
some ideas of your own, I hope the text and pictures make it clear, this kind of
thing is not easy for me and I’m no Dwayne.
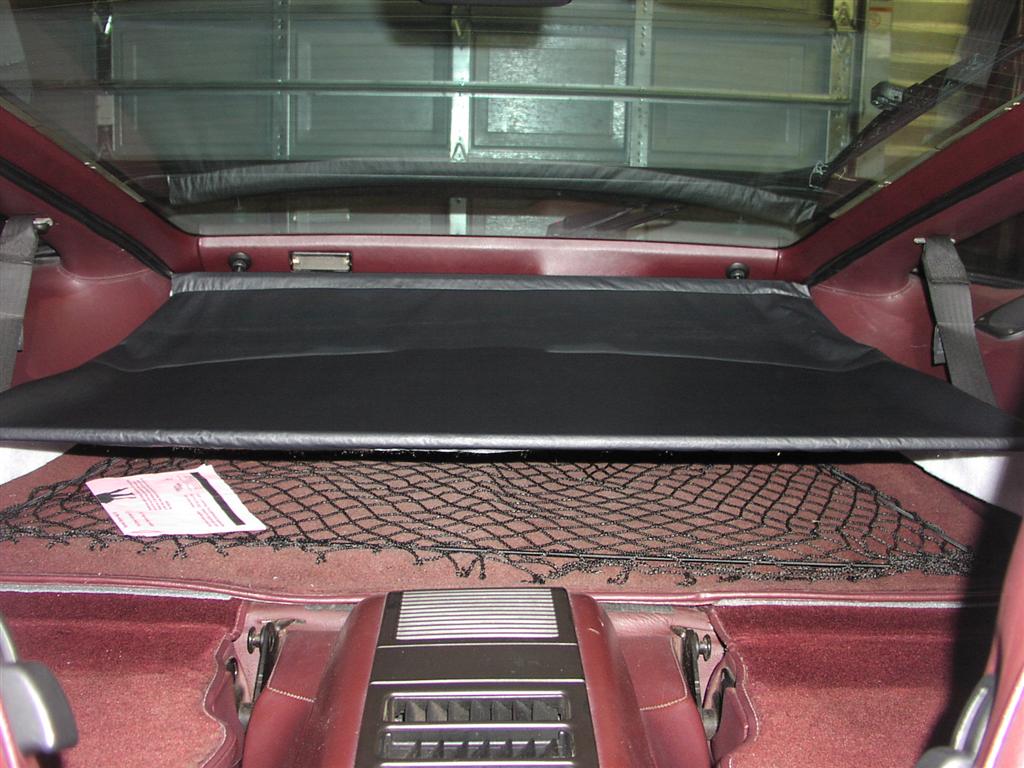
My car came without a luggage cover when I bought it; the cover is handy to hide
what you have lying back there but trying to find a good used or tatty one that
you can recover is not easy, I know a guy in Australia and Champagne make them
but at the moment my dollars need to go to other jobs on the car so I thought I
would have a go at a home made one, not a complete copy but one that would work
like the original and look presentable. My old S2 had one so I knew how they
worked and fitted or so I thought.
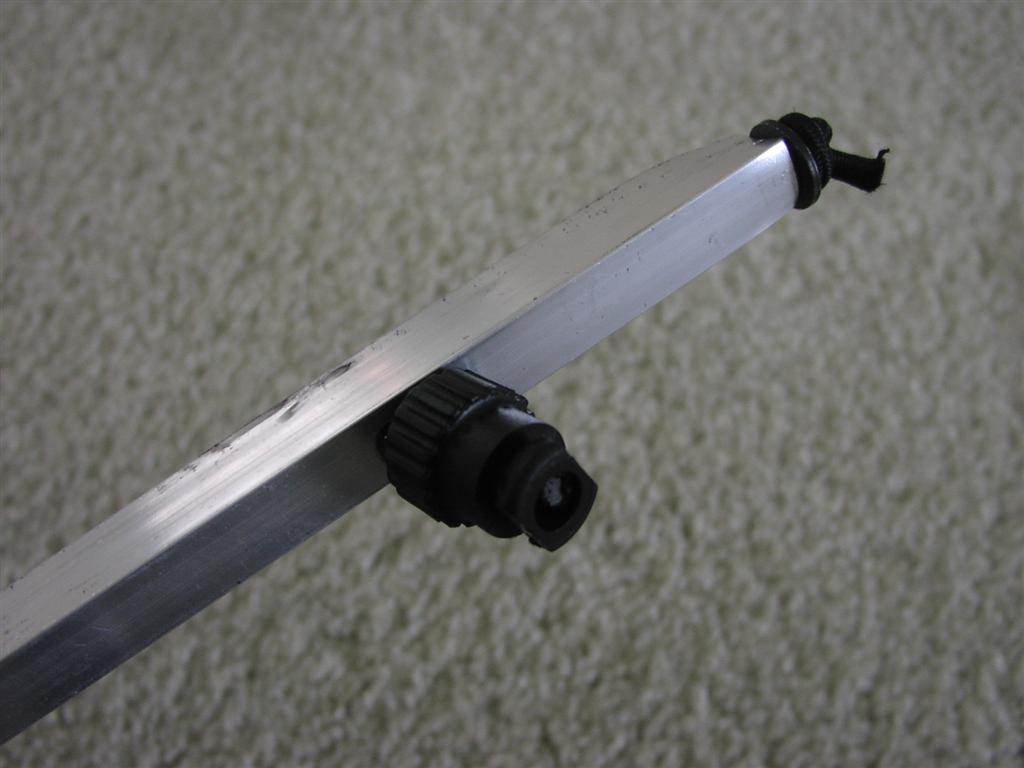
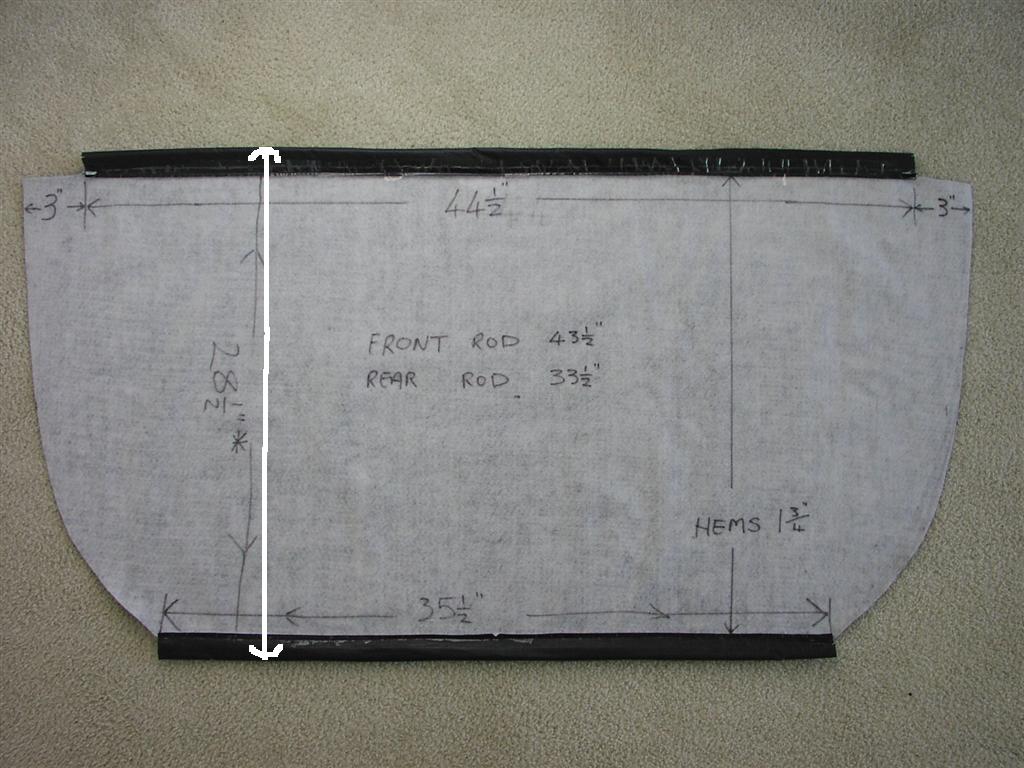
The thing I needed before starting was the plastic bobbins for the bungee cord,
these bobbins secure the cover to the sockets in the wheel arches and on the
hatch, the bobbins are still available from Porsche, A friend sent mine from the
UK he also measured the length of the rods for me, I think Roger should be able
to get the bobbins. My interior’s Burgundy, I called into a fabric shop to check
out what they have and found a shade of good quality Vinyl that would do at $16
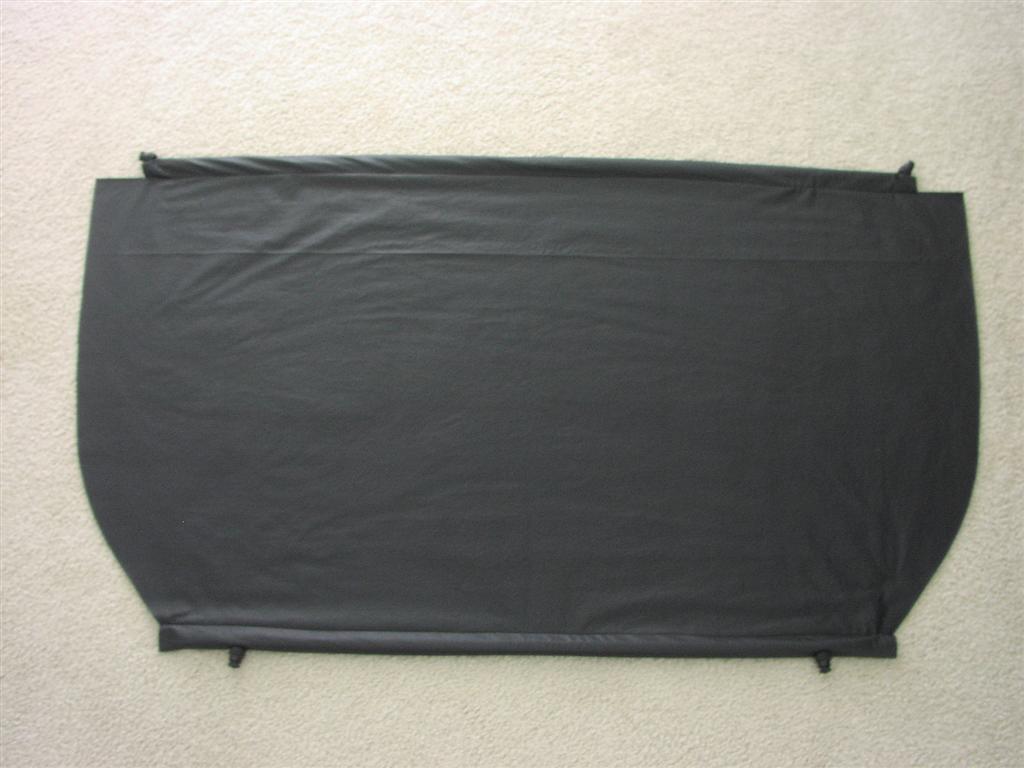
per yd (54in wide) but first I needed to make a pattern, so I went to Wal-Mart
and bought one and a half yards of black Vinyl for $6 to make the pattern, it’s
the only color they had if you’re wondering why I bought black. From the
hardware store I bought some aluminum channel, bungee cord and nylon spacers.
I took some measurements, I also had a picture of a cover with some measurements
written on it saved from Rennlist I gave this info to my wife and she cut the
Vinyl and sewed the hems for me, I didn’t include the extra part of the cover
that unfolds and covers the rear seats when they are folded down.
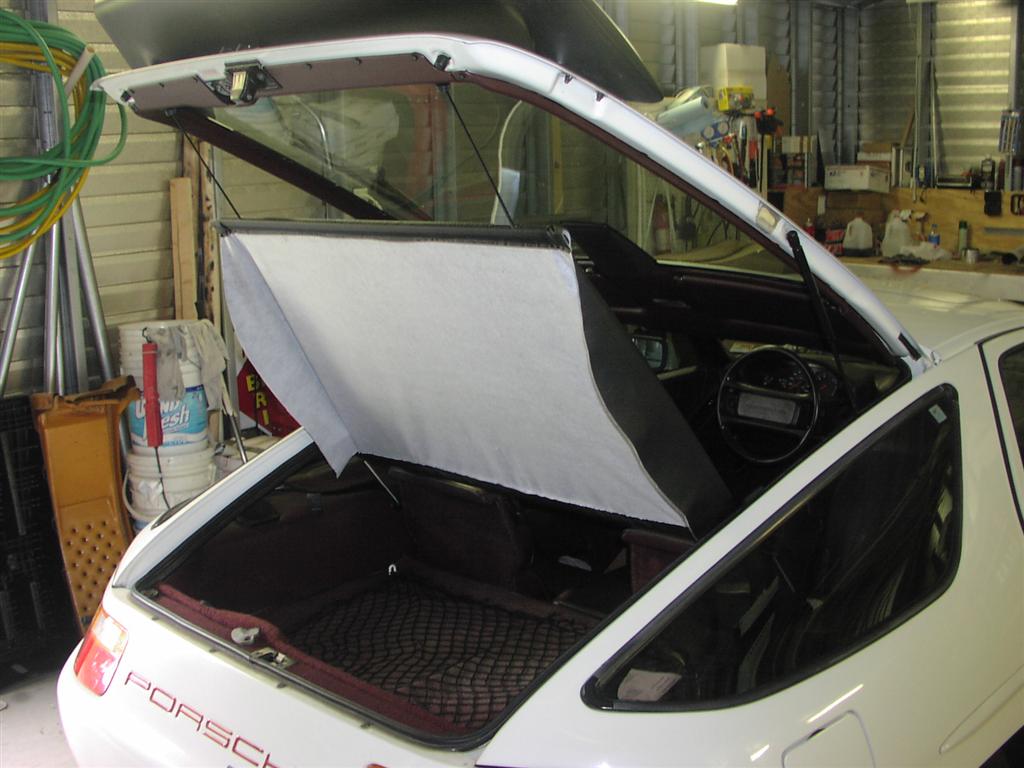
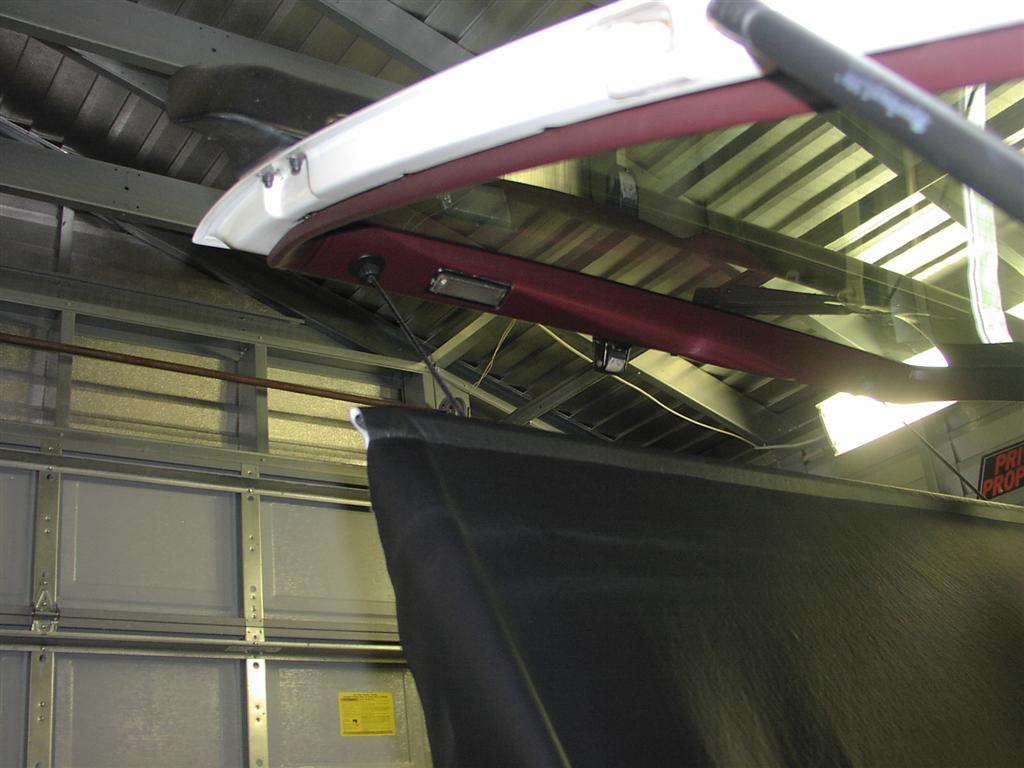
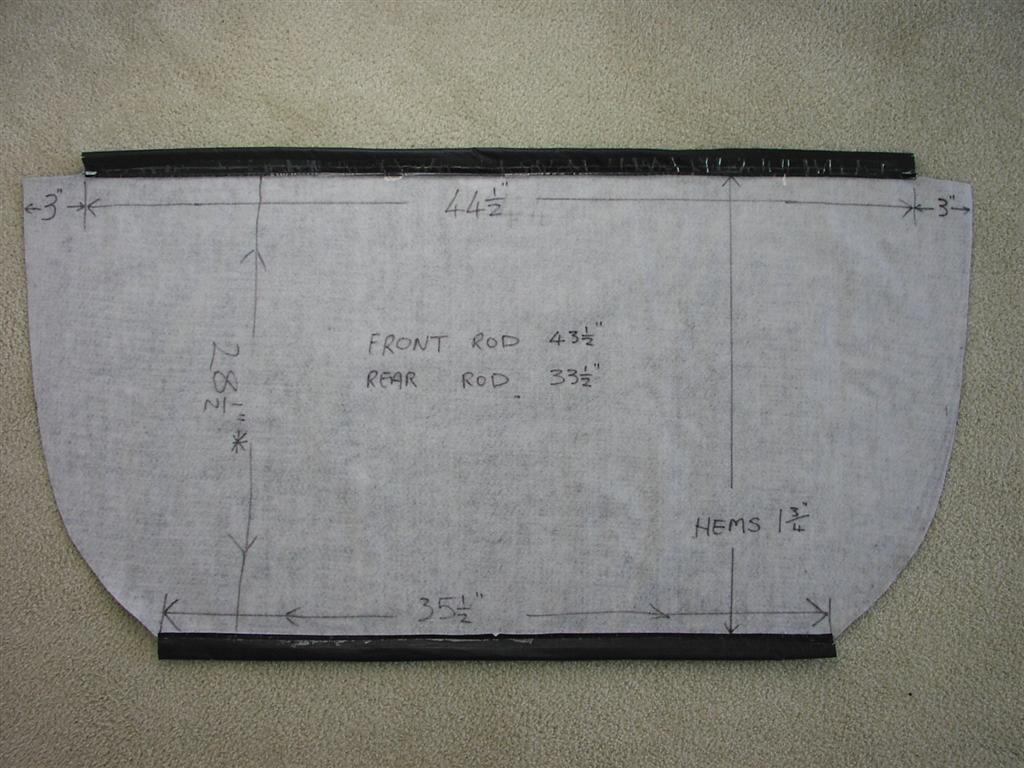
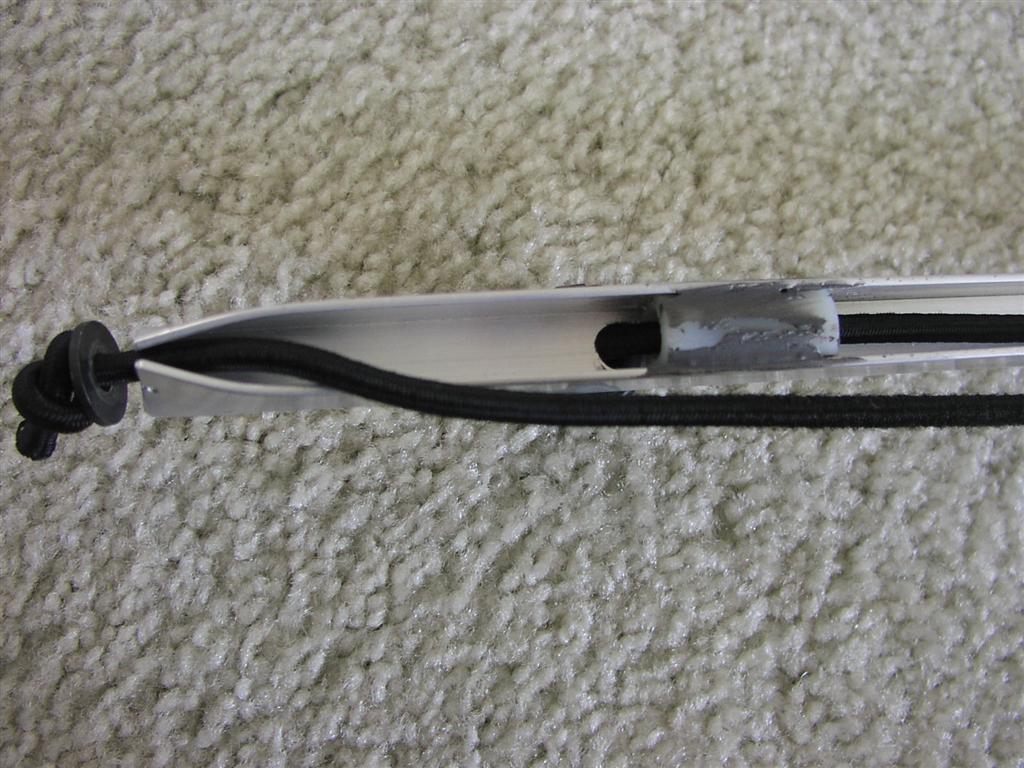
The front rod/channel is easy to do, cut the cord to length, slide on the
bobbins and knot, the knot has to be pushed into the bobbin so that it will
locate in the socket, I then laid the cord in the channel and crimped the sides
at each ends together to hold the cord in place as in the picture, this can then
be slid into the front hem.
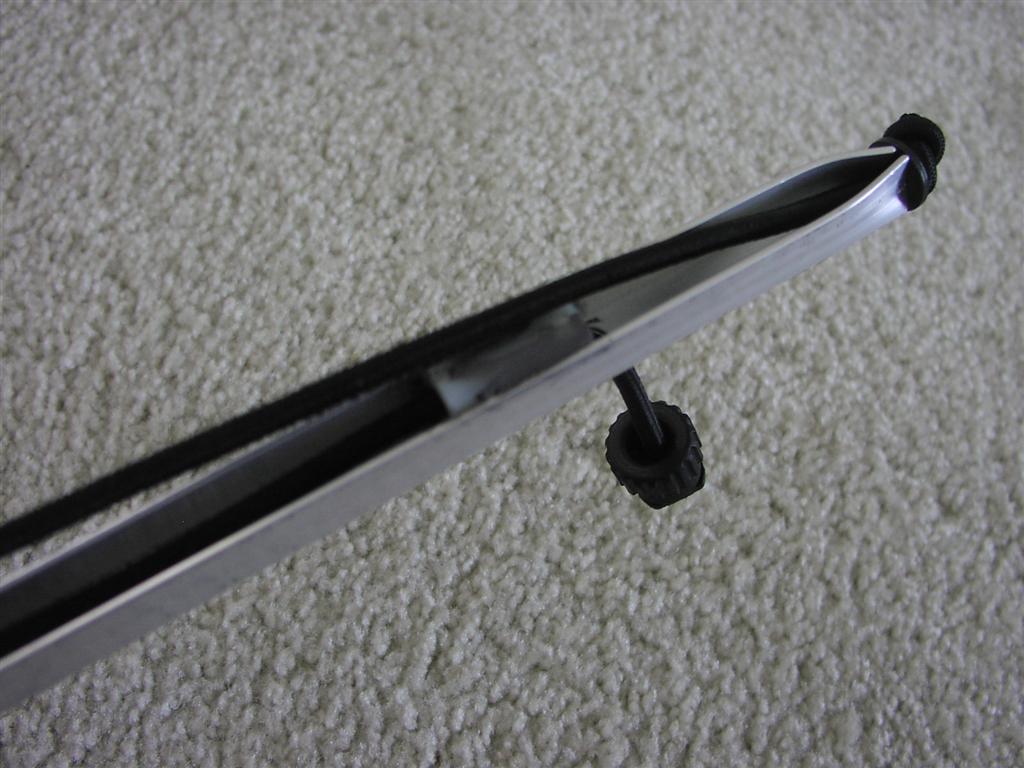
The rear rod/channel is a bit more complicated, once the channel is cut to
length two holes need to be drilled, center the channel on the sockets on the
hatch, mark the channel and drill about ¼ inch holes in the bottom of the
channel, two holes need to be punched in the vinyl, same distance apart as well.
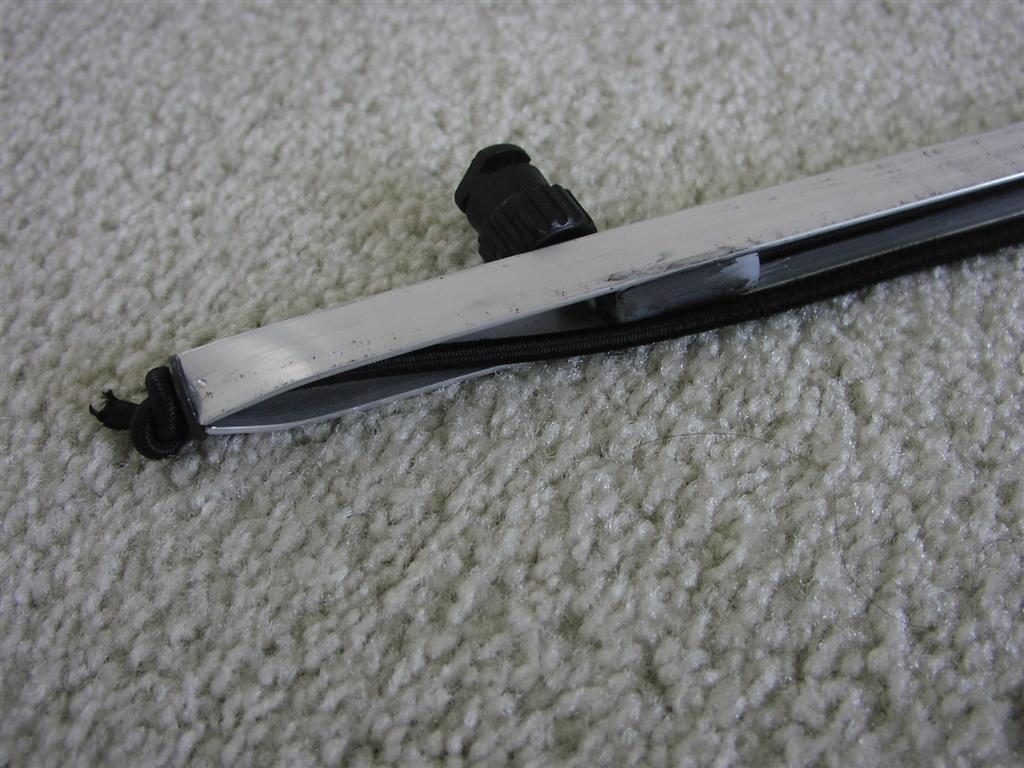
When the cover is in place and the hatch is opened the cord in the rear channel
needs to stretch and slide, my first attempt the cord snagged where it passed
through the holes, then I remembered on the original there’s a plastic insert
which the cord slides through, I filed and glued some nylon spacers to fit
inside the channel next to the holes, I also had to chamfer the front edge of
the spacer to help the cord to slide. The cord in the front channel doesn’t
stretch as much and didn’t cause a problem.
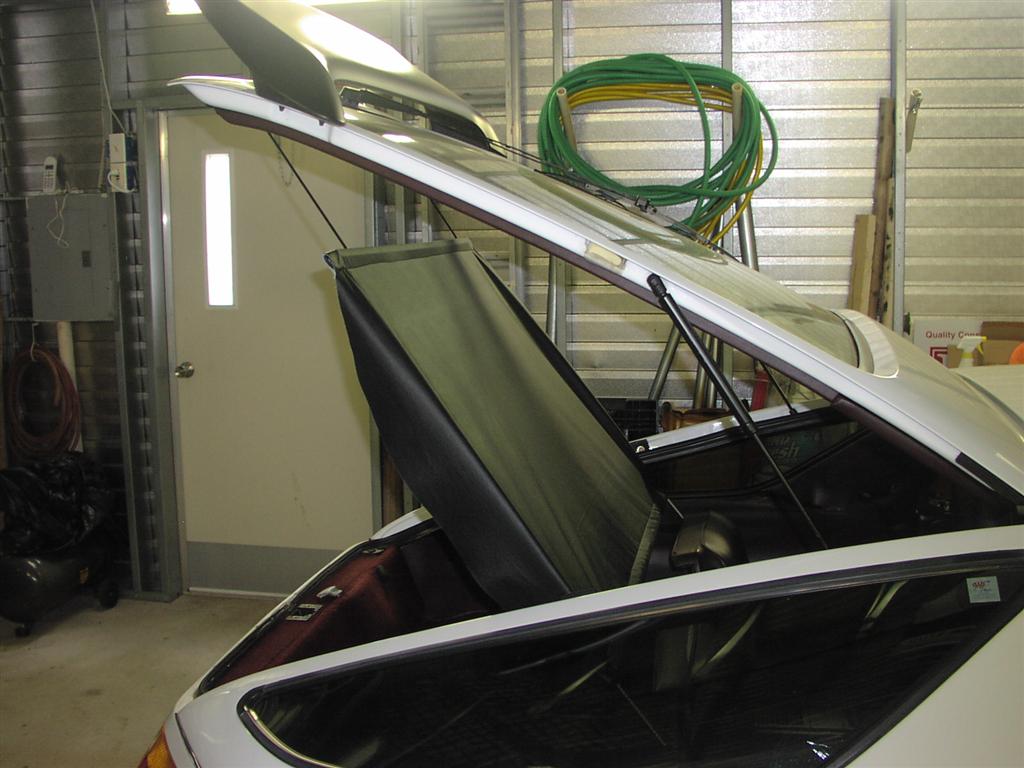
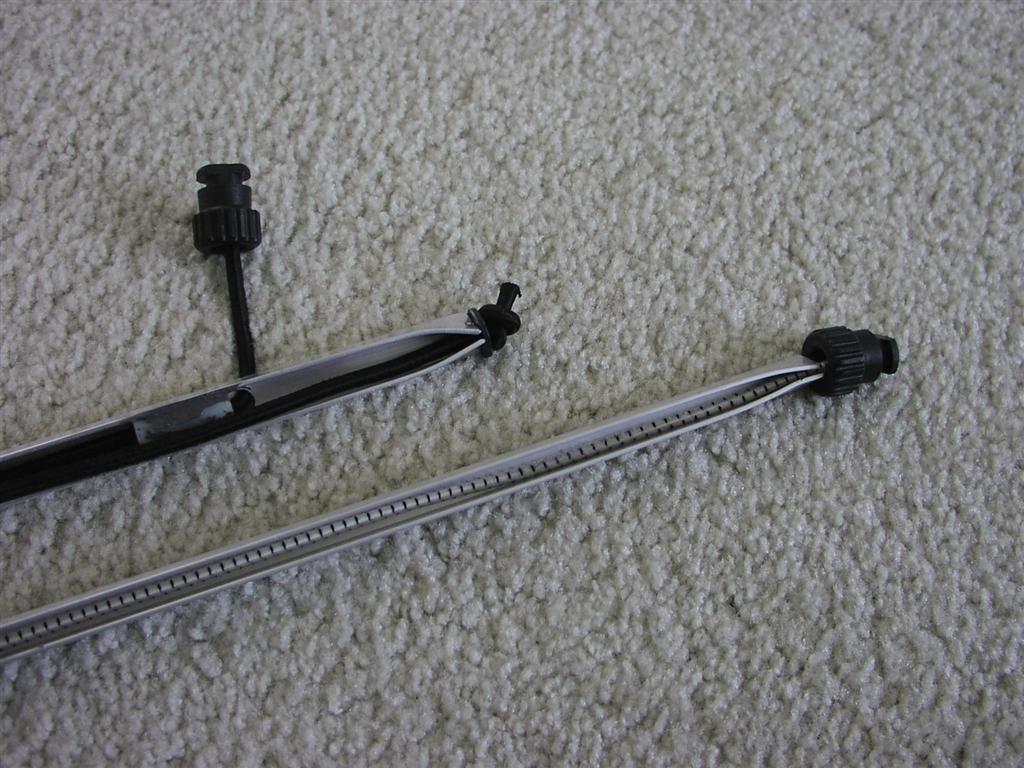
I cut the cord for the rear channel and got confused as it was clearly too
short, I thought the cord ran from one bobbin, in one hole and out the other in
the channel and back to the other bobbin, I rechecked Pet to make sure I’d got
the lengths right, I had but then I noticed the 2 in the “number per car”
column, so the rear channel had two cords, it took me a short while to figure
how it worked, the cord for the right bobbin is fixed at the left end of the
channel and the cord for left bobbin is fixed at the right end of the channel,
this gives it enough stretch when you lift the hatch. I hope you can see from
the pictures how it all goes together but it’s a bit fiddly threading the cord
through the spacers, hem and knotting the ends of the cord, when the cover is
off the car the bobbins need to be just under tension (Front and rear rods) so
that when you shut the hatch the cover is pulled to the hatch and to the rear
seats. This prototype works very well and I’ll leave it for awhile and see how
it wears, cost for bits was about $35.
List of what I bought,
4 bobbins 928 555 775 02
From hardware store,
A length of 3/16 Bungee cord Pet gives the length of the cords which was handy,
one piece 45.27 inches long and two piece’s 29.13 inches long. (The 2 short
cords on mine ended up a little shorter to get the tension right)
Aluminum channel, (Front rod 3/8’ x 43.5 inches long, rear rod ½’ x 33.5 inches
long)
Nylon spacers to fit inside the channel for rear rod
Vinyl, one and a half yards by 54 inches wide from Wal-Mart
And someone to sew the hems.

Sean,
The length of my cover is 28.5 measured flat, including the hems, rods removed.
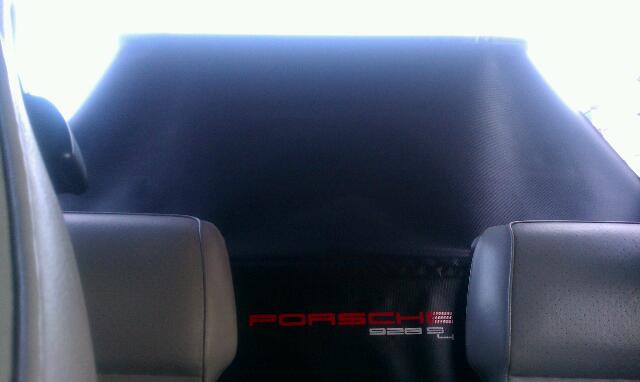
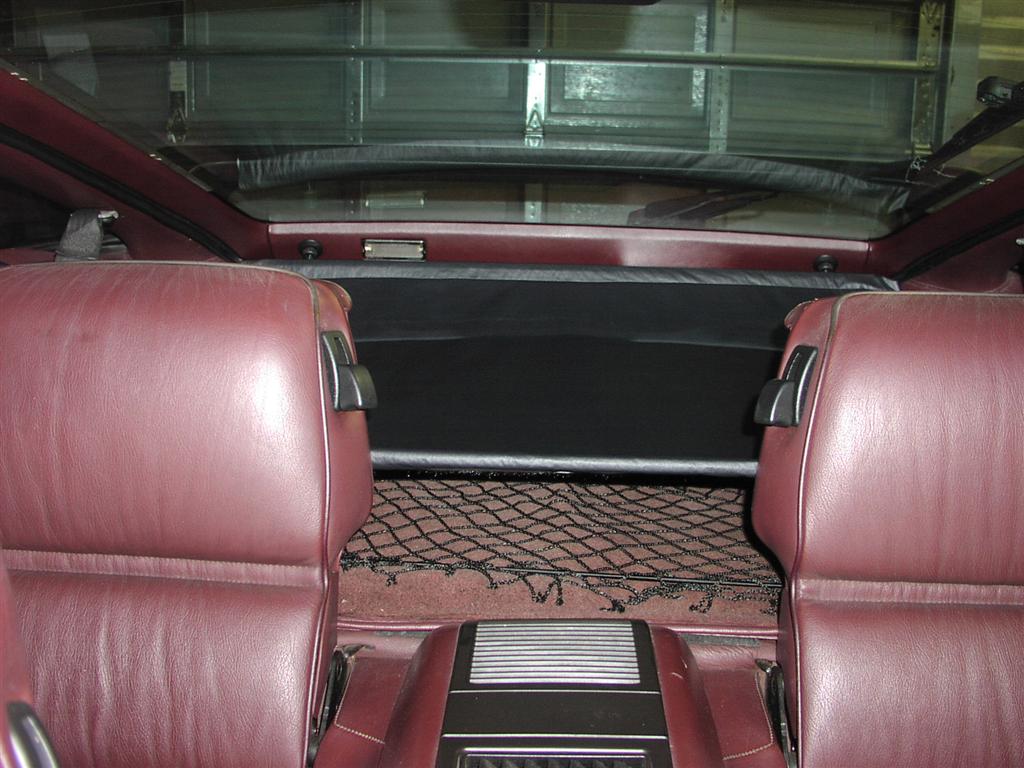
Pic of seats up but doesn't tell up much.
 __________________
Ivan Gleaves.