
Sunroof seal long, front side of the car, part number 928 564 259 02
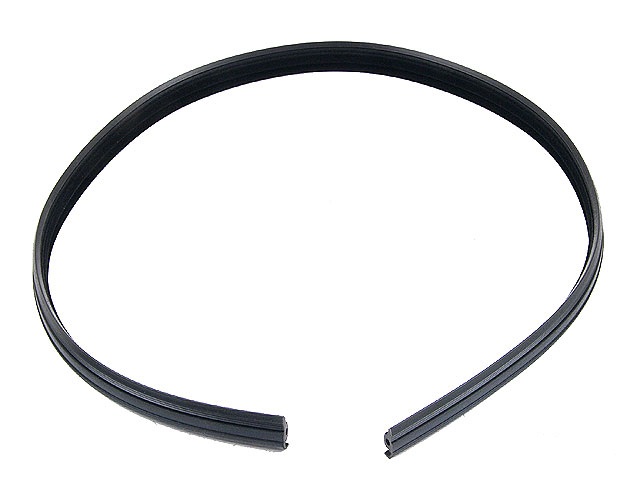
Sunroof seal short, rear side of the car, part number 928 564 261 02
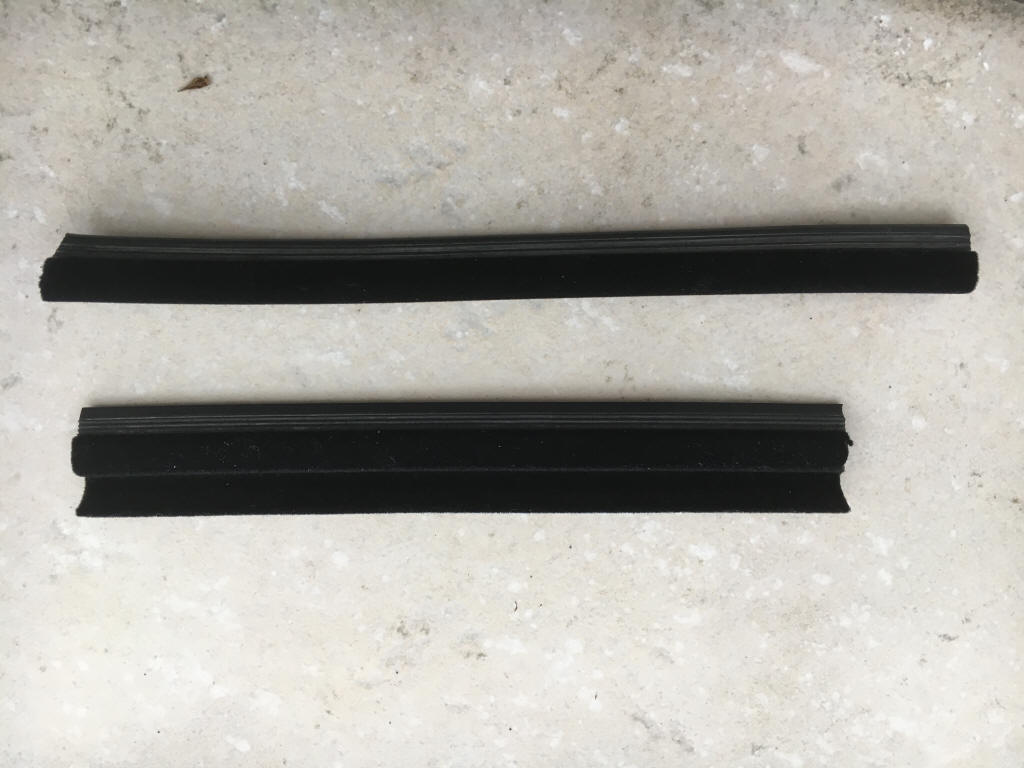
Here is a close up of the actual seals I installed:
====
So, I pulled off the old rubber and it's time for the new
rubber to go on. Obviously, it's a tight fit and it's not going to go in with
hand pressure.
I was thinking either lubricate it, or to use a thin plastic blade to push it
into the slot, or maybe both. Or is there another - better - way?
Can someone give me the benefit of their hard won experience?
Shawn Stanford
======
Well, the fitting of the seal is really straight forward. I used a rather large (big flat surface) hammer to gently tick them in. Patience and not force :)
doing the job is like this:
- undo the 3 phillips screws that hold the inner cover to the upper cover
- move the inner cover to the front of the car and take it out.
- undo the 4 bolts (8mm) at the front side. Take note that the front ones have two washers each. Probably to avoid hitting the top.
- undo the 4 bolts (8mm) at the sliders.
- take the sunroof out in the front direction.
- replace seals. Make sure you do not stretch them as they will shrink over time
- lubricate the sliders and mechanism
- put the upper part back into the car
- make sure the sliders hook up the the push/pull mechanism and bolt them up with the 4 smaller bolts. If you bolt the sliders to the sunroof without properly hooking them up the sunroof will move forward (pushed) but not backward. It is a bit of a fiddle to get this done.
- install the longer bolts in the front section, and make sure the two-washer version is at the front side.
- test carefully. keep an eye on the two springs. They need guiding if you move the sunroof.
- if all ok, install the inner liner.
- 3 phillips screws attach it to the upper sunroof section. A magnetic screwdriver is a handy tool for this :)
regards
Theo
1992 928GTS midnight blue
======
Find a smooth area to work on outside in the sunshine, spread at least two
blanket thicknesses out and secure the ends.
place your roof panel and the new seal in the sun and let them soften and
expand, get a spray bottle with dawn dish soap and water mixed 10 parts water to
one part soap. You wont need much.
NOTE after the seal is soft place the roof top surface down and feed the seal
into the groove with some of your spray.
the seal will slide into its groove with minimal pressure .
NOTE when you get to the end you want to make sure to feed the seal into the
groove so its not in a stretched state.
NOTE since there are two seals pushing the seal into its groove then back
forcing it will be necessary for both seals.
NOTE once your happy with the seal get a fresh razor blade and slice the ends so
they fit .
NOTE the seal will shrink as it ages so make sure you back force the seals prior
to cutting.
NOTE use blue loctite on the roof bolts, don't over tighten the front transition
bar or it will bind.
NOTE install the roof and close it let it sit in the sun for at least 3 days,
this is necessary so that the seal will take a set to the roof, otherwise your
roof may not close fully.
NOTE don't bother adjusting the roof for perfect closure till the seals have
seen sun, the roof will usually need some help to fully close until the seal
takes its new form
MrMerlin
========
To install a new seal around the sunroof, first remove the
rain channel at the back of the roof, held on by (3) phillips head screws. Flip
the sunroof over and pull out the old seal. This is in 2 pieces as you will
plainly see. The seal is compressed into a channel surrounding the whole
sunroof. Pull the seal out directly away from the roof. Inspect the channel for
any left over pieces of rubber or trash.
With the new seal (2 pieces), start with the front (long) seal. Fold it in 2 and
find the center. With the felt side up, insert the barbed rubber edge of the
seal into the front center of the sunroof. (a little saliva helps it slip in
pretty easily) Do one side at a time. Work the seal in one direction all the way
around the side and the back, then do the other side starting at the center. (I
found that after a few attempts to get the seal to fit correctly when installed,
you will need to stretch the seal around the sunroof, since it will be thicker
than the seam of the sunroof and fixed roof. This may not be necessary for your
car.) Make sure that the front seal reaches around to the back of the sunroof by
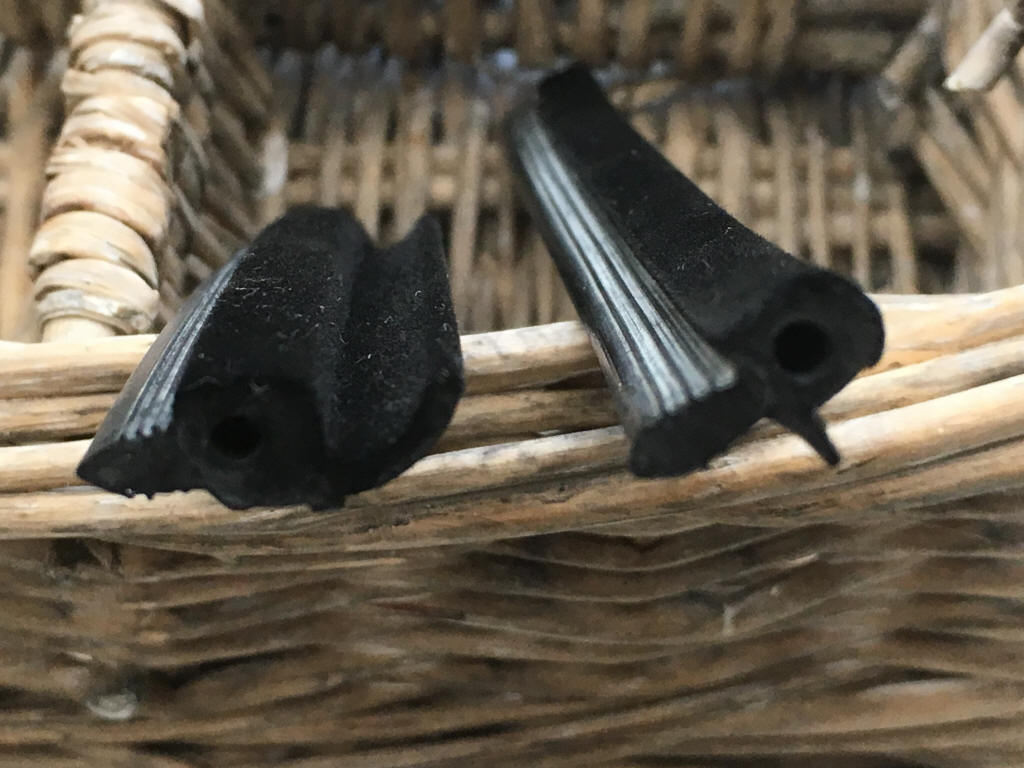
an inch or more on the straight edge. Take the back seal now and install it. The
back seal is thicker and has an extra rubber channel. Cut to fit flush with
front seal. Insure that the seal is seated all the way around. Re-install rear
rain channel.
__________________
Ken

Front seal