
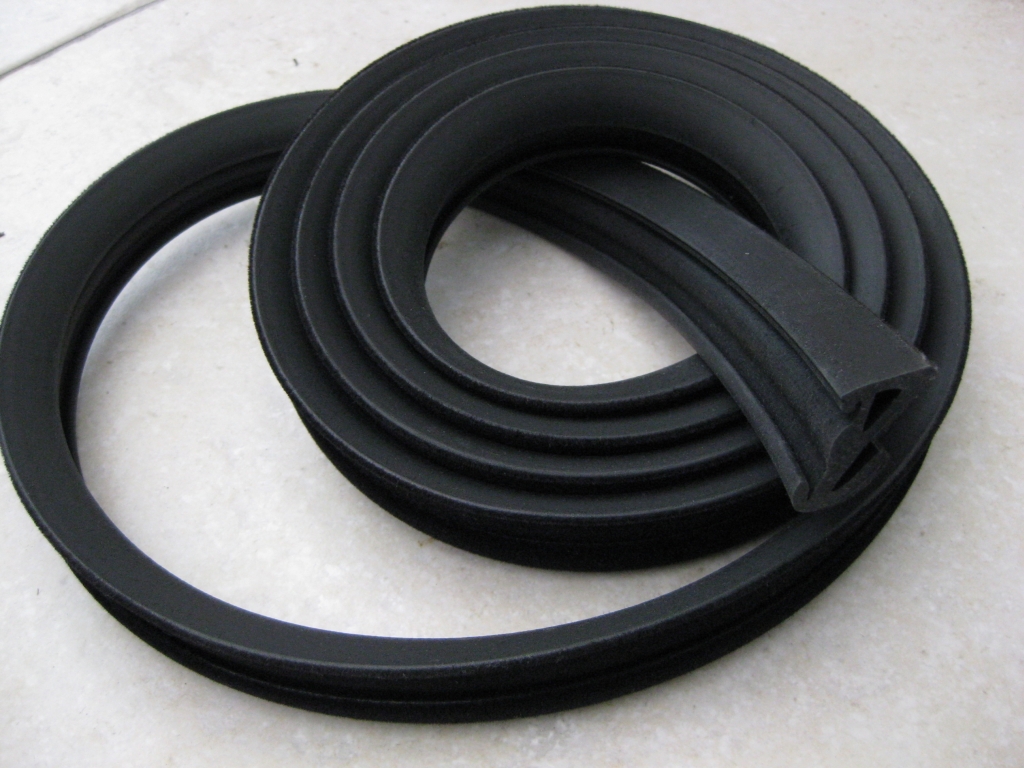
New (aftermarket remake) outer door
window rubber is less than 1/2 of the cost of an original (Porsche 170 euro
each).
Hello shark-drivers
I'll try to explain, how to install a new and weather-stripping part on the door
of your 928. This will eliminate the gap between the side-window, and the
aluminum outside, and finally it will stop protect the windows from scratches....!!
First take off all the door paneling including the thin plastic foil and the
rubber part inside the door.
The window is held in place by two felt guides, loosen these bolts, press the
guides down and pull them out.
Following that, you can work through a hole in the front and towards the rubber
part outside, move it up a little and be careful taking it out and off the door.
After that you can try to install the new weather-stripping part, but if you do
not have enough room between the outside door and the window to install the
fixture with a finger, I’ll recommend to take out the complete window.
Take a good look at the ends of the original weather-stripping and take the new
in your hands. Notice the curve it has at the end. To accommodate this curve in
the more flexible new seal, you need a form-piece that matches that curve. The
form-piece (one for left side and a mirrord one for right side) is supplied with
our product.
Cut through weather-stripping in the middle, so you will have two
parts now one for the left and the other one for the right door.
This will give you the possibility to adjust the length more precisely.
Do not use Teflon or Vaseline in an attempt for a smoother assembly. The
weather-stripping will clip in the fasteners better without pre-treatment.
Check that the lower inside part of the weather-stripping (flap) is not “glued”
together it might happen during the fabrication process. Separate the part
carefully if necessary.
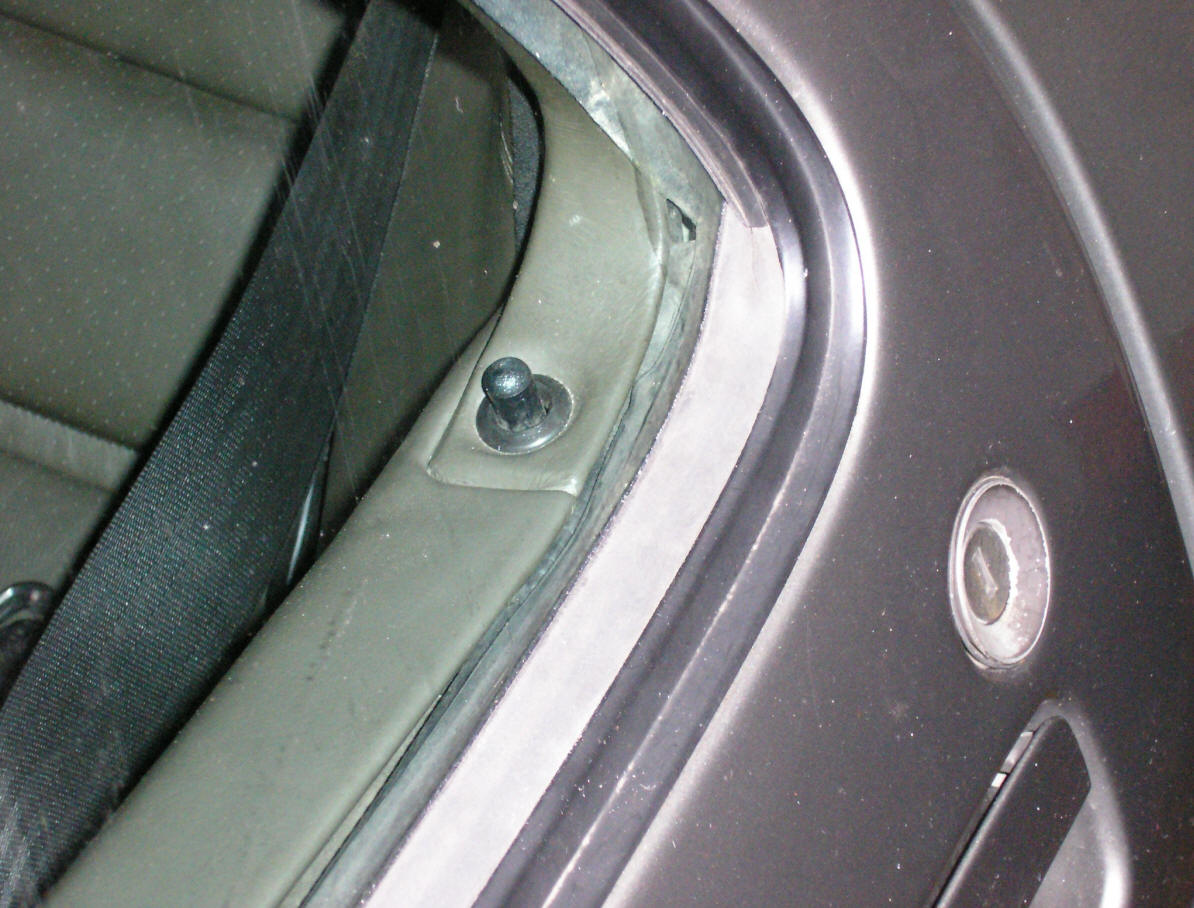
Begin as far as possible at the edge above the door lock pin, press the rubber
part in. First the upper part, hold it and then with the help of the other hand
press it in between the door lock and the window. From inside the door work the
lower lip around the rail. Press the rubber a bit toward the edge and continue
to install more of the material the same way as before. It should rest against
the original material which comes in from above.
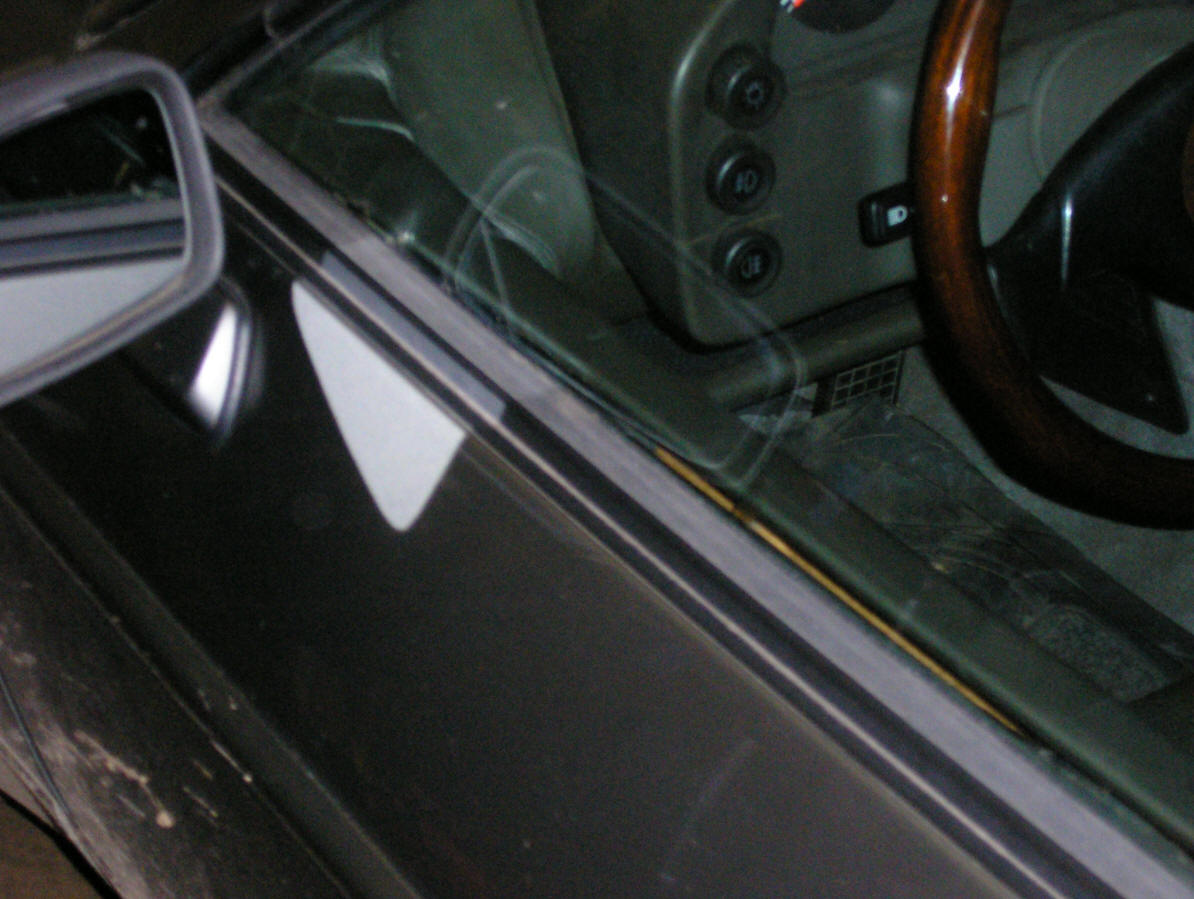
After this you have to fasten the other side, start at the front. Measure the
length from the beginning and cut it long enough to be tension free later on. I
recommend 2 mm extra material, this will compensate for any possible material
shrinking in the future.
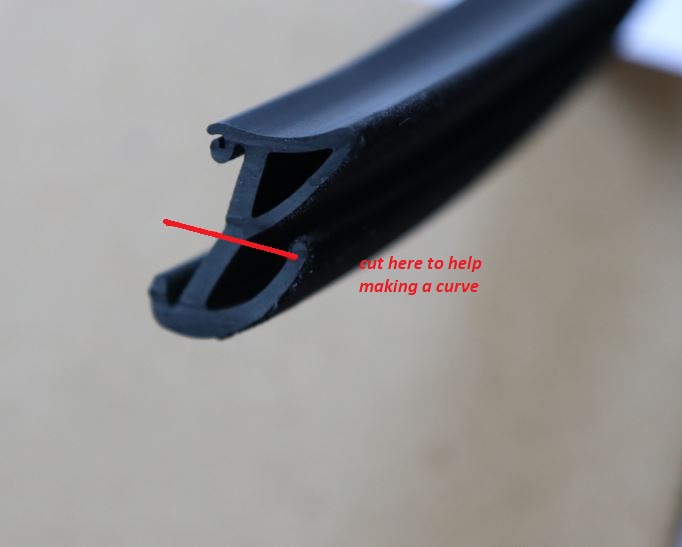
It might be necessary to cut out a little portion (reference photo 36) to make
sure that everything works just fine. When I installed the second set in my
second car, I noticed that this is not always necessary. Reminder: Press in the
upper part (flap) in the split first and then the lower part (flap).
After that, you’ll have to fasten the upper part first and then the lower flap
over the total length of the door.
This all can be done without taking the window out (you might try the
installation with the help of a screwdriver).
For the lower part of the “V” inside the lower “flap”: Press down the rubber a
bit and with another tool (or finger) work the lower fastening part of the
“flap” around the rail.
Sometimes this is really difficult! Be very careful with pressure when using a
screwdriver. The rubber might “resist” against installation and might not
“settle in” properly.
If the upper “flap” can’t be fastened very well, you might help it by using a
little bit of contact-glue in the split.
It’s a little time consuming, but the result is fine and justifies the work.
Plus you’ll have the piece of mind that your window will remain scratch free for
many years to come
Here are the pictures:

Hello all,
I finally got round to replacing the old, brittle window scrapers on my S4 over
the weekend so I thought it might be useful to share some tips... The
replacements are an aftermarket product I got from Theo Jenniskens in the
Netherlands, and are supplied as a single length of seal so need to be cut to
size carefully - measure twice, cut once and all that. I had about 4 inches
spare so used that to practice shaping the rear section so it'd follow the
curve.
Tip 1: I have a set of cheap plastic trim removal tools (£7 or so off amazon)
and they saved my bacon - worth investing as the plastic won't scratch paint or
tear rubber as easily as metal tools will.
Removal of the old seals was straightforward but left a lot of residue in the
channels - I used the plastic tools to scrape that out, and cleaned the channels
with some soapy water.
I found I had enough access without removing the door panels and inner seals -
your mileage may vary! The only place the fit is tight is the middle part of the
door where the glass is closest to the outer skin; I started placing the seal at
the front of the door and "slid" it rearwards along the channel as I worked.
Tip 2: lots of soapy water! Apply it liberally to the non-felted side of the
seal, and to the channel to which it locates. That (and cleaning the bits of old
seal out) made it easy to slide the seal along the channel as I worked.
Tip 3: tape your fingers! If you choose not to remove the door panel (what can I
say? I'm lazy like that) and have sausage fingers like mine, then be aware that
you'll be rubbing the skin off the first join of your middle and index fingers.
I've "learned by doing", but there's a reason that the guy in the YouTube
fitting video has tape on his fingers...
Anyway - the whole thing took maybe an hour to complete, no damage to door or
seal, the fit is excellent and the Windows no longer judder and scrape as I open
them. One of the easier (albeit more daunting) cosmetic jobs I've done on the
car.
Cheers
Rob
'91S4
====
Hello,
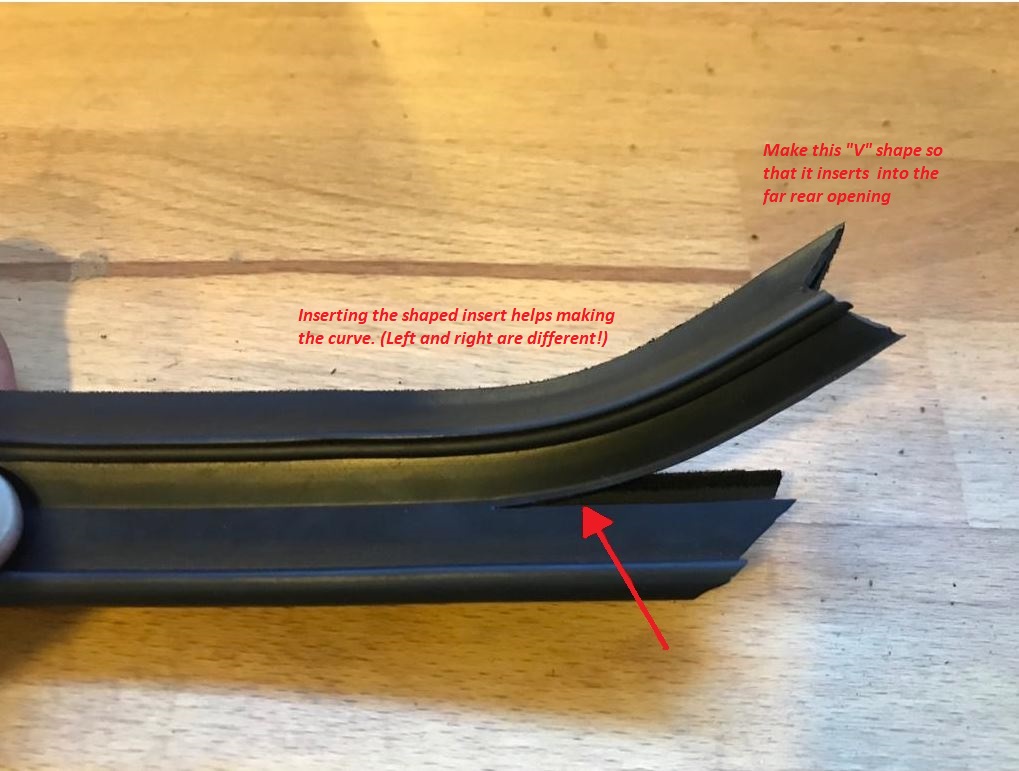
this new version of the remake seal has a stiffer fit and looks perfect. The curve the seals needs to make, can be made by inserting a special shaped piece into the seal. This requires cutting the seal as shown in the pictures below. The inserts are specific for left and right side, and cutting the end piece is needed to make it look nicely. If you have enough length you can consider to cut a few cm off to practice making the V shape that fits the rear window frame opening. Make sure you have the seal pushed forward into the door before working on the rear curve.

regards, Theo