Rebuilding
1. Measure the distance from the transmission end of the drive shaft to the
bellhousing end of the tube and record it. This is so the drive shaft end can
later be reinstalled to the correct depth in the torque tube.
2. Get a 6 foot long piece of standard black or galvanized 1/2" steel plumbing
pipe at the hardware store. Slip the end of this pipe over the pilot diameter at
the front of the drive shaft.
3. Use a large hammer to pound the shaft out, towards the bellhousing side of
the torque tube. The steel plumbing pipe is soft and will not damage the
heat-treated splined drive shaft.
4. Once the shaft has been removed, you will need the following:
A 6-foot long 3/4-10 threaded rod
Five 3/4-10 nuts
Two thick flat washers which will fit inside the tube I.D. and reasonably close
to the O.D. of the threaded rod (I used heavy-duty fender washers). I went to
Lowe's in their specialty bolts section.
A flat bar or spacer of steel with a 1" hole in it (I used an old go-cart engine
sprocket - anything which has a 1" hole in it and is larger than the small end
of the torque tube which can be pressed against without deflecting will work).
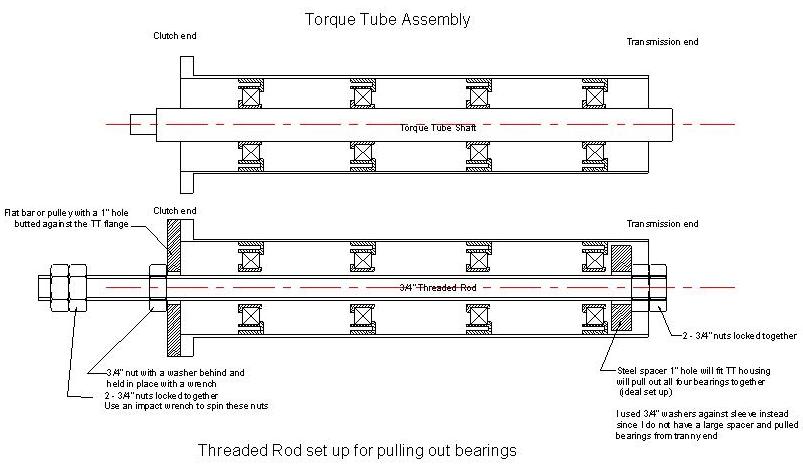
5. Slide the spacer or the large washer on one end of the threaded rod, then
lock two nuts together near the end of the rod. You may find it works well to
place a large socket in front of the washers to act as a "driver" to pull the
bearings out.

6. Slide the rod into the tranny bellhousing end of the torque tube.
7. Put the go-cart pulley or the flat bar with 1" hole onto the protruding end
of the threaded rod at the front of the torque tube. Add a washer and nut. This
nut will be held stationary with a wrench. Alternatively, if you have a welder,
you can tack weld the nut to the flat bar.
8. Lock two nuts together at the protruding end of the threaded rod in front of
the torque tube.
9. Hold the ¾" nut which bears against the pulley or flat bar with a 1" hole
with a wrench.
10. Use an impact wrench to "spin" the two locked nuts at the front of the
threaded rod, spinning it counterclockwise. This drags the washer at the
bellhousing end forward, accumulating the 4 bearings as it goes. Can also do
this by hand, but it takes forever. Alternatively, if you don't have an impact
wrench, you can simply turn the ¾" nut against the flat bar with an open end or
combination wrench. Again, it will take a long time. The picture below shows a
puller with a flat bar on the end and one with a go-cart pulley.
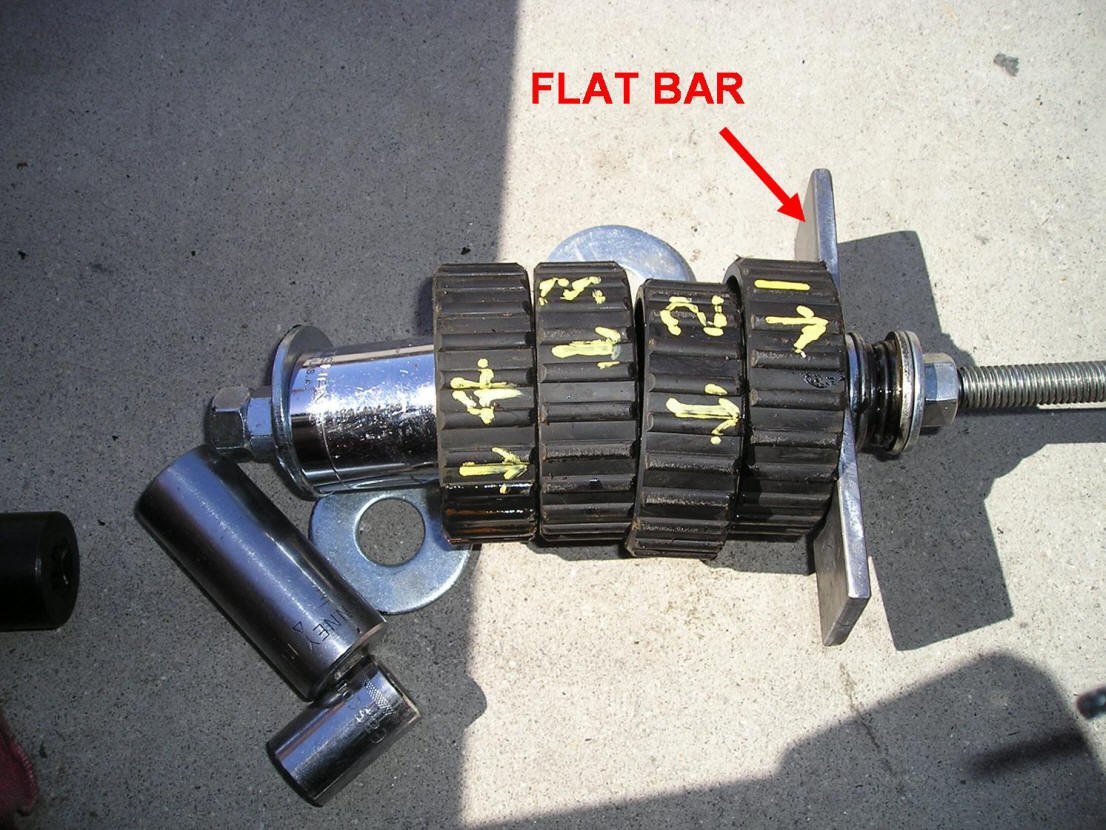

11. After so many turns (a million), presto - out pop all 4 torque tube bearing
assemblies.
NOTES
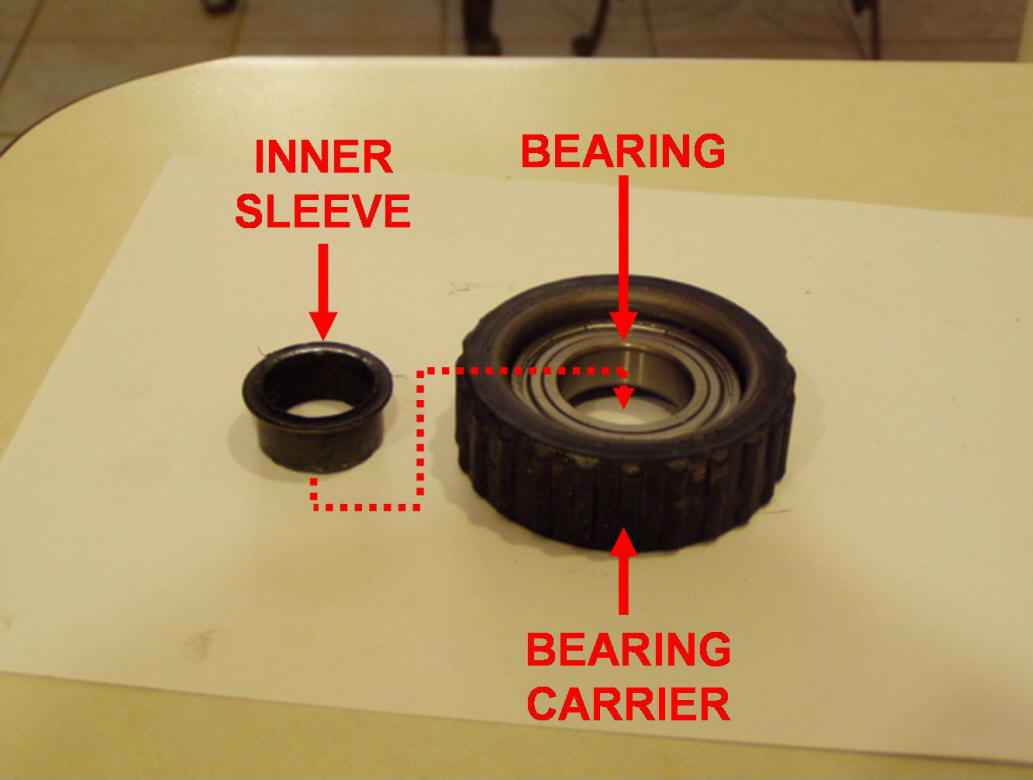
After removing these, their construction is evident - they are standard sealed
ball bearings FAG 6006 2Z that are pressed into stamped steel carriers with
rubber splines molded onto the O.D. There are also little rubber-covered inner
sleeves that are pressed into the I.D. of the sealed bearings, that are staked
in 4 places. You need to "unstake" the sleeves and remove them, then press the
bearings out of the carriers, and press in new ones. On older 944s, the bearing
carriers are two-pieces that are riveted together. You'll need to drill the
rivets out and separate the two halves of the carrier to remove the bearing.
**torque-tube-bearing.jpg
If the rubber coated inner sleeves are intact, once you've pressed them out of
the bearings, save them for reuse. However, if they are shattered or are in
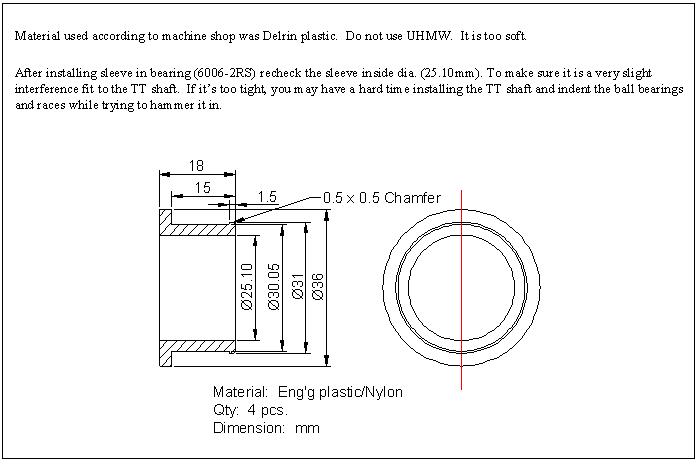
otherwise poor condition, you'll need to have new sleeves fabricated. I went to
a machine shop to have them fabricate 4 of the inner sleeves out of Delrin
plastic (see drawing below).
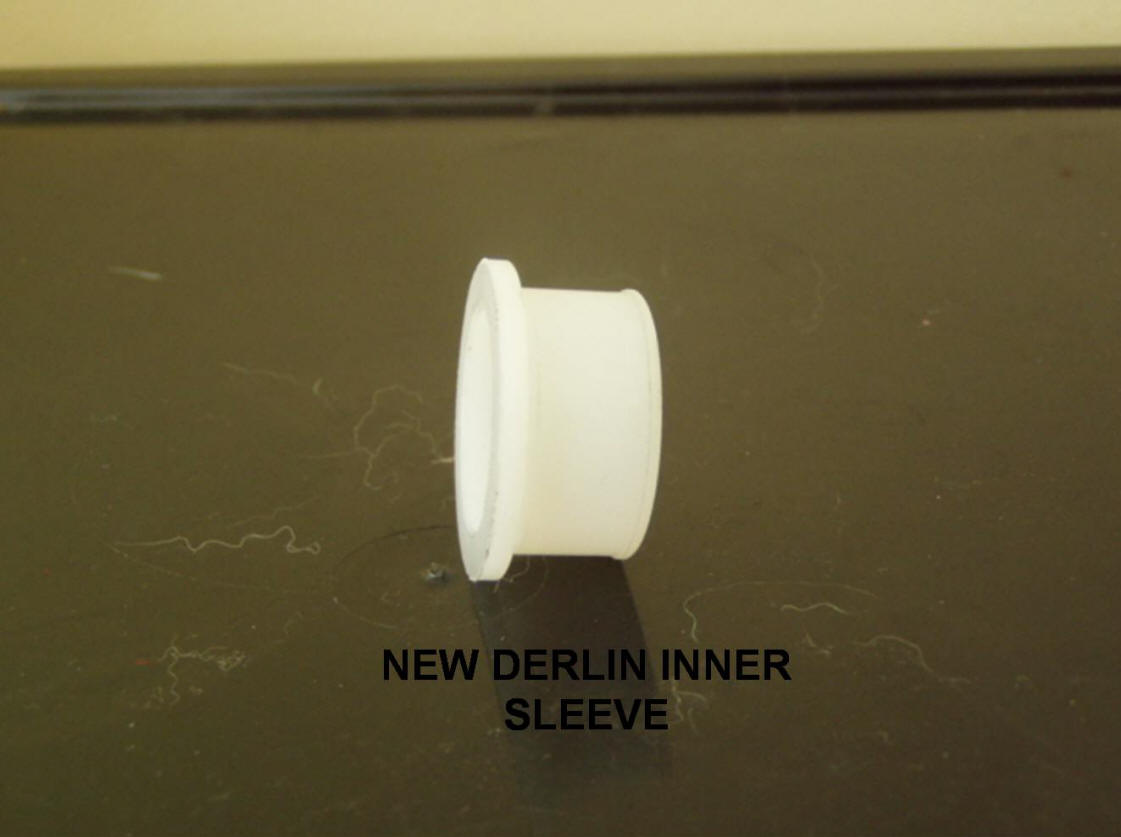
I used a hydraulic press to install the new bearings and inner sleeves.
12. Install the bearing assemblies and drive shaft in the torque tube as follows:.
Measure and mark 1st, 2nd, 3rd & 4th bearing locations in the torque tube with
1st in front. Use bearing marks in the shaft.
All 4 bearing housings must be in same orientation. Look at the attached dwg.
Position inner sleeve in a way it will not come out when the shaft is driven
from the front end of torque tube. Whether you are reusing the old sleeves or
using new ones.
Install 2nd bearing in the front end using the 3/4" all threaded rod until it is
in the second bearing mark. Then do the 1st bearing.
Then install the 3rd and 4th bearing from the back end. I did it this way so I
don't have to install one bearing from the front end all the way to the back
end. That is a lot of wrenching. I put some loctite anti-seize inside the torque
tube so bearing will slide easy.
Insert the drive shaft into torque tube from the front end inserting the tranny
end first. I used a plastic mallet to tap it in. Once it hit the 4th bearing it
got a little stiff so I had to use a 1/2" x 2" pipe inserted in the pilot
bearing end then hit it with a ball peen hammer (not too hard!). Position the
shaft based on the measurement before disassembly.
The key here is to have the sleeve ID to have the right tolerance fit. If it's
too tight, you have to hammer the shaft really hard to drive it in thus
destroying the ball bearings due to shock load during installation. If it is too
loose, it may not last long and vibrate soon.