I really need some
help please? Crank position sensor removal
--------------------------------------------------------------------------------
Hi, this is my first post having been recommended to this forum by another 928
enthusiast and I could really do with some help please.
It seems that the crank position sensor on my 93 GTS manual (UK car) is playing
up as the engine cuts out once it's up to temperature. My problem is I seem to
be unable to figure out how to get either the bolt out of the sensor due to it
being seized (I've applied liberal amount sof WD40) and limited space to get to
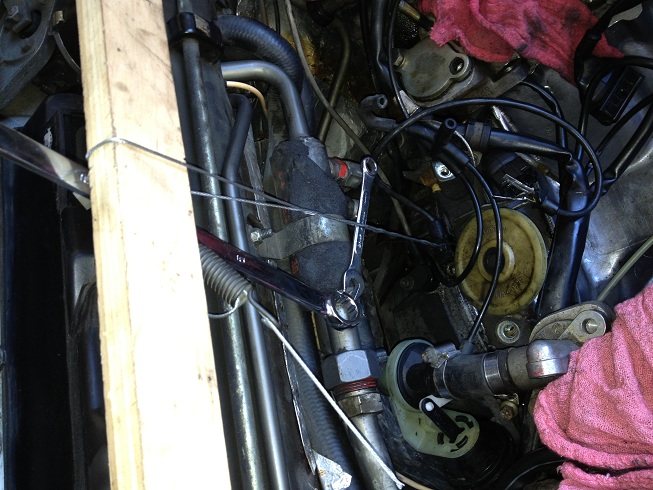
it and there is even less space to get to the connector. Immediately above the
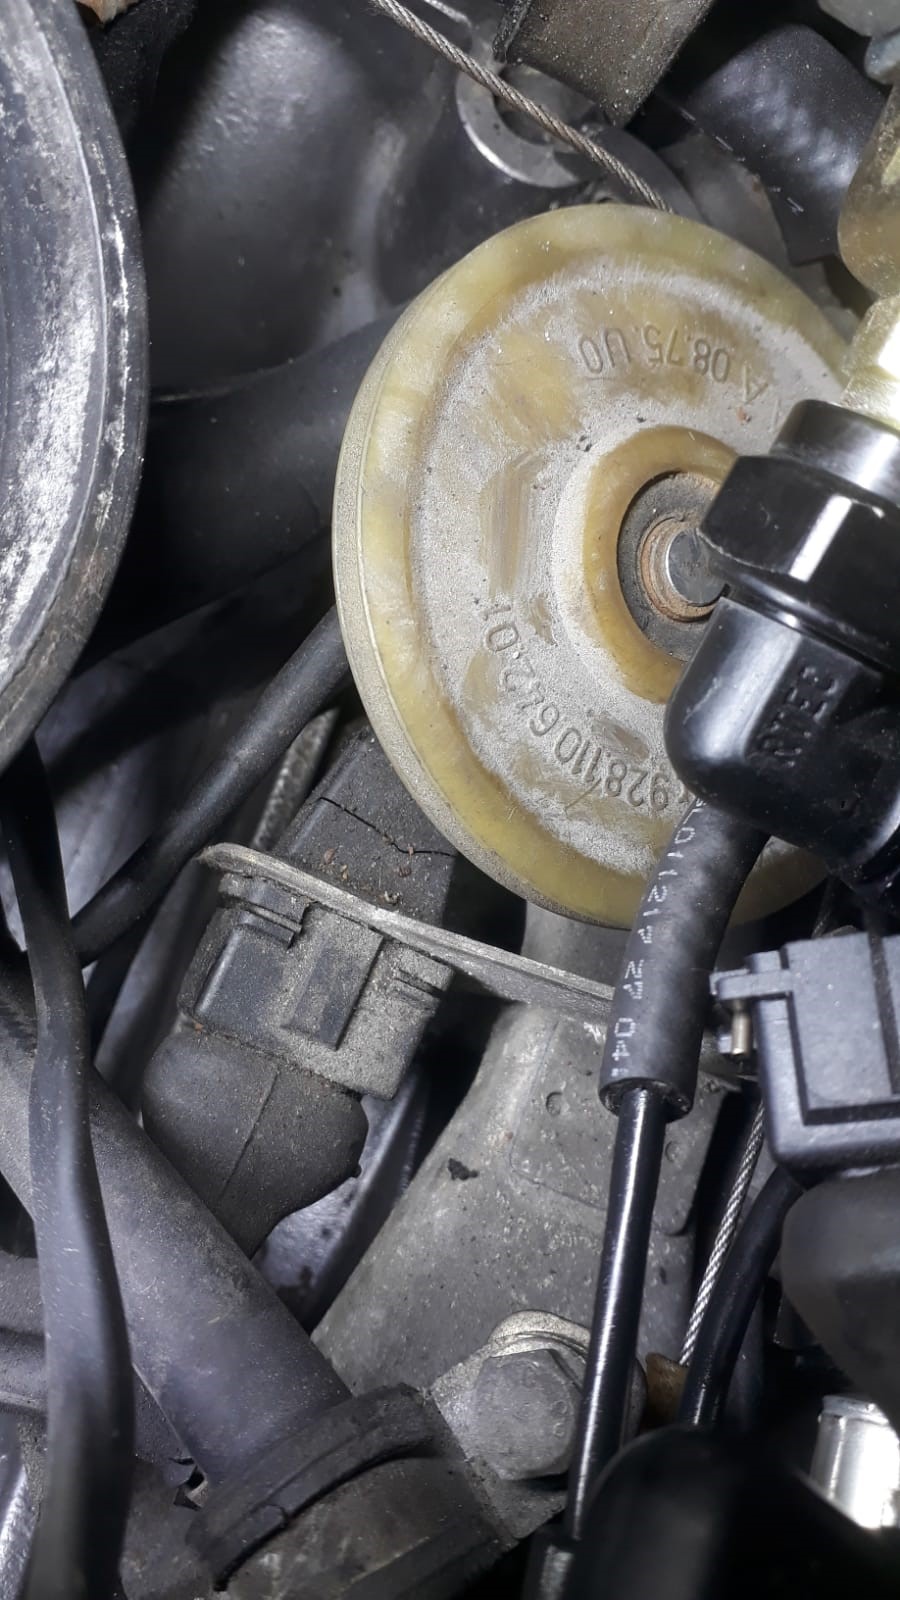
connector is a white nylon pulley which appears to be a cable guide. There are
also what I believe is a fuel pipe above linked at either end to what I assume
are the pressure regulators.
I thought of removing the circlip and taking the pulley off but I really don't
want to lose the circlip and with the limited space it's very likely if I can
get to it that it will ping off somewhere. I don't really know what to about the
fuel hose or regulators as I'm thinking if I try and remove these I'll end up
with fuel everywhere and possibly need to replace any O rings etc. that may be
present.
Does anybody know how I can set about removing the crank position sensor, which
items are safe to remove if I need to remove them and in which order?
Sorry for the long post but I'm really stuck here, I can't even get it to a
garage to do as it cuts out.
-----
I assume you have removed the top and bottom of the airbox...
Lay some thick towels on the intake, then lie stomach-down on them. Seriously,
this will put both of your arms in the perfect position to get around and below
the fuel lines and throttle cable stuff, and you will be able to see directly
down there. You can then yank on the connector, just make sure you don't break
it on the harness side. Working from the sides really gives you little
opportunity to put pressure on stuff.
Dan
-----
I have removed the complete air filter assembly and the MAF, but I'm not sure
that even lying on my stomach I'll be able to get behind the fuel lines. The
allen bolt has started to round ever so slightly so as soon as the drive started
to move but not the bolt I backed off and applied more WD40 to it and I've left
it soaking. I need to be able to get a straight hex drive onto it rather than an
L shaped one so I'll go hunting tomorrow for set of ratchet drive allen keys.
Mrmerlin, the right fuel rail you refer to is presumably as you look from the
front of the car and regardless of LHD or RHD? I think I'll go this route as I
really need more space to work on this thing. I'm concerned that this may break
when trying to remove it as I had similar problem with an ABS sensor on a BMW.
The parts stayed together but only the top was turning!
Once I've got the fuel hose out of the way I'll try dprantl's suggestion of
lying over the engine. Can anybody shed light on what that cable and pulley
does, presumably it's attached to the throttle mechanism?
-----
One more thought: Try to find some better penetrating oil than WD40. The best
stuff we know of is Kroil's (Kano Labs), PB Blaster is also good, or a 50/50
mixture of ATF and acetone (or diesel and acetone)-- what you need is some
lubricant and a vehicle to get it in there, WD40 penetrates but isn't a very
good lubricant.
The crank sensor has a stainless body, the bell-housing is aluminum, the
clearance is very tight-- the steel and aluminum in combination with a bit of
water and salt makes aluminum oxide which does a good job of locking the sensor
in place.
If the screw turns a little then the penetrating oil will be able to get in
there, so wiggle the screw a little, soak it with penetrating oil, wiggle,
soak-- until it comes loose. (A gently tap with a hammer might help break loose
the corrosion also).
Once you get the screw out then try to turn the sensor a little, same deal--
wiggle, soak, wiggle, soak... Patience is the key, not large forces.
Good luck!
__________________
Jim & Sue Corenman
--------
OK, mine was easy. Two minutes (but like I said, I had easy access). I had
sprayed PB Blaster on it yesterday.
Cap head bolt was kind of hard to remove; it had blue Loctite on it. I used a
nice GearWrench ratchet with a hex socket.
Sensor fits into tube not much larger in diameter than the sensor cylinder, but
pretty deep (didn't measure it, but it seems to be about 3 cm or so?); now I see
how the sensor could get stuck if there was a bunch of grit in there. Mine was
pretty clean.
Good luck, 928GTSM; hopefully, your biggest problem will just be getting enough
room to work.
After seeing how this sensor seats, I guess the main thing to avoid is doing
anything that gets the head of the sensor out of the plane it's seated in.
Rotate it about its axis while lifting.
Ed Scherer
-------------
Like John said, don't pry it with a screw driver! I did and broke it flush!!!
Here is what I did to remove it.
Ok here we go!
I did remove it from the top.
By the way, you can't easily reach it from under as the flywheel is the way!!!
Also, don't try to push it out from under as you will probably bent it and have
more problem removing it from the the top. Ask me how I know!
Anyway here's how I did it.
1) I put a lot of penetrating oil on top of the CPS.
2) from the top, I used a Dremel tool to remove as much plastic as I can inside
the CPS on top and around the magnet. About 1/4" below the top of the magnet
worked fine for me.
3) I used a pair of long nose pliers and pull the magnet out. It did come out
quite easily.
4) Now that the magnet is out, you can tap the hole and use a long bolt, nut and
a spacer (a 1/2" small pipe work well for me) and take it out!
When I pull the CPS out, the lower metal part separated from the top plastic
section and stayed stuck inside. Now another problem. As I couldn't remove it
from the top, I push it from the top and picked it from under on the top of the
bell housing.
It took me about 5 hours to do it but at least I did not have to remove it from
under - moving the trans./ torque tube, removing the flywheel etc.
Just take your time and try to remove it without braking it!
Good luck.
__________________
Bertrand
------
More usually, CPS failure is actually CPS-connector failure where it plugs into
the harness (just underneath the plastic throttle wheel). Its a 3-pin Bosch
connector and the sensor-side crumbles and falls apart. The intermittent nature
of your problem says its likely just an electrical connection rather than the
sensor itself, so you may not need to remove it.
------
I've known several CPS to only fail when engine is hot....
__________________
John '86 Euro S2
-----
If the CPS can wiggle a bit back and forth, I would get some mechanics wire or a
zip-tie under it to pull up while you wiggle it back and forth.
I did mine a long time ago and I used a screwdriver... luckily it didn't break.
One way to get it out for sure is to drop the clutch and knock it out with a
drift. Just giving you options...
__________________
AO
------
Some creative ideas to remove the CPS:
Stuck Crank Position Sensor (CPS) removal
--------------------------------------------------------------------------------
This post includes a method for getting out a stuck CPS that worked for me.
Background:
I'm refreshing my intake and the original 25 year-old CPS was on my list of
sensors to replace. I soaked the CPS with PB Blaster. The CPS wouldn't budge
upward when I pulled with my arms. It turned in the housing back and forth a
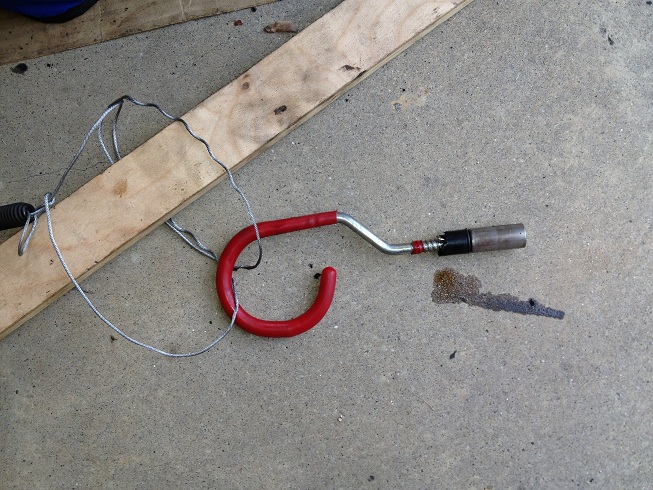
bit, but did not come up. I rigged an old lawnmower throttle wire around a scrap
piece of lumber sitting across the firewall and looped the wire on the cable
lead end of the CPS. Then I twisted the wire with a small lever (a wrench) and
the CPS budged up slightly. I looped the wire the rest of the way around the CPS
to get a more even pull and twisted. It came up maybe 1/4 inch total. In
hindsight, maybe I should have let it soak some more and kept going with this
method. Impatiently, thinking I was almost to victory, I began prying with a
screwdriver at the new gap between the CPS and the housing. Of course, the top
of the sensor proceeded to snap off leaving the rest of the sensor stuck in the
hole.
Solutions:
On these boards, I read about folks going under the car to punch it up, or about
going from the top using a dremel on the perimeter plastic to get the magnet
out. Yes, I took a stab at drilling the magnet and quickly realized the futility
of that.
My path:
I decided to try from the top. I couldn't figure out how to get a dremel in
there without potentially damaging the walls of the aluminum housing. Instead I
used a soldering iron with a small flat tip to melt and dig the plastic out
around the magnet. I dug down maybe 1/4 inch. Eventually I was able to grip the
magnet and twist/jiggle the magnet and some other metal cylinder that was in
there up and out.
After some more PB blaster, I tried at first to tap the remaining sensor and
pull with a bolt/washer/nut rig on a socket. The only thing I could pull up was
wire and internal bits of the sensor. Then I sank a thicker wall hook into it
and used the lumber and lawnmower wire to lever it up and out. It came out
easily with the hook.
Anyway - wanted to share my experience for anyone else that might wind up with
this challenge. There is hope and the soldering iron worked great for melting
and digging out the plastic without damaging the crank housing.
MFranke
-----
You did well ! The vital part is that you didn't damage the aluminium cylinder,
by the look of it. The slightest dent or kink will ensure it is well jammed, and
only very drastic measures with get it out...
Did your hook only thread into the upper plastic part ?
__________________
John
-----
I initially drilled and tapped for the bolt a little deeper, so I suspect the
hook point could have gone deeper. The hook was nice and fat and gripped the
inside walls well. I noticed the CPS started to move a bit with a little upward
force on the hook and then the CPS just came out somewhat easily at that point.
I was relieved.
The whole ordeal took several hours, spent here and there, allowing soak, over
the last couple days.
__________________
Mark