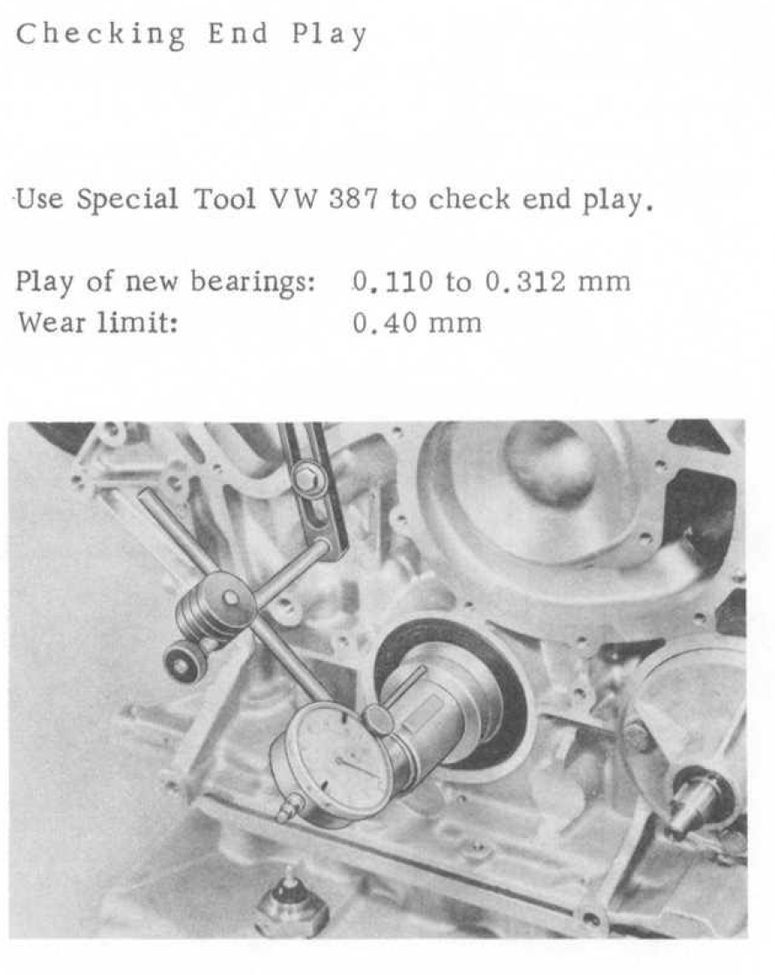
This is the official end-play check service note from Porsche:
333Here's what I
did.
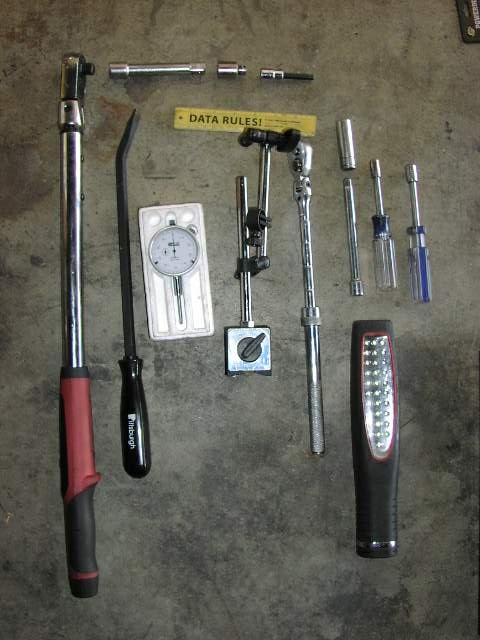
1. Gathered these tools.
- torque wrench
- extension, adapter
- 8mm Allen
- pry bar
- straightedge
- dial gauge accurate to .001 inch with mounting base and arms
- ratchet, extension and 13mm socket
- work light
- 5/16ths (eh, 8mm seems too large) nut driver for belly pan screws. Many people
will find some 10mm screws as well.
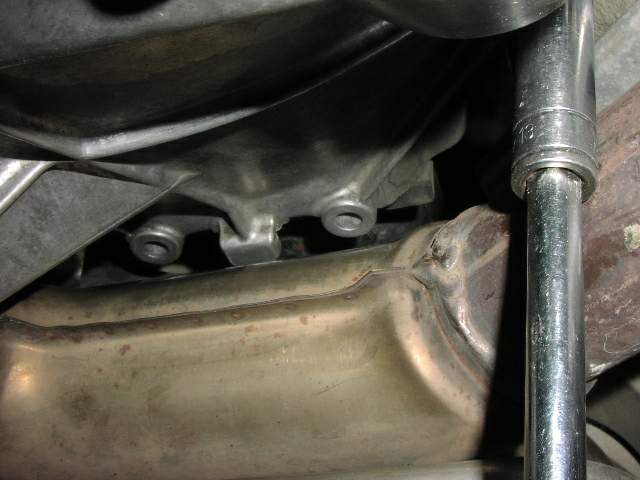
2. Get the car in the air. Looking up in the area you need to work on, this is
what you see - the rear belly pan needs to be removed. Front belly pan can stay
in-place.
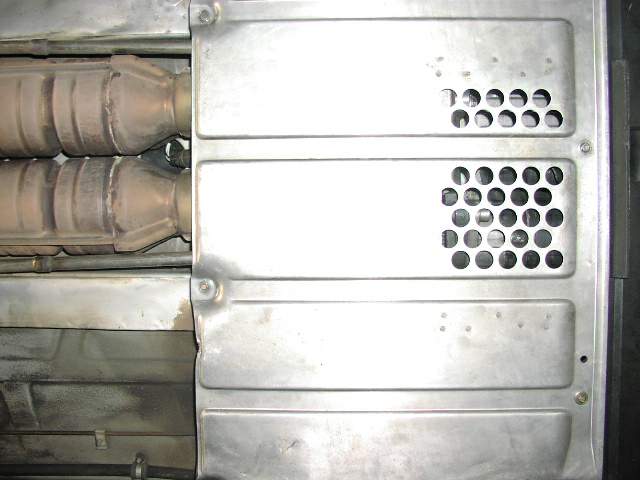
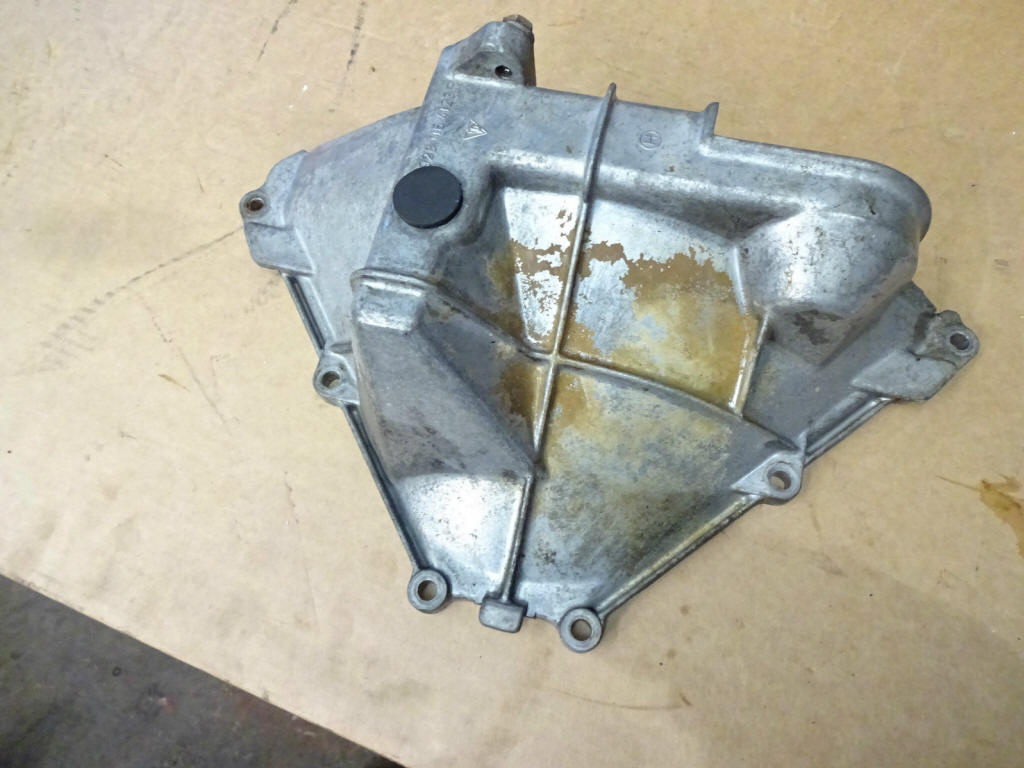
3. After you remove the rear belly pan, the lower bell housing cover is exposed.
It is held on by 6 hex bolts with 13mm heads, 4 of which you can see in this
photo.
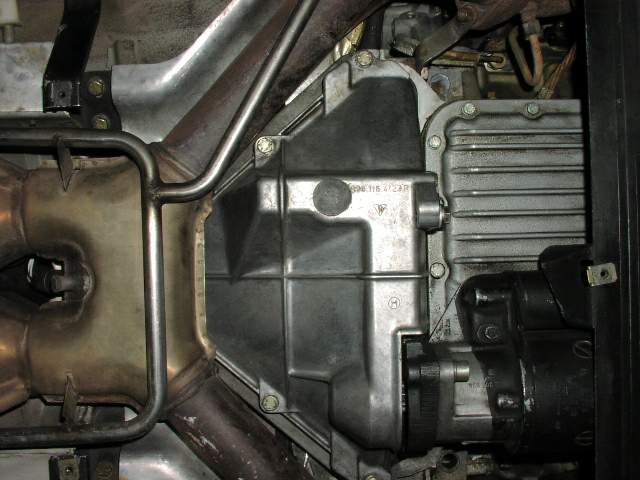
4. If this is the first time you have done this and you have the stock exhaust
and cats, you will be confronted with a problem getting the two rear bolts out
of the cover. They are trapped by the H-pipe area. I have been in here many
times, so I left those bolts out long ago. You probably will have to remove the
front exhaust from the manifold and let it dangle down to get these bolts out.
This is a real nuisance, as you will find if you have to do it. The exhaust
bolts are often rusted on hard and require a variety of wrenches due to awkward
locations and counter holding the bolt heads. Also, to separate and lower the
front exhaust even a bit, the two lower 19mm bell housing to block bolts must be
loosened as they hold brackets to a couple of the exhaust bolts. Finally, the
joint in the air line to the catalytic converted must be opened. Ugh! After the
first time doing this crap, some people will shorten the rear cover bolts so
they can be removed with the exhaust left untouched. I just left them out. When
I shortened them, they were still trapped by the exhaust. Some have used a
Sawzall the cut those bolts out rather than drop the front of the exhaust at
all.
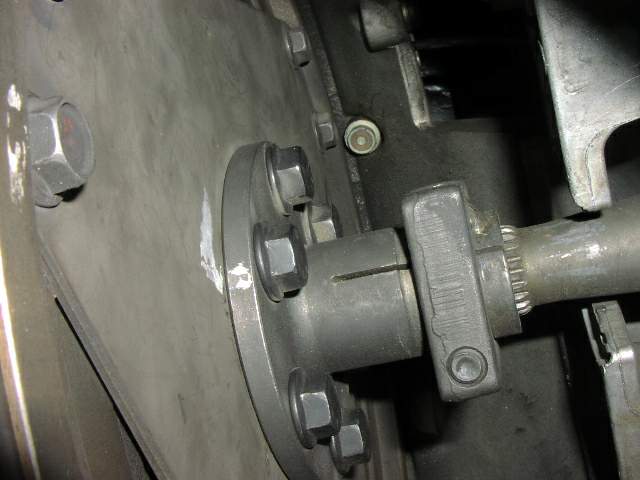
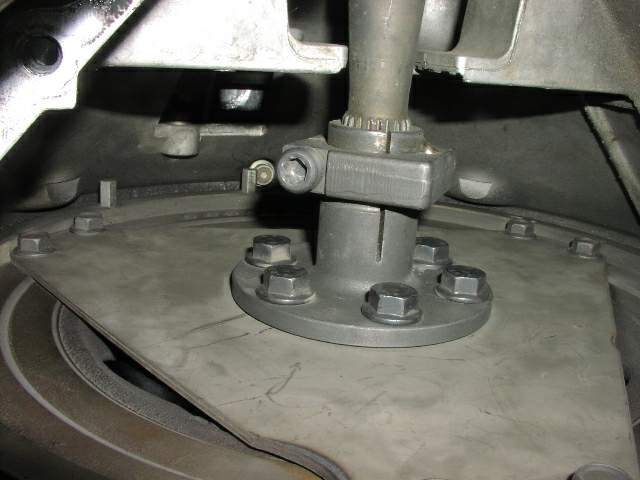
5. Once the lower cover is off you will see the flexplate and clamp. Here it is
positioned so I can't get to the clamp bolt head to loosen it.
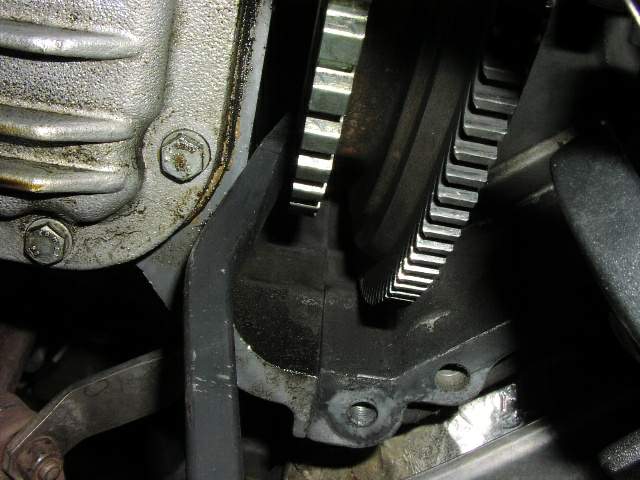
6. I use a pry bar/large screwdriver to move the flywheel. The ring gear and
flywheel on later cars are one piece and can be handled this way. The engine
should only be rotated clockwise (which would be counterclockwise back at the
flywheel). You could use a 27mm socket on the front crank bolt instead or tweak
the starter until the bolt head is accessible.
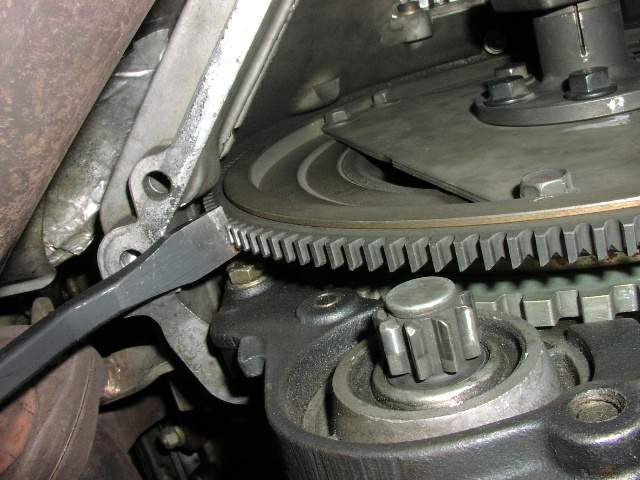
7. Now I can see the 8mm Allen head.
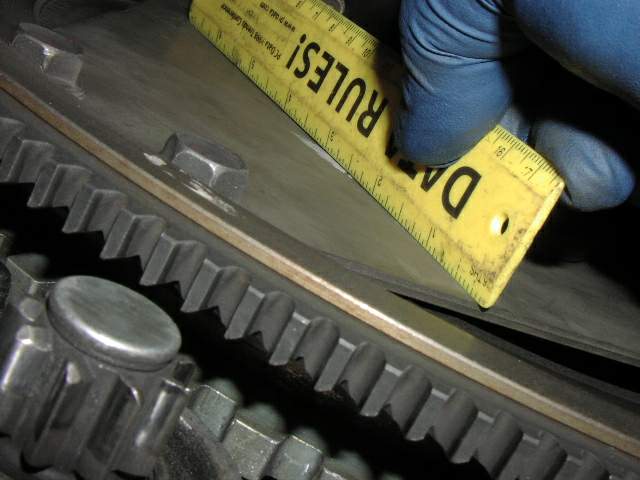
8. Before loosening the clamp bolt, lay a straightedge across the flexplate.
This isn't the best straightedge, but as you can see there is a tiny but
insignificant bowing. There have been some reports of finding as much as 10mm
bowing in some cars. As much as 1 or 2mm wouldn't bother me too much, but
anything more would mandate an immediate endplay check after releasing the
preload.
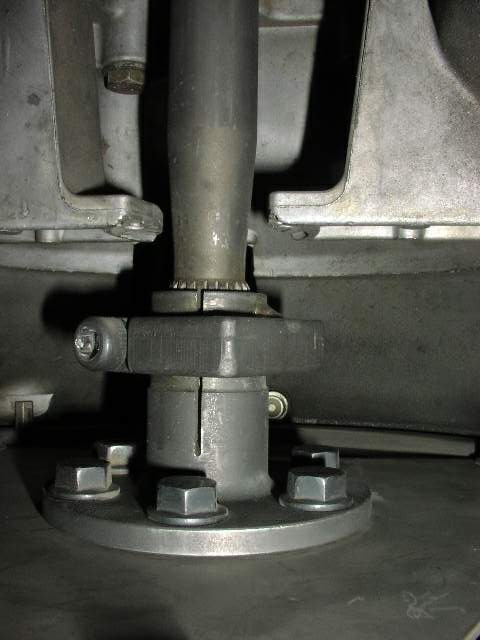
9. Loosen the clamp and observe the clamp and flexplate for movement. I think
the clamp moved maybe 1/2 mm (compare the photos above and below). This is after
I had beat the crap out of the car in the Nevada desert earlier this month. As
you can see, I have very little of the splines showing. This seems to have
decreased over the years, and you can speculate as to why. The TT is original. A
few years ago the tranny was moved once back 1 inch so I could replace the rear
main seal, and then slid forward back into position, but otherwise nothing has
moved or been removed at any time. That should not have changed the geometry as
the TT was left attached to the tranny when it was moved back and forth.
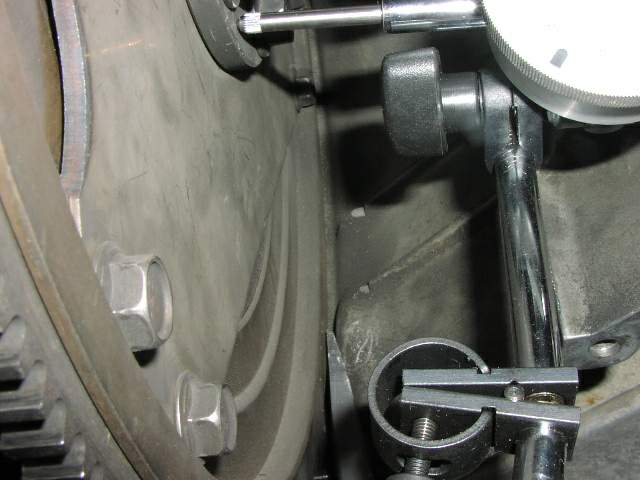
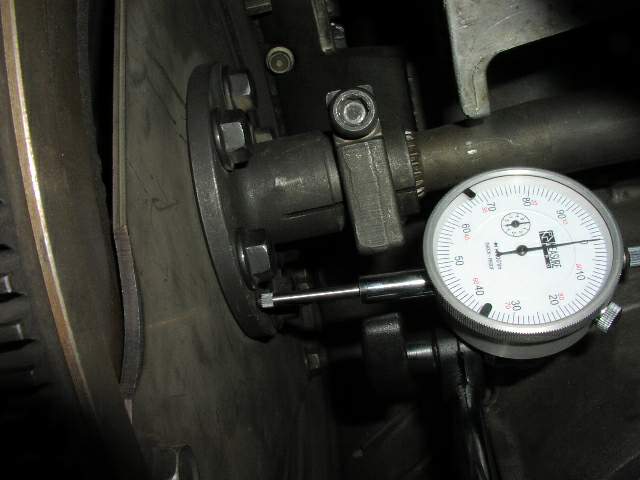
10. So much for the flexplate. Now it's time for crank endplay. Leave the clamp
loose. Position a dial gauge against the clamp base. Actually you could measure
at any of several places. You guys can argue about that, but this location, even
though it is on a part of the flexible flexplate, is fine if the clamp is nice
and loose. Others would use the more solid starter ring gear rear face, shown in
the second of two photos below. I have the magnetic base mounted on the exhaust
pipe. It took some maneuvering to get the dial gauge hardware lined up well
enough.
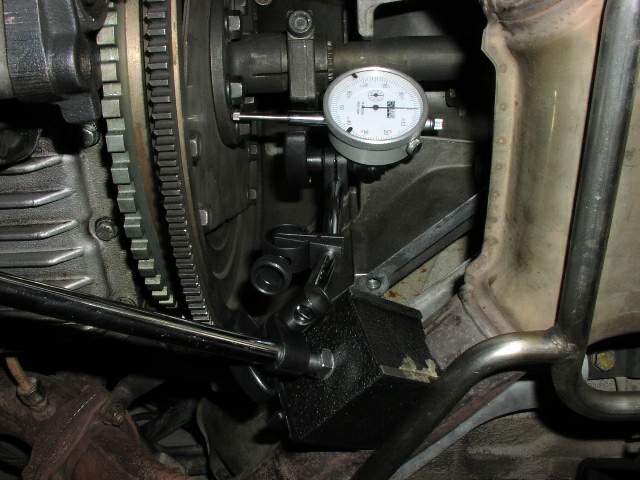
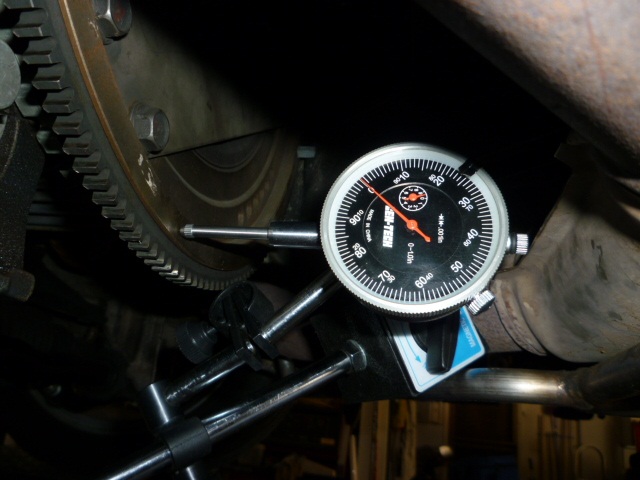
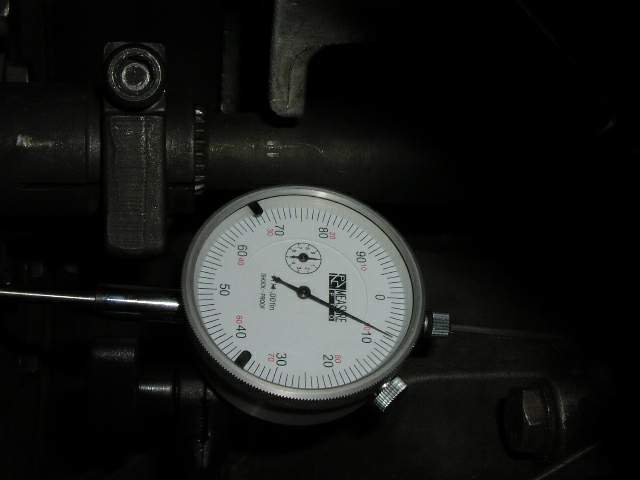
11. Lever the flywheel toward the front of the car with the pry bar and zero the
dial gauge. I set the gauge several thousandths below zero and use this angle
adjustment to bring it up to zero, assuring good contact at zero. Note the
pry bar tip between the bell housing wall and the flywheel. You don't have to pry
hard; just enough to make sure it is seated. Hard or soft prying will seat it
firmly with no additional movement.
12. Zeroed, crank forward. Ready to go.
13. Pry the flywheel to the rear. You should hear a small clunk as it moves.
Keep modest pressure against the flywheel so it doesn't slip back on its own.
14. Observe the reading. 0.008 inch. Release, pry the flywheel forward and
observe if the gauge is again zero (mine was), then pry to the rear again and
check the endplay reading again. Mine was 0.008 inch both times. That's 0.20 mm.
Lucky me. That is essentially factory. The spec limit is 0.4mm. Anything above
that and the motor should be pulled for a rebuild. The stated range in the WSM
(volume 1, section 13, page 8) is: New 0.110 to 0.312mm (0.004 to 0.012") with a
0.40 mm (0.016") wear limit.
15. Leave the flywheel in the rear position with no preload, torque the TT clamp
bolt to 62 ft lbs (some use 66 ft lbs, others red Loctite the clamp to the TT,
etc.). Put the bell housing cover and rear belly pan back on, lower the car and go
for a celebratory burnout!
__________________
Bill Ball