HID Install without glare
--------------------------------------------------------------------------------
I've been following the HID discussions lately and after finding out I already
had E-Code Cibie lenses (7"), I decided to try my luck with HIDs. I was able to
eventually figure out how to eliminate the glare but it wasn't as easy as just
having e-code lenses.
I'm not much for writing up procedures, but this worked out so well, I thought
I'd give it a try. I don't think I'll be putting Dwayne out of business any time
soon though.
I didn't get pics of every step of the process but most of it is fairly
straightforward.
I found a local wholesaler on craigslist who also sells to the public who
delivered a set of HIDs to my work for $70. These are the Chinese 35w, 6000k,
digital slim ballasts, with low beam only (actually there is a small halogen
bulb that lights up for high beams but it's pretty useless and is only there so
the lights don't go completely off when the lights are switched to high beam.
I'm guessing it's 20 watts). The idea is that you don't really need high beams
with these.
Here's what the H4 bulb looks like

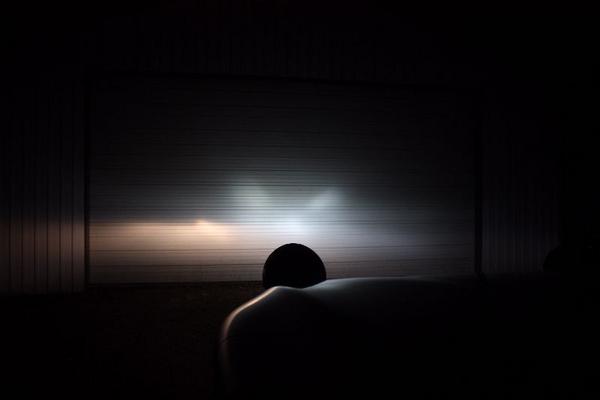
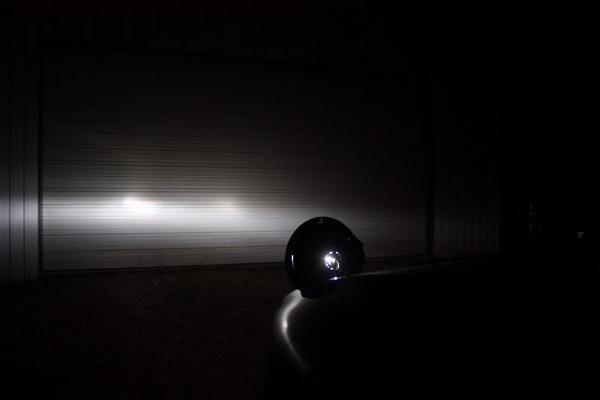
After installing the passenger side light, I noticed a weird pattern on the
garage door test. There was light shooting up at 10 and 2 o'clock. I also took
it out to a dark street and stood in front of it and the glare was unacceptable.
My first thought was that the small halogen bulb, which is right next to the HID
tube, was catching some light, and reflecting it on the lower section of the
reflector, since it is not blocked by the lower shield. I put some electric tape
over the halogen to test this theory and that didn't fix the problem. Next I
started looking at the shield that is supposed to only allow light from the HID
tube to shine up to the upper half of the reflector, which reflects it down onto
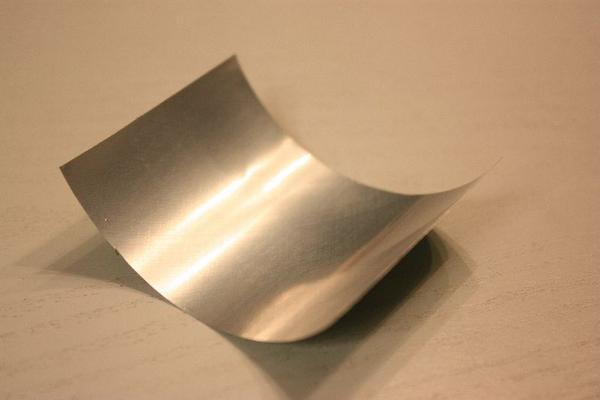
the road. Obviously it was too small and not totally effective. I then decided
to make my own shield. I cut a square out of an aluminum soda can and curved it
so that it fit inside the headlight, into the existing round front shield. The
depth of this piece was 2" but I didn't measure the other width.

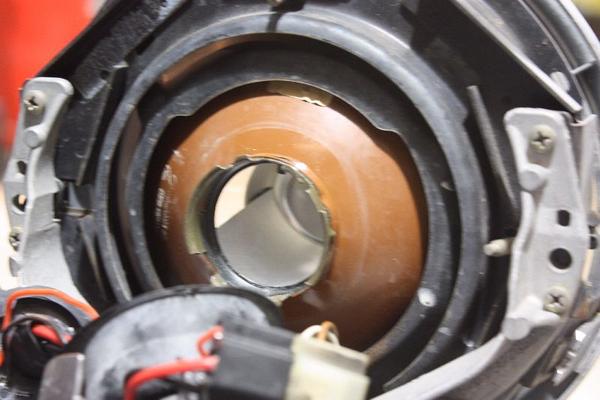
Here's the inside of the headlight without the new shield

And with the new shield
From the front, you can barely see the aluminum can piece, but it's not very
noticeable. Could paint it silver I guess.

This seemed to work really well and eliminated the stray light giving a nice
clean cutoff. I have not yet glued this into place, since it is held pretty well
by the bulb and the front shield, but I will probably epoxy it to the front
shield eventually.
Here's a shot that shows the intensity, and color temperature difference
You can see from this shot that the lower half of the reflector isn't getting
much light from the bulb.
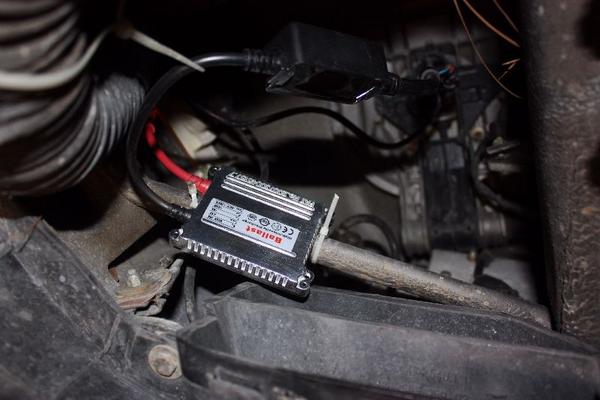
Running the wires is fairly easy. After removing the plastic painted rear cover
(3 screws), you can see an obvious hole where the wires need to be fed through.
The wires on this unit were plenty long for me to mount the ballast down low
just about the brake duct. I decided to plastic tie it to a metal support. These
ballast do get hot, so I thought this would be more reliable and provide better
cooling than double side tape or velcro.
(From below, looking up to the underside of the headlight)
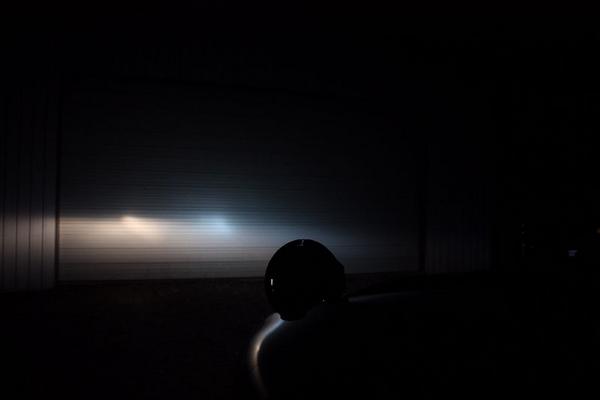
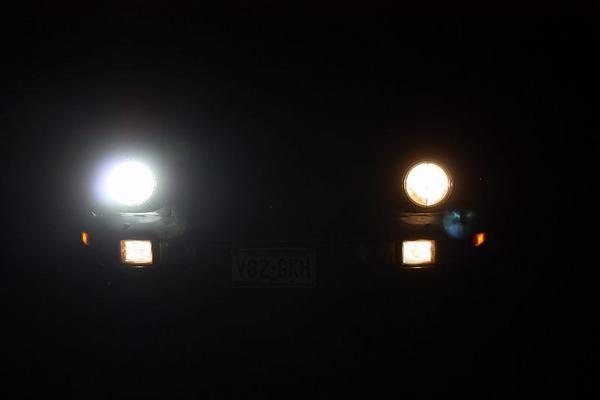
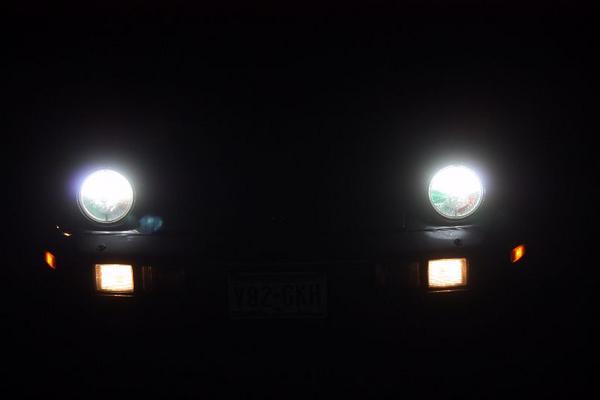
Here's the final pattern with both lights installed.
My reflectors are showing their age and the lenses are not as clear as they
should be, so I may end up getting new lenses eventually. It's also strange that
the drivers side lens focuses some of the light in one area, sort of light a
flash light, but the passenger side lens does not. I was able to adjust this
intense spot of light right into the lane in front of the car and it really
lights up a long way.
The color of the lights is just what I wanted, about the same as stock HIDs, but
of course the light is not as uniform as projectors. I don't like blue tinted
headlights and these just look pure white. After taking a test drive on a very
dark country road, I can say it's a huge improvement over the halogens, but
granted, my bulbs were probably 20 years old. At 80 mph, on a dark road, I
didn't feel the need for high beams at all. Street signs and reflectors are lit
up like never before. I highly recommend this upgrade, but can't vouch for the
reliability of the HIDs yet. At least this local guy I got them from will swap
out the ballast for a year if I have problems.
I'll be selling the new aluminum shield for $99 per set, plus $25 shipping and
handling (US only). I can't guarantee this low low price for long since the
price of aluminum could go up at any time. Yes I take PayPal! Roger, can you
stock these? Actually, if you feel adventurous, the aluminum cuts pretty easy
with scissors.
__________________
Don Carter
86.5 Auto, meteor-metallic, chips, RMB, 18" C III wheels
--------
The lights themselves are plug and play. You have many choices of bulb types,
but on my car at least, I specified H4 and the plugs that were on the bulbs,
just plugged right into the wire going to the ballast. Some people wire a relay
and a heavier wire going to the battery, or in our case battery post, but I
figure if our wiring can handle a 80/100 watt bulb, they can handle these 35W
ballasts. They do pull a lot more power during startup, but I'm thinking since
that's only for a few seconds, should be ok. Time will tell.
Really not sure about my lenses. I had another thread where I asked for help
identifying them, and everyone said they were e-codes, but they do say DOT on
them also, and the pattern seems different from other e-codes out there. I will
probably replace them eventually since the reflector is somewhat foggy as is the
glass.
Hey, it's dark out, I think I'll go for a drive!
__________________
Don Carter
-------------
Here's some more information on the HID
subject
HID Conversion Kit.pdf
from 928 specialists
HID Manual Pilot
Mono HID Kit.pdf in Dutch I'm afraid, but pictures say a
lot.