How to clean/recondition your Hydraulic Tappets
By Yunus Patel from Club Calibra
As you know when an engine reaches high mileage, components are not what they
were when they were fresh and young. Though the deciding factor is the care that
the owner takes to maintain youth reliability of components. Regular servicing
and oil changes are a must, also the use of good quality oil, not the cheap
reconditioned oil.
If you imagine at start up a thicker oil would take some time to pressurize the
tappets, as the oil feed hole is very small, so a thinner oil would flow into
this more quickly. Another factor for rattles on tappets is the oil feed hole
may become blocked, with sludge, subsequently the inside where the piston valve
run would also suffer from this and possible varnish build up.
Now with hydraulic tappets, it is generally best to use an oil that flows well,
not necessarily Mobil 0W40, but a range from about 0W – 10W should be fine. I
personally have found 5W40 a good compromise.
Engine flush may help, but if they are really blocked, or in fact the spring
inside the lifter is broken, there is no way you will know other than taking
them out and cleaning and testing each lifter.
Below I will go through the steps required to clean and test the Hydraulic
Lifters, in most cases they are just gummed up, and you can save around £160+
for a set of new lifters.
I have just taken out the lifters out of my car as I'm doing a top end rebuild,
I initially though about replacing them before I learnt that they could be
cleaned up and tested in their functionality.
Materials Required:
WD40
240 grade wet and dry paper
Gunk/ Jizer engine cleaner
Small paint brush or cotton buds
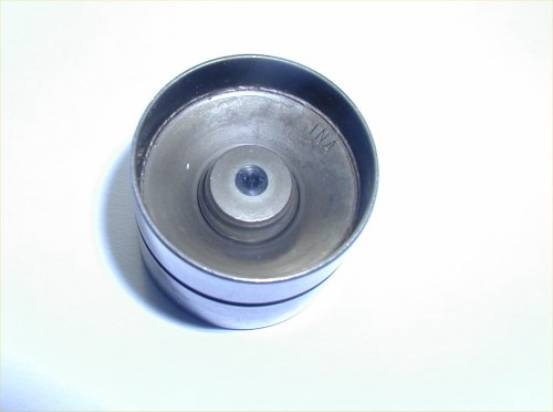
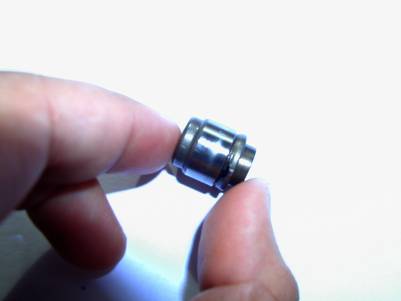
The picture below shows the piston inside the tappet.
Once the lifters have been taken out of the head (making sure you have numbered
them to its original locations) give them a wipe, so to clean off any excess
oil. Once this is done, find a wooden surface, not your kitchen table, as it
will get quite messy, but an old MDF board or similar. Hold the lifter with the
open end facing downwards and tap quite hard several times, and see if the
piston has moved downwards? If it has the if will come off fairly easy with
either further tapping or with assistance of a pair of mole grips.
This next step would be time consuming, but this is how I did mine as they were
badly gummed up. In which case the best thing to do is soak them up in a bath of
Gunk engine cleaner or Jizer overnight. But as you soak them in, with a pair of
pliers try to free up the piston in all 16 lifters so it goes up and down in a
smooth manner as this would free it if it had become gummed up. What you will
find in the morning is most of the oil would have flowed out of the lifter,
simply take them out and flush them with fresh cleaner and a cloth.
Now, what you will need to do if get a old pot or something and as you pull the
piston up and down a lot of oil and gunk will shoot out of the hole in the
lifter keep doing so until no more fluid comes out. After this try to tap the
pistons out, by knocking them on a hard wooden surface.
Again, full clean out the inside of the tappet, getting rid of any oil deposits,
gum varnish etc , this is done by using a small brush/ cotton buds with some
gunk poured into it.
This picture shows the piston that is fitted inside the lifter, look to the
centre, and you will see a ball bearing, this acts as a release valve to let oil
in and out of the piston.
Now that we have established this, you can get a pointed object, like a small
punch or similar and depress the ball, what you will get is the oil will begin
to come out, keep doing this until all the oil has come out.
Having done this what you need to do now is to test to see if the spring inside
is ok, or whether its collapsed or broken, this is done by compressing the
piston. If all is ok, just clean up the piston, making sure the sides are
totally clean with no varnish or gum.

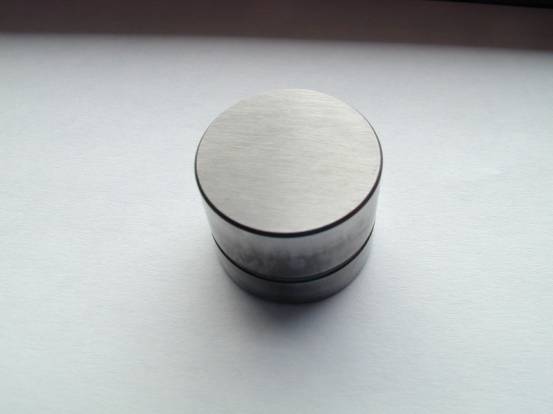
We will now go onto see how we can sort out the tappet itself, i.e. the bucket
shaped part where the camshaft lobe pushes against. Normally after several
thousand miles, you will no doubt have some wear. You will now need to linish
the tops of each tappet, this can be done by using P240 wet/dry paper using WD40
as a lubricant, put the paper on a flat surface (a machined pieces of steel or a
small sheet of glass) and then rub the base of the follower is a circular motion
over the paper, make sure you turn the follower regularly as you linish, keep
going until there are no scuff makers present.
It should look something like this!
If you have some wear on the sides of the tappet, then very carefully and
lightly smoothen up with some 1200 or 2000 grade wet and dry paper, but don't
over do it as this need s to be a tight fit inside the cylinder head valve
bores.
Finally once all the lifter have been cleaned assemble the lifters and put them
in a bath of *hot* oil, the hot oil will cause any air inside to expand and be
forced out, mind you don't burn your self.. put the lifters open side down. Then
allow the oil to completely cool, the remaining air will contract and be
replaced by oil.. that will get them nearly full, test each of the little ball
valves before you put them back together.
I must credit Dave Andrews for some of the information here, as he gave me a lot
of useful tips.
Disclaimer:
If you find the info useful, use it at your own risk, I will not be responsible
for any problems/injury which may occur with you or your engine.
Yunus Patel
========
This is interesting from the INA website:
Tappet INA ivt_de_gb.pdf
========
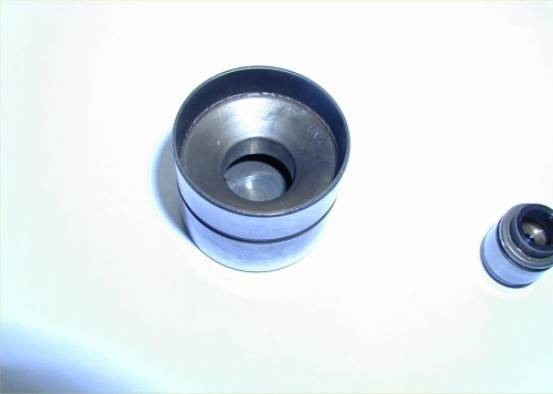
Lifters apart!!!!
Here is the key. Tap the lifter on its edge to remove as much oil as you can and
at the same time pump the button with a magnet. It will act as a pump shooting
oil out the inlet hole.
Once you think all the oil is out (which it will not be) , the button should
move freely (but with no spring) Push the button in all the way and then bang
(very hard) the open end of the lifter down flat on a table using a couple of
ply of shop towel or something as cushion. Then look at the button. It should be
very extended or almost out (if it didn't fall out) Once you see it extended
(may take a couple of bangs, and be sure the button is pushed all the way in
before you bang the table) then you can easily pull it on out with your pliers.
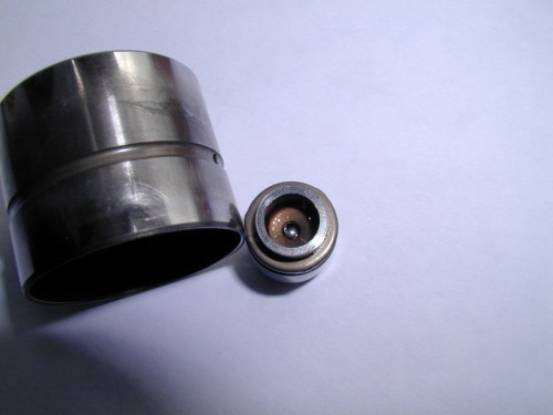
Once out:
Release the oil pressure behind the little ball by using a pick to push the ball
a little (check its action) and at the same time squeeze the piston together
with your fingers and you will get a shot of oil from the balls hole. Then its
free and guess what "There is now very nice spring action.
After I cleaned the parts per Bill's post above, reinstalled the piston (very
easy, just slide it back in) the button acted as it should with very nice
spring.
I am now working my way checking all the lifters.
__________________
David Lutz

Part number equivalents:
PORSCHE 928 105 312 00
PORSCHE 928 105 312 02
LuK 420 0010 10
INA F-46547
INA F-46547
SCHAEFFLER GRUPPE 420 0010 10
0057 266705
=====
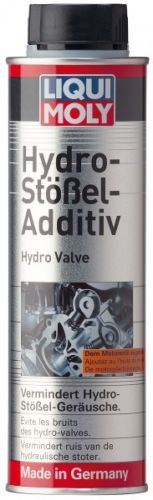
LiquiMoly have an additive that may help cleaning the oil passages and
reducing clatter. I have had a good experience with this stuff and feel it
actually worked for my GTS. I used 1.5 can for the big 928 engine.