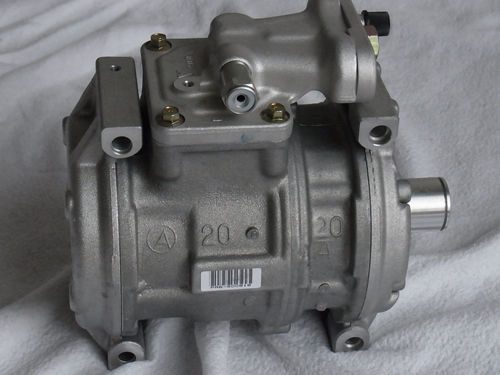
Nippondenso 10PA20C Compressor Rebuild pics
--------------------------------------------------------------------------------
After re-doing all the o-rings in my A/C last summer, replacing the expansion
valves, drier, and the relay in the head unit, the only things not up to snuff
in my A/C were the two hoses that run to and from the compressor, the PITA
pressure line that runs from the drier to expansion valve (R&R’ed now, see
http://forums.rennlist.com/rennforum...ighlight=drier) and the compressor
itself. Well, at least one of these is leaking, as I lost my freon charge over
the course of a few months. Time to fix that.
In addition to R&R'ing the pressure line and new compressor hoses, I decided to
re-seal the compressor. To do this one needs a gasket kit, a and a shaft seal
kit. The only special tools that the 10PA20C requires are some internal and
external snap ring pliers (including a big one for the snap ring that holds the
clutch coil to the housing) and a shaft seal protector- more on that in a bit.
I wasted about 2 weeks waiting for shaft seal kits convinced that I’d gotten the
wrong one (see http://forums.rennlist.com/rennforum...ght=compressor)
The shaft is about 13.5 mm in diameter, as was the ID of the old shaft seal. The
new seals I got measured less than 11mm ID. Turns out this is ok- The carbon
seal itself is deformable and can be ‘stretched’ over the compressor shaft. In
order to properly install it, though, one needs a shaft seal protector. I ended
up a MasterCool # 91319, from an outfit called Polar Bear
(http://www.polarbearinc.com/PBPC/homepage/Product.html) for $15.
So- To rebuild the compressor:
Have the system evacuated unless you’re sure the system is empty- My charge from
last year had completely leaked out again, hence the decision (after taking with
Greg Brown about it) to replace both compressor hoses and re-seal the
compressor.
A complete set of large combination wrenches from 17 to 32 mm, as well as a
1-1/16 and a 7/8” combo wrench are needed for all the combinations of fittings
you’ll find on the large diameter suction hose going to the compressor and the
smaller pressure hose coming from it. There is only one fitting where you cannot
counter hold, and that's a 19 mm fitting at the bottom of the down pipe from the
drier to the condenser.
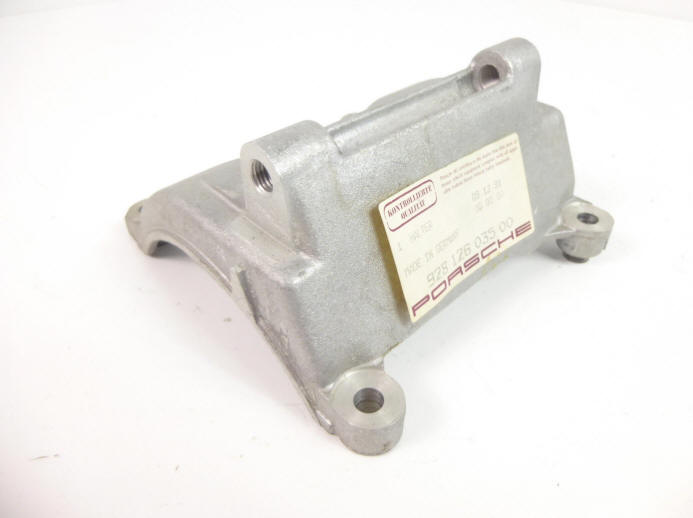
Removal of the compressor entails undoing the pressure and suction hoses at
their fittings, then loosening the 10 and 13 mm nuts on the belt tensioner, and
then undoing the two 17 mm bolts that hold the compressor to the mounting
bracket. I pulled this bracket just to clean up the area:

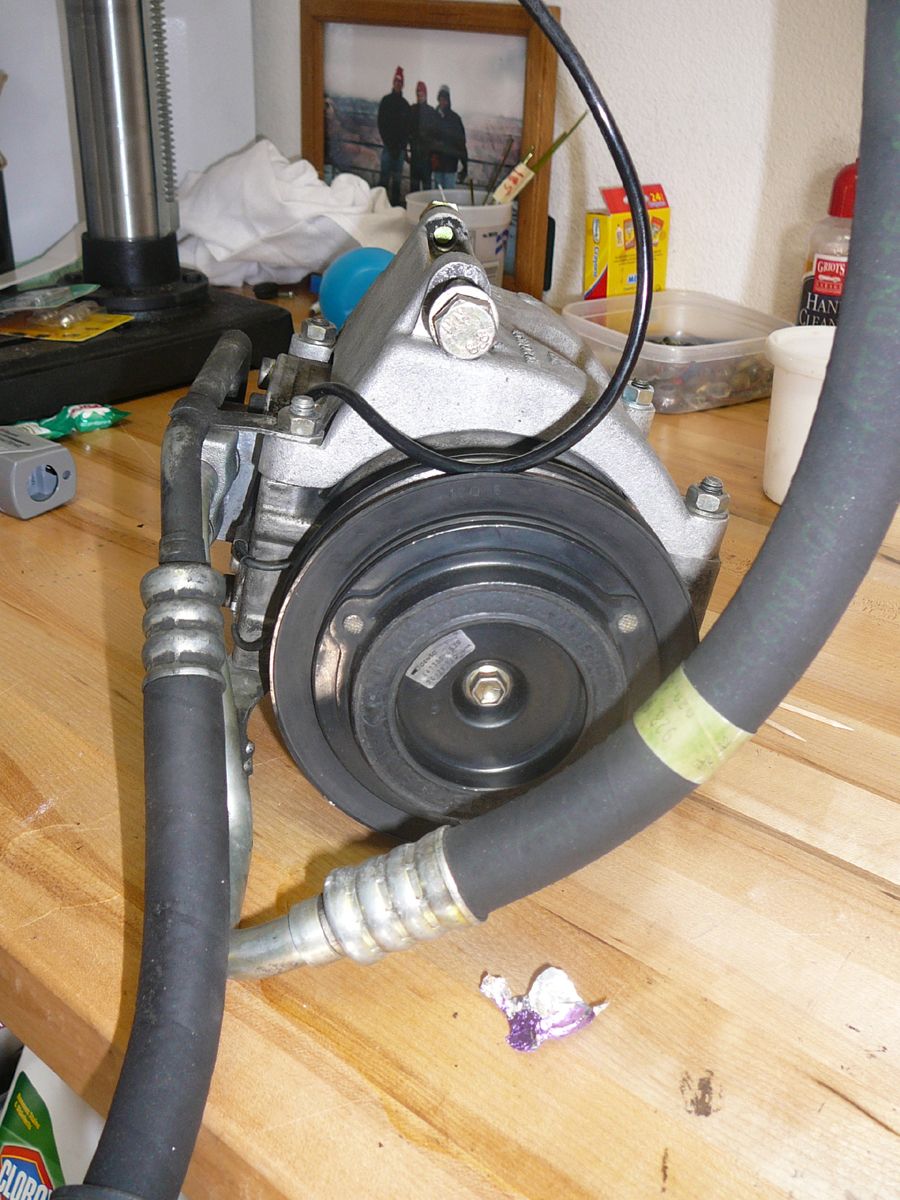
Do yourself a favor and take lots of pictures of the orientation of the
bracketry that hold the compressor and hoses to the block. Here are a few shots:
Front:
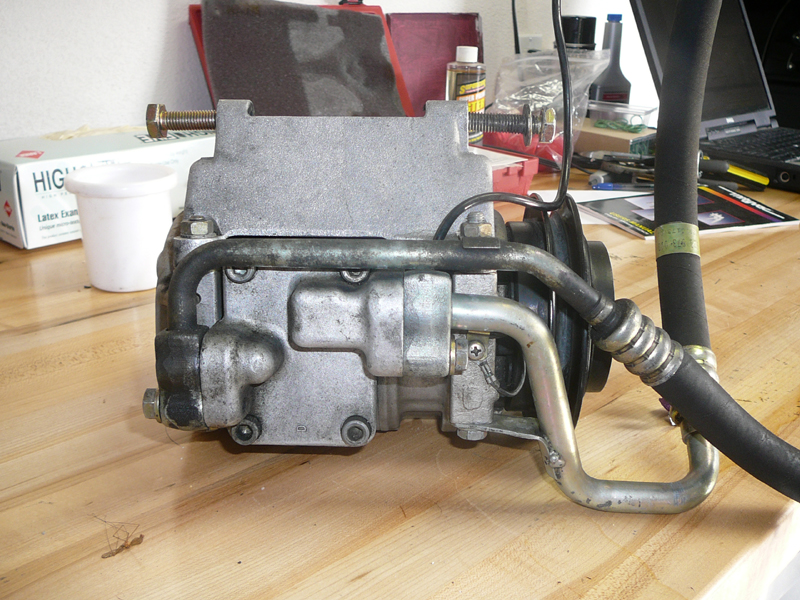
Bottom:

Passenger side:
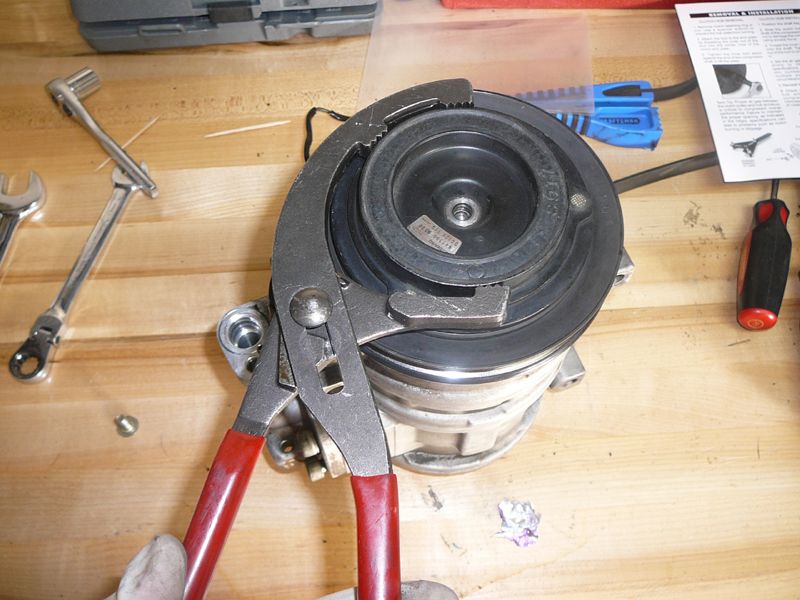
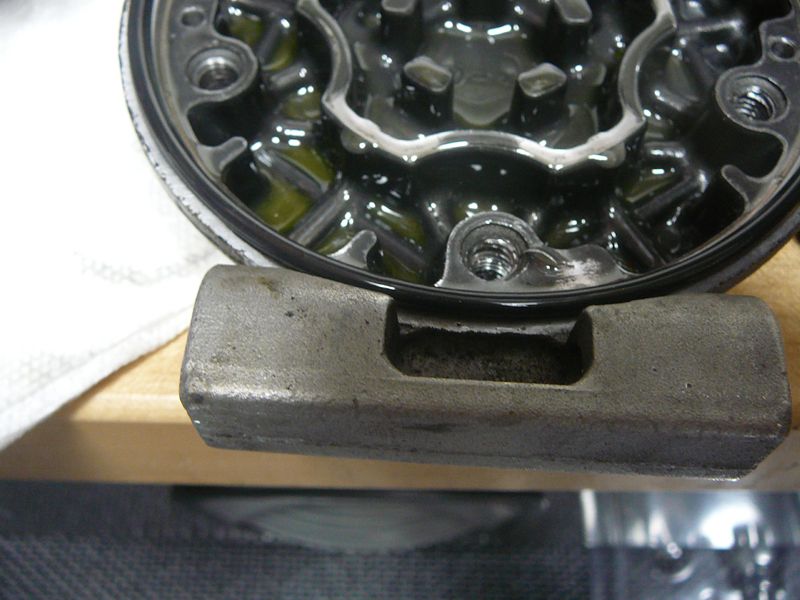
Start by undoing the 10mm bolt that holds the clutch hub/cover plate. An oil
filter wrench will keep the cover plate and compressor from turning.
Lift off the clutch hub, taking care to keep track of any shim washers that
are between the clutch hub and the face of the compressor shaft- These set the
‘air gap’ between the clutch hub and the clutch itself. Air gap spec on a
10PA20C is 0.3 to 0.6 mm. I had two shims of different thicknesses.
Here’s the front of the clutch:
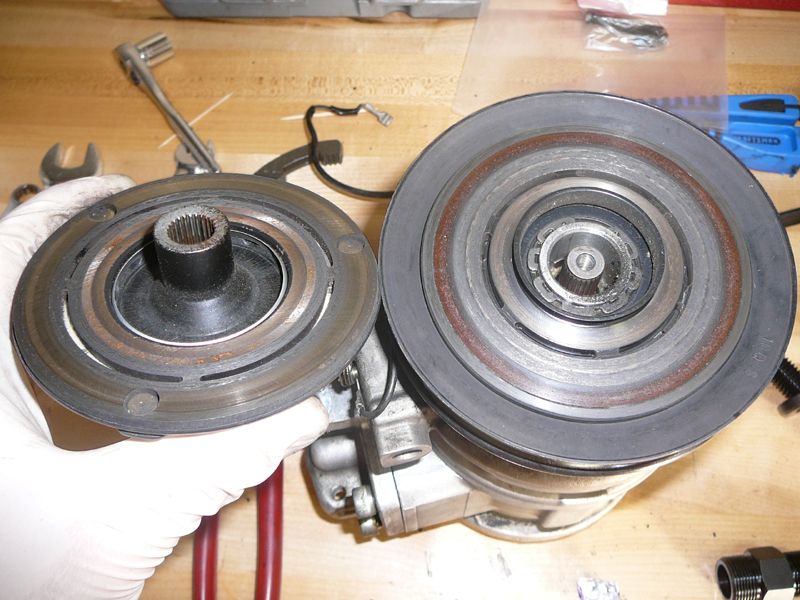
The clutch/pulley assembly is held by a weird wavy-shaped snap-ring, and the
clutch just pulls off easily.
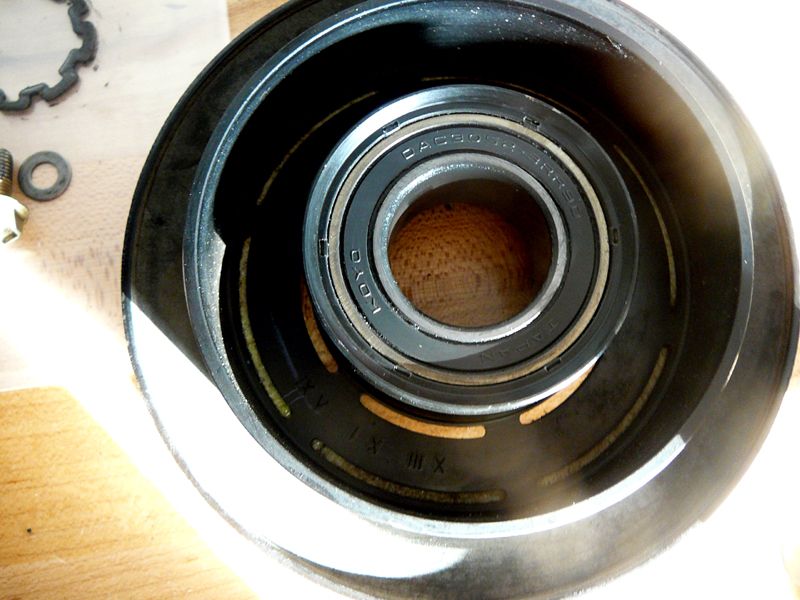
Here’s the clutch/pulley bearing (Koyo DAC3052-3RR90, see the 'bearing madness
thread for more on clutch bearings):
Then undo the Philips head screw that holds the clutch wire, and then remove
the big snapring that holds the clutch coil to the compressor body. It’s indexed
with a small pin. Sorry, no picture!
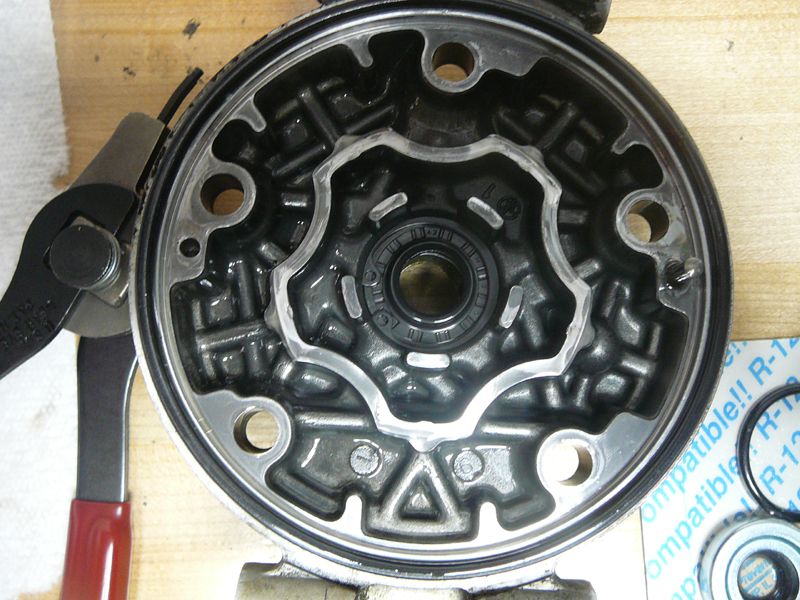
You’re now staring at the face of the compressor, clean it up with some brake
cleaner. Lots of oily greasy crap under the clutch coil. Perhaps my leak is/was
from the front seal?

Remove the 5 case through-bolts with a 6 mm hex socket. My compressor was a
rebuilt unit back in 1997, whoever did it used some sort of sealer on the
threads. The gasket kit comes with five new brass washers for these bolts.
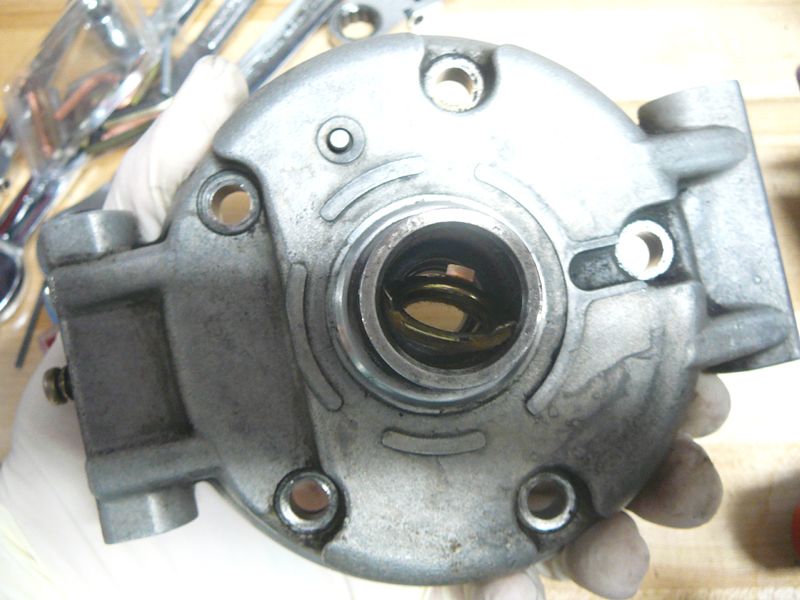
Gently lift the compressor front plate off the shaft. On the inner face of the
compressor front head is the shaft seal, held in with another snap ring:
Once the snapring is out the old shaft seal can be tapped out with a deep 10
or 11 mm socket:

Then remove the felt seal from the nose of the front head with a pick or
somesuch:
To install the new seal, lube it up with compressor oil (I’m staying with R12
so I used ester oil) and install it by tapping it in (straight!) with a 19 or 21
mm socket.
The gasket kit includes three large (113mm?) o-rings to re-seal the case
sections. No way in hell was I going to split the middle of the case, but I
replaced the front and rear piece gaskets, lubed up first with compressor oil.
I cleaned up the faces of the case with brake cleaner, then installed the shaft
seal protector over the shaft and oiled it well.
Now- this pic shows the old shaft seal at right, with an ID of 13.5 mm. The
middle seal is ACKits.com’s #21-34629, and probably would have worked. But I
screwed it up installing and removing it from the front plate,so I reinstalled
it briefly and used it for practice. It has been put on the shaft once and
pulled off. The seal on the left is the seal I got from Polar bear inc, part #
SS 767HNBR. At bottom is the shaft seal protector, with its beveled top, to ease
the shaft seal over the nose of the shaft.

So with the new seal installed in the front plate, re-assembly is just a
matter of oiling up the seal, putting the shaft seal protector over the shaft,
and gently pushing the front plate and seal down onto and over the compressor
shaft. Then remove the shaft seal protector, reinstall the felt seal (the kits
don’t come with a new one) and you’re all set:

I tried to install the case bolts but had some difficulty doing so –felt like
they were stripping. So I pulled the rear plate off the compressor to look at
the threads. Ouch:
I ended up chasing the threads in the rear plate and running a die (M8 x
1.25mm) over the bolts to clean them up. Note the gray rubbery sealant crap in
the recess in the tap:

Once these were done, I cleaned off the cutting oil then reassembled the
compressor, torquing to a final value of 19 ft lbs. i didn't use any sealant on
these bolts. I reinstalled the coil, clutch/pulley, and clutch hub, torquing the
front hub bolt to 9 ft lbs.
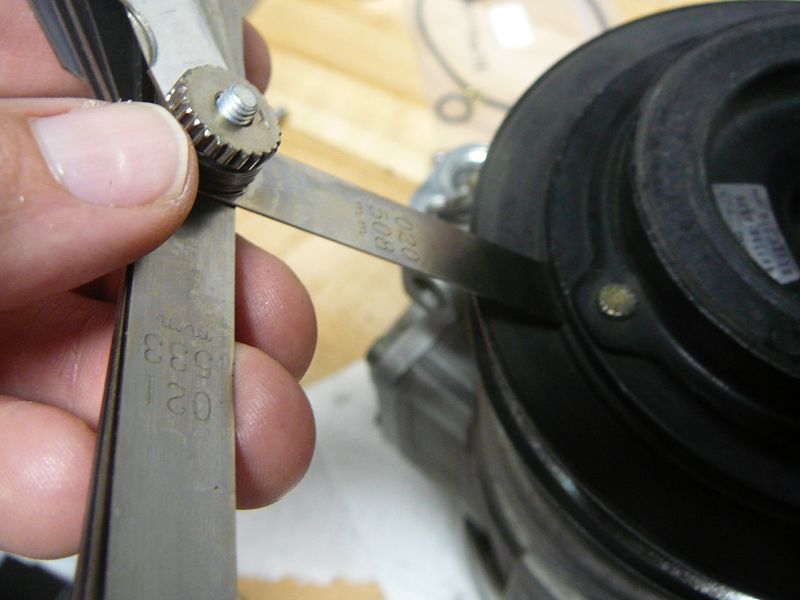
Here’s measuring the air gap, at ~0.5 mm:
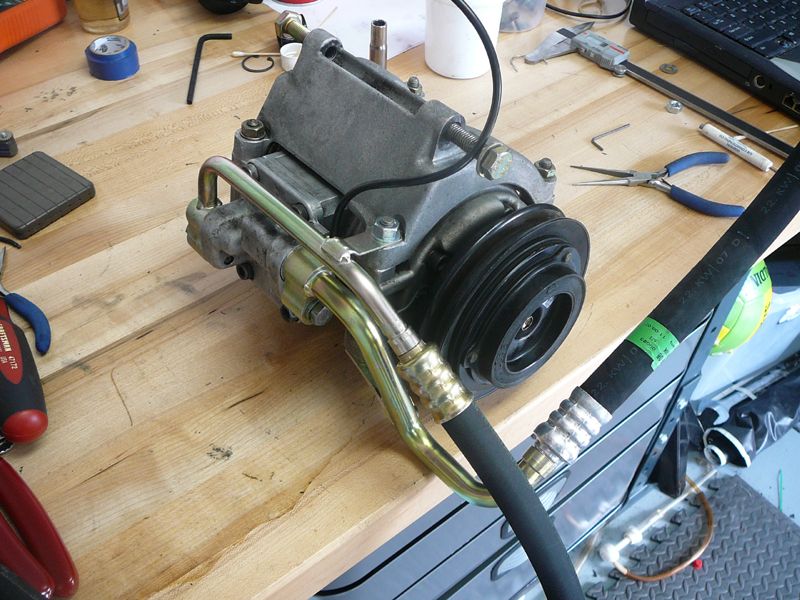
Last but not least I changed the gasket at the manifold plate, which is held
on with 4 6 mm hex bolts. I added 6 oz of oil to the compressor before buttoning
this up.
Ready to go back in:
I installed the compressor back in the car, replaced the drier, connected all
the lines, and pulled a vacuum. The gauge hasn’t budged in about 6 hours now- if
it’s still good in the morning I’ll pull a few more hours of vacuum on it and
then charge it up.
This is an extract from Renn list bt Rob Edwards
http://forums.rennlist.com/rennforums/showthread.php?t=424999
As a side note if on A/C repairs you find any metal shavings inside the lines
they should be flushed out and new receiver drier and expansion valve/s
installed.
Finding metal shavings is a sign that you need a new compressor. Don't install a
new compressor unless the lines have been cleaned
The paper towel holder- shaped compressor bracket that bolts to the block at
four points has two lower M8 bolts that point straight up into the block, but
the two upper mounting bolts run horizontally into the block. The anterior one
is no problem, but the rearward one is located ABOVE the heat shield and is a
PITA to install even with the compressor removed- you need a 13 mm socket on a
6" extension. I can't imagine getting to it with the compressor still attached,
let alone torquing it properly.

That said, it can be a pain to get the compressor back up in there, when you put
it into place you need to make sure that the bushing in the compressor mount
isn't pushed too much towards the front of the car or you'll never get the
mounting bosses on the compressor up and in between the flanges on the mount.
The bushing can be pressed rearward with a channel locks. Also, the rubber
portion of the compressor hoses both start out straight but require some pretty
significant bends to line up with the condenser and the suction pipe.
EDIT: D'oh, I see what you mean. If you're just removing the compressor, yes,
you could just drop the compressor itself off the swivel bracket (held by the
17mm bolts to the block mounting bracket) that it directly mounts too. In my
case I had that whole area stripped anyway, as you need to remove the compressor
and air pump to R&R the pressure line that runs to the expansion valve.
Stan- good point about the metal shavings, the one I show was threads from the
rear plate. The rest of the inside of the compressor was nice n' clean. And
despite having to chase all the threads, the bolts all torqued properly, so
hopefully it'll behave.
The gauges on the vacuumed system didn't budge overnight, so I'll charge this
afternoon.
Same basic process applies to the earlier compressors, like 6E171.
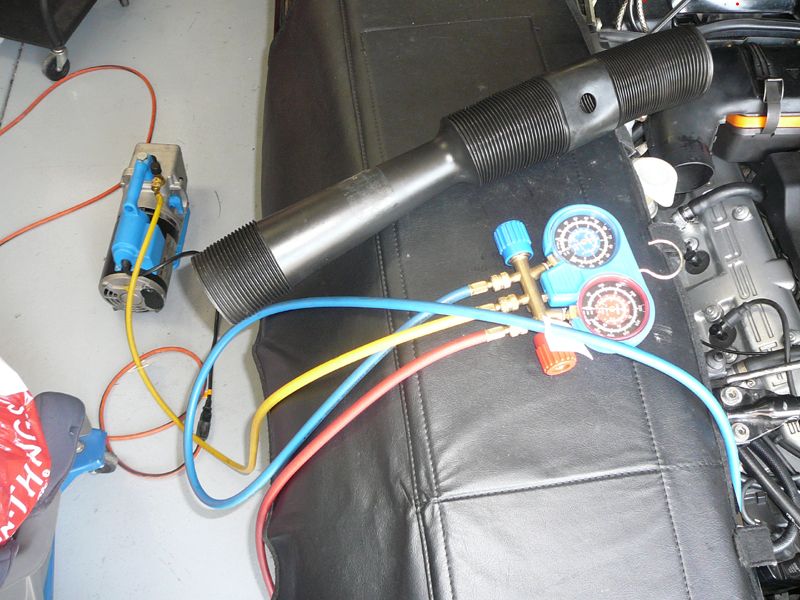
Just a few more pics from filling the system. a while back I splurged $20 and
got my EPA 609 certification so I could buy R12 from Ebay. After pulling vacuum
for a few hours this morning the vacuum was still at 30 mm Hg:

So- I closed both the low and high side valves, turned off the pump, then
disconnected the high side hose. I connected up the yellow hose to my R12 tank,
then cracked open the R12 and loosened the yellow hose at the manifold for 1-2
sec to fill the line with R12 then tightened it down. Then I zeroed the scale
(got a good deal ($70) on Ebay last year, it's good to 100 lbs down to 1/10 oz
or 2 grams.)
Here's the R12 tank before taring to zero, total weight = 32+ lbs:

With the system under vacuum, you need to jumper the pressure switch in order
to get the compressor to kick in for filling:

{Oh, and you don't have to jumper the switch. Just open the low and high
sides with the car off and let the freon get sucked in (since the system is
under vacuum). Then shut off the high side, start the car and turn on the A/C.}
Then- start the car, turn on the A/C button with the fan on high (and crank
the rear air fan and thremostat to full cold), and open the low pressure side
valve. Since the low side connects to the suction line, the compressor will
slowly pull freon into the system, at a rate of about 2 grams per second. I
added a total of 1150g:

Then close the low side valve and the valve on the tank, disconnect the low
side, and done!
The center vent temp is at 21oF by IR gun (I know they're not accurate, but it's
cold....) So at least the compressor didn't immediately explode. I will report
back when it does.
So if this works, I spent $20 for certification, $300 for R12 (but only used 2.5
lbs, so figure $25 worth), $200 for a vacuum pump, $70 for the scale, $12 for
the seal, $20 for the compressor gaskets, $35 for a drier, $15 for the shaft
seal protector and $20 for a ton of o-rings. That's about $400 for all the tools
you need to re-do the system, assuming your compressor is rebuildable. Not bad
considering a reman compressor is $500 alone. I don't even want to think what
all this would've cost at the dealer in 1997.....
----------
Some more (maybe too late...) thoughts:
-- Evacuate the hoses and the charging manifold all the way back to the bottle
using the vacuum pump prior to charging. Use a spare hose to hook up the vacuum
pump to the pressure safety switch port, the one you see there in the third
picture. This is a little more thorough than trying to purge the lines with gas
as you fumble with the yellow hose on a schraeder holding vacuum. Once vacuum is
established for a while with all the charge plumbing attached, disconnect the
pump while it's still running, and reinstall the switch before charging.
-- You can do the initial fill with liquid from the bottle. Engine is off. Fill
to the high side so no liquid will get to the compressor. (must go forward
through the expansion valve and evaporator, or backwards through the condenser
before any gets to the compressor) Close the high-side valve as soon as liquid
stops flowing. Let it set a bit to make sure all the liquid evaporates before
you start the engine. Then finish the charging through the low side port in the
normal fashion.
-- 21 degrees is pretty darn good, especially with a >80F ambient. Verify that
the freeze switch is working if you plan any extended rides with AC on.
Otherwise you'll be shutting the compressor down manually every once in a while
to thaw out the evaporator box. You'll know when you need to do it when airflow
is choked off by the ice block in there.
__________________
Bob Fuelleman
-----
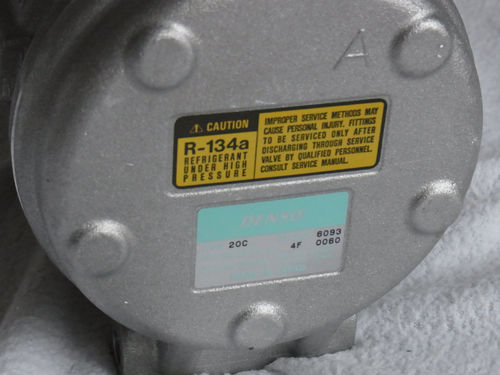
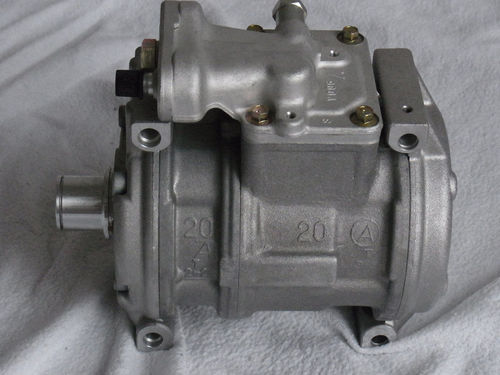
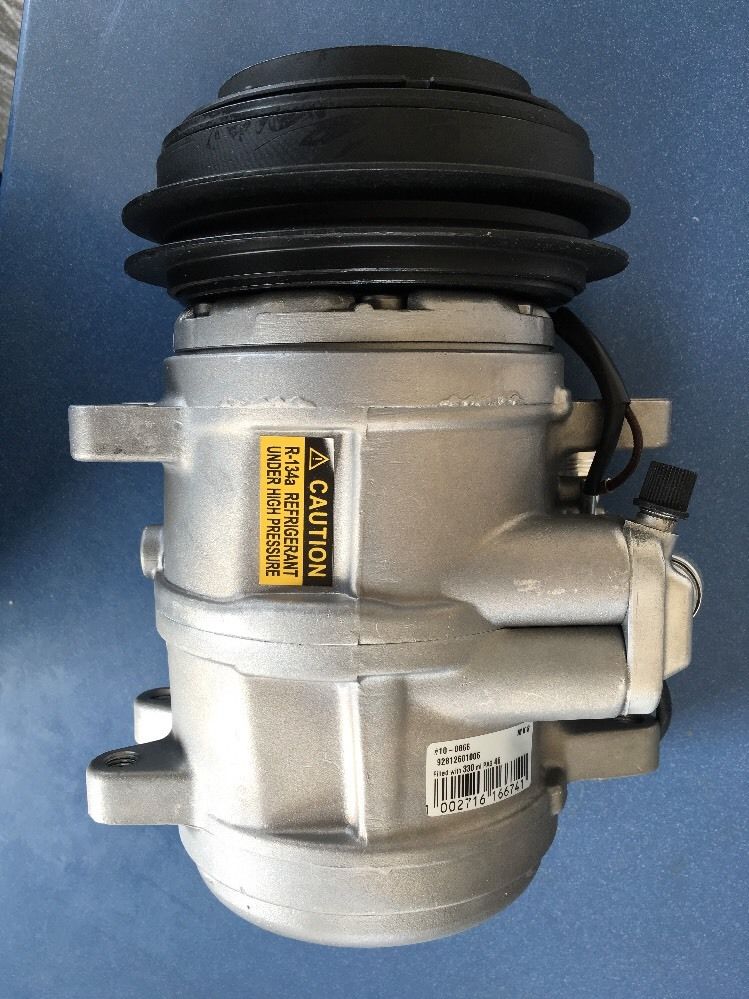
Porsche 928 AC-Compressor Original Denso
10PA20C
For Porsche 928 starting MY89
Type 5,0 GT/S4, and 5,4 GTS up to MY 1995
You can not exchange this compressor with AC-Compressor 10 P15E MY
1988-1989 or AC-Compressor 6E 171 MY 1980 -1989