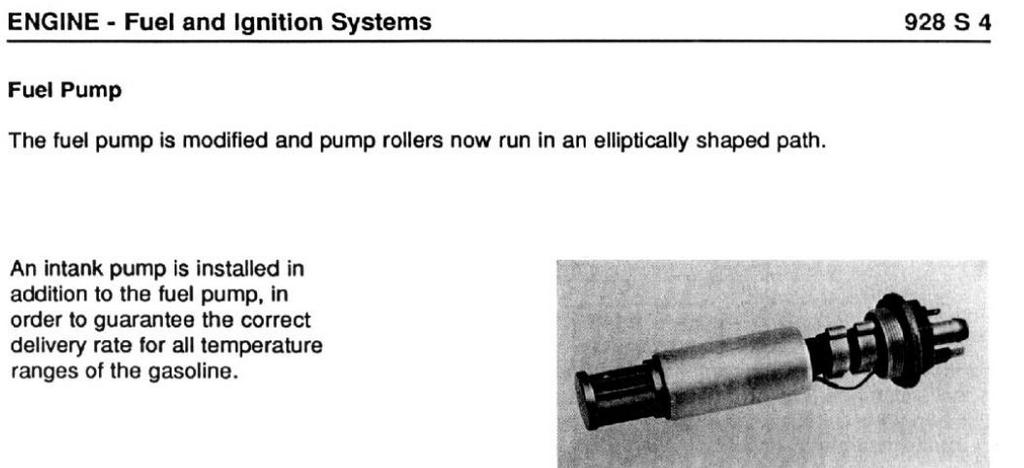
The internal pump is a low pressure pump
that is only there to prevent the external pump from vapor locking.
It runs at around 5 psi IIRC and you can get away without using one unless you
live in a very hot climate and you daily the car in temps above 100F or in high
elevations like Colorado.
__________________
Blake G.
=====
The issue that caused the factory (and other Bosch customers) to use a two-stage
pump system was fuel boiling in the inlet of the pump in hot weather. As Fred R
stated, the net pump suction head needs to be higher than the boiling pressure
of the fuel at whatever the temperature might be. On a hot day as the
temperature increases, so too does the suction pressure requirement. It's not
enough that the fuel is liquid as it enters the pump. It must remain as liquid
as it is drawn into the first stages of the pump. With just the external pump,
that means that there is pressure lost in the screen, the inlet tubing, the
connecting hose, the external pump inlet fittings, and finally the inlet of the
first stage of the pump itself.
Still with me? The casing temperature of the external pump is another variable,
where 'a bit hotter' is the difference between pumping liquid and trying and
failing to pump vapor. So we add a priming pump inside the tank. It's a small
pump made to offer a fairly high volume with a small pressure difference between
inlet and outlet. It sits in the liquid fuel in the tank so it doesn't get a lot
hotter than the fuel. It's at the bottom of the tank so it starts out with tank
pressure plus the head from whatever fuel happens to be in there. The head
pressure isn't a lot-- it takes almost 3 feet of fuel to generate 1 PSI at the
pump suction at 70ºF, and the hotter it gets the more head it takes to have the
same suction pressure.
So the low pressure differential in that in-tank pump means there is less chance
of boiling in the inlet bell and the first stage. It does increase the pressure
enough to eliminate boiling in the inlet and first stage of the main pump.
Back the the proposal that using a higher-pressure higher-flow 044 pump means
you won't need the in-tank pump. I propose exactly the opposite. If you drive in
conditions where the fuel temp gets high, like driving in the hot desert,
extended hot idling in stop-and-go traffic with the AC adding under-hood heat,
these are times when the in-tank pump is needed.
It should be noted that the AC system actually cools fuel returning from the
engine. That system was added to help with fuel boiling problems starting with
the later CIS cars, and it continued to the end of production. Bosch initially
supplied higher-pressure pumps for many CIS cars, but eventually the core
problem was identified as pump suction boiling as much as it was a problem with
boiling in the fuel distributor.
My too sense.
__________________
'89 S4 Auto, black.
Dr Bob.
====
The in tank pump does add pressure that is why it works. We are not talking huge
amounts of pressure here- just enough head to suppress cavitation- a concept
that is difficult for most folks to understand but something that is vital to
pumped liquid systems that are at or near to their boiling point.
Once the liquid is at its boiling point the in tank pump has to add sufficient
head to overcome the suction losses into the main pump and then satisfy the
NPSHR [nett positive suction head required] for the pump in question. The head
due to liquid level inside the tank is next to nothing thus why this priming
pump is immersed inside the tank.
Do not let the test that Jim did confuse the issue- I suspect that what Jim did
was what we call an "end of curve test". This means that the pump is allowed to
flow with no resistance so it delivers quite an amount of fuel at little to no
head. When it is connected to the main pump the delivery pressure will increase
but the flow will drop to suit the demand of the main pump. Under such
conditions I would think that the in tank pump will deliver at least 3 feet of
head and maybe more. The only way to check this is to fit a pressure gauge in
the delivery line or make a test rig with a valve in the discharge and monitor
the flow/pressure as the discharge is throttled to the point where the flow is
the rated capacity of the main fuel pump.
Rgds
Fred
=====
I did a flow test on the in-tank pump after we got it installed and fuel in the
tank. flow was 4.6L/min with a 1' head or about double what the main pump needs.
__________________
Jim & Sue Corenman
====
This splendid repair info for how to repair the intank fuel pump was posted on Rennlist by Andrew Olson. Just to make in available and easy to find, I am offering a copy here. All the credits go to Andrew for the good work.
How to replace your fuel pumps
- including how to install an 044 pump
Recently, my external fuel pump seized up on me. This was precipitated by a POS
in-tank pump. If you have an in-tank pump, chances are you have the same failure
as me, and you're living on borrowed time until your external pump ingests a
hunk of rubber or other debris and jams the impeller.
Anyway, here's the writeup.
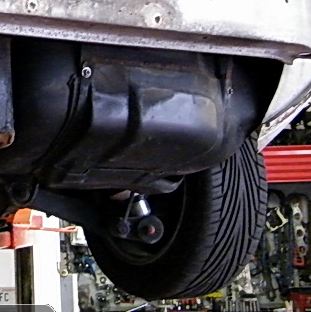
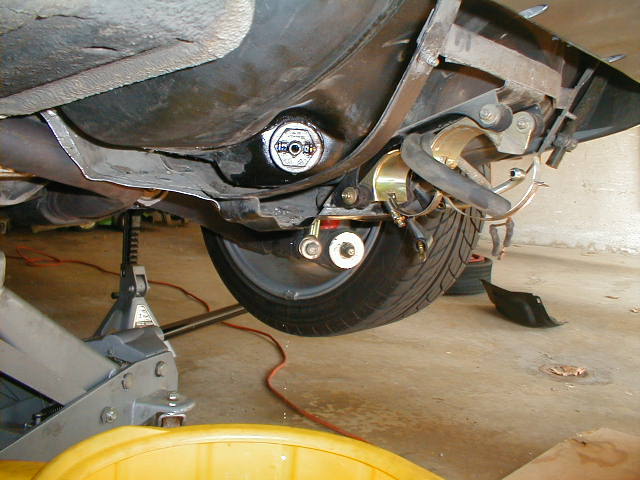
1. Disconnect the batter. Remove the fuel pump cover which is on the bottom of
the gas tank. There are two nuts that hold the cover on. Remove these and pull
the cover off.
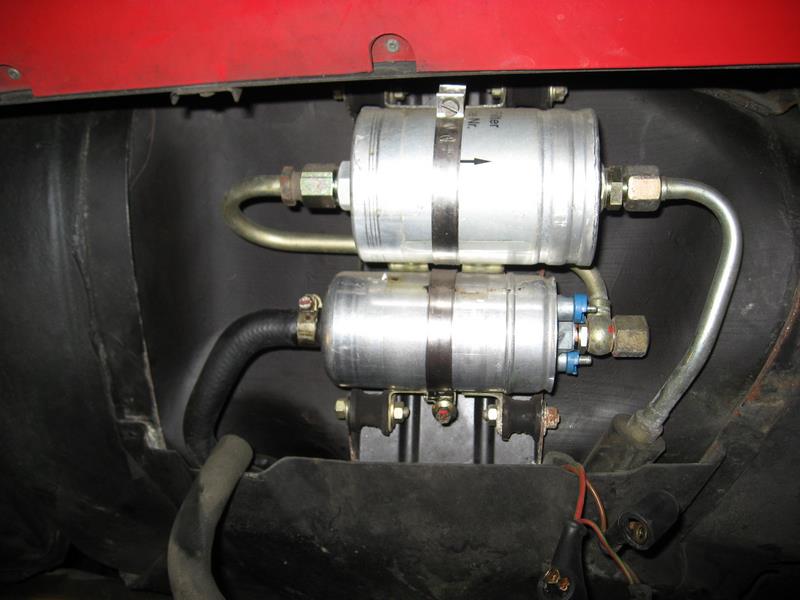
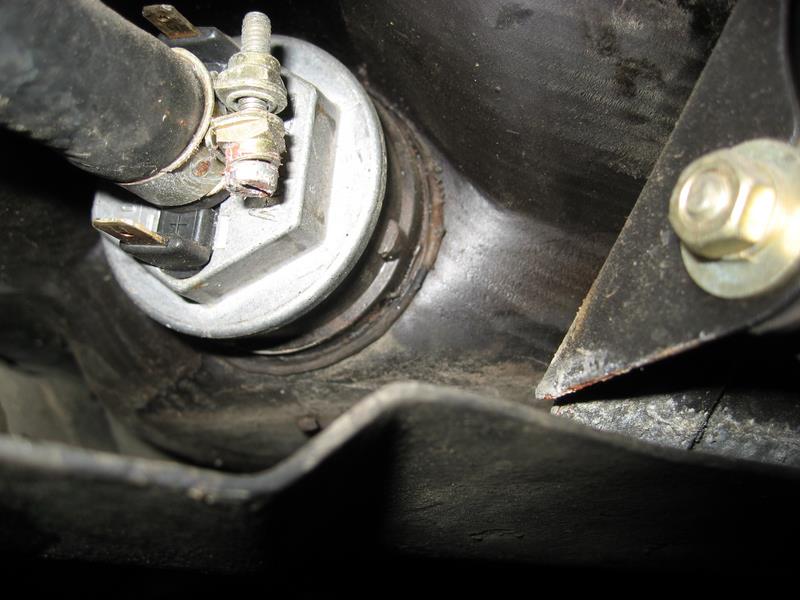
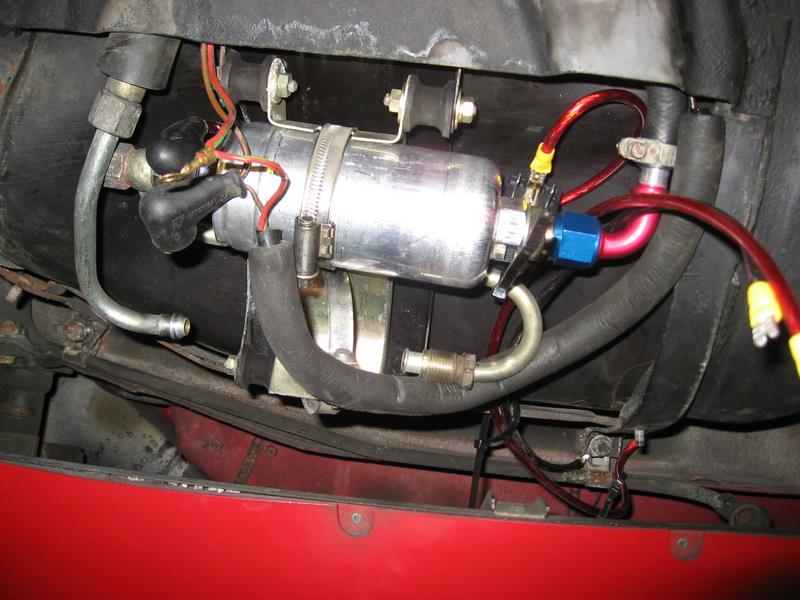
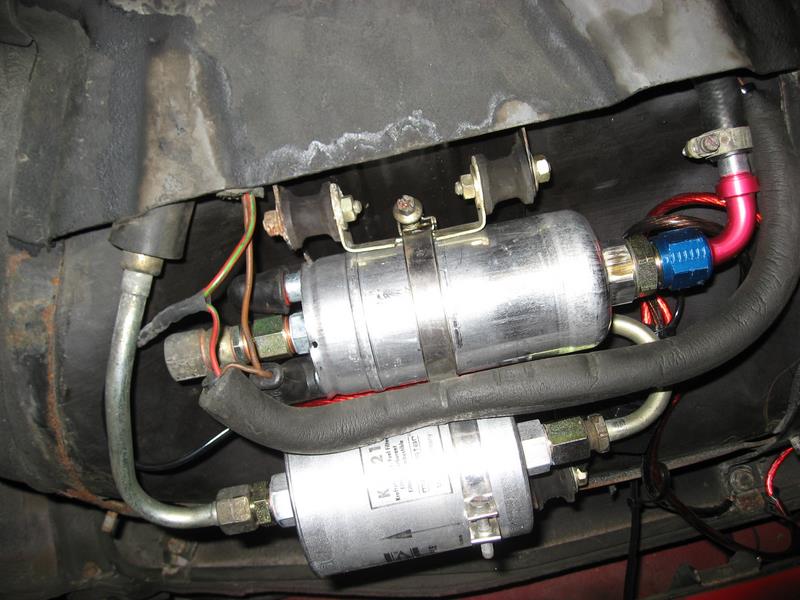
2. You can now see the (from top to bottom) fuel filter and external fuel
pump. In this picture I have already disconnected the electrical connections to
the fuel pump. At this point, if you still have gas in the tank, you can
disconnect the hose that goes to the external pump and drain the tank. I used a
5-gal pail and then siphoned it from that into a gas can and filled up my
minivan with the excess gas.
3. Once the gas has been drained you can disconnect the fuel filter and the
fuel pump. If you have the internal pump or if you are going to replace the
in-tank filter, you will need to remove three bolts that hold the straps that
hold up the gas tank. The gas tank will not come down, so don't worry. There are
2 bolts on the rear bumper and one near the transmission. Sorry, no pic of
these.
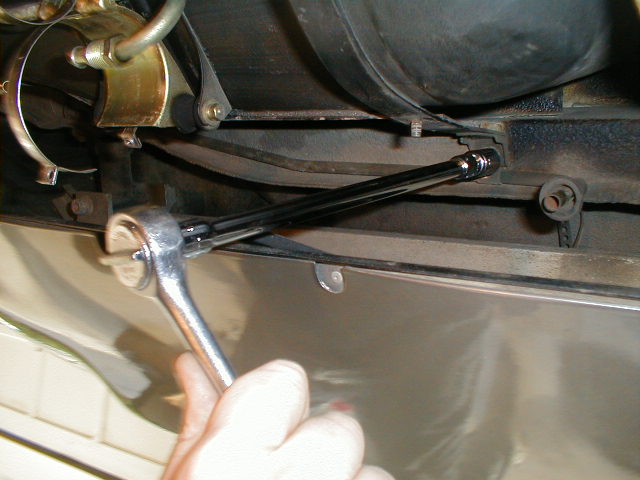
4. When you have dropped down the straps, you'll be able to get at the in-tank
pump. If you have a 36mm socket, you'll finally be able to use it here. I didn't
have one so I used an adjustable crescent wrench and had no problems.
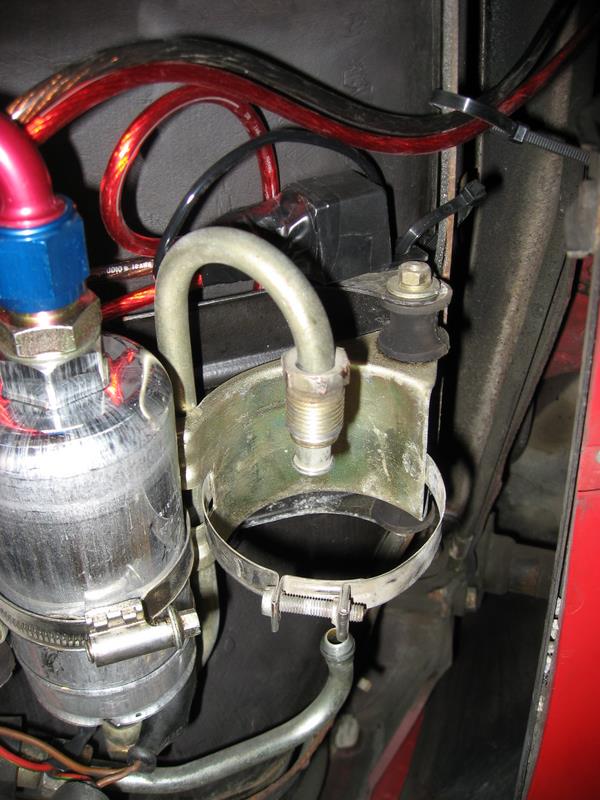
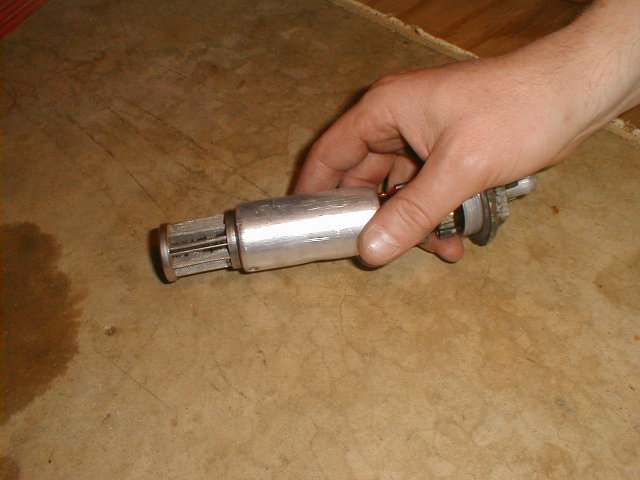
5. This is what I found when I pulled my in-tank pump. there is a small
section of rubber hose that fails. You might be able to replace the hose with a
small section of 1/2" i.d. fuel hose. to make a better repair. I decided to go
ahead and replace mine and I'll fiddle with my old pump at a later date.
6. Install the new in-tank pump with a new gasket. Don't over tighten. Reconnect the hose.
7. The .44 pump is not original, it has a different fitting, but if you insist
to install a .44 pump, this is what you will need:
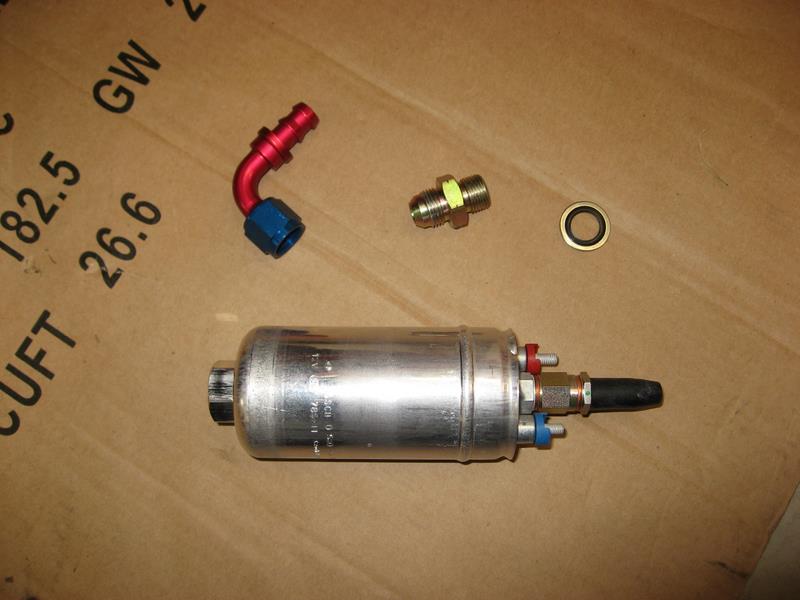
The pump, wiring kit (not pictured), from left to right : 8AN 90* push-loc
hose-end, 8 an MF x 18mm 1.5m (steel), washer o-ring for 18mm threads.
I got the pump and wiring kit from jayracing.com for about $230. The other bits
can be obtained from Kinsler Fuel Injection (kinsler.com) in Troy, MI
Part #s are:
1 part #6192 : fitting; 8 an MF x 18mm 1.5m, steel $13.20
1 part # 6133: washer o-ring; for 18mm threads $2.70
1 part # 6910: hose end; 8an, 90 degree, push-loc. $14.30
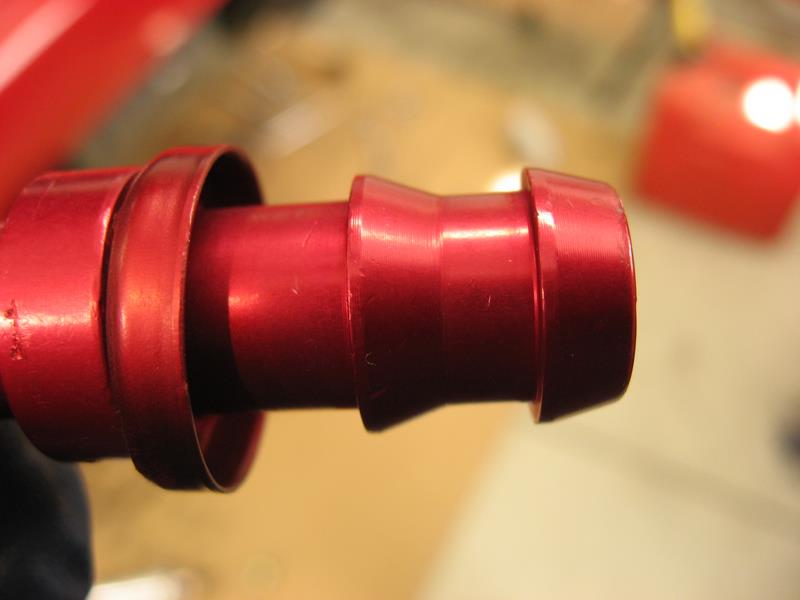
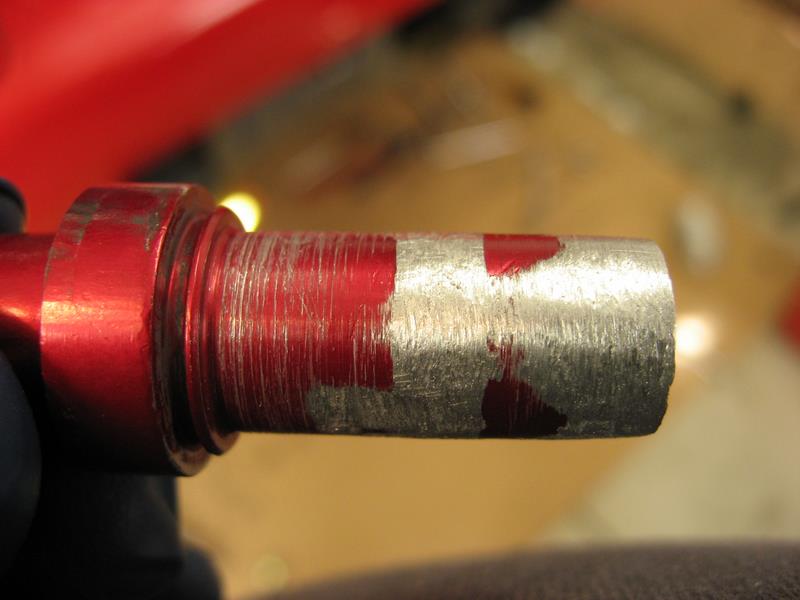
8. You will need to remove the hose barbs. I used a wheel grinder and then use some sandpaper to smooth out. The second pic is before I used the sand paper. I went up to 400 grit to make it as smooth as possible.
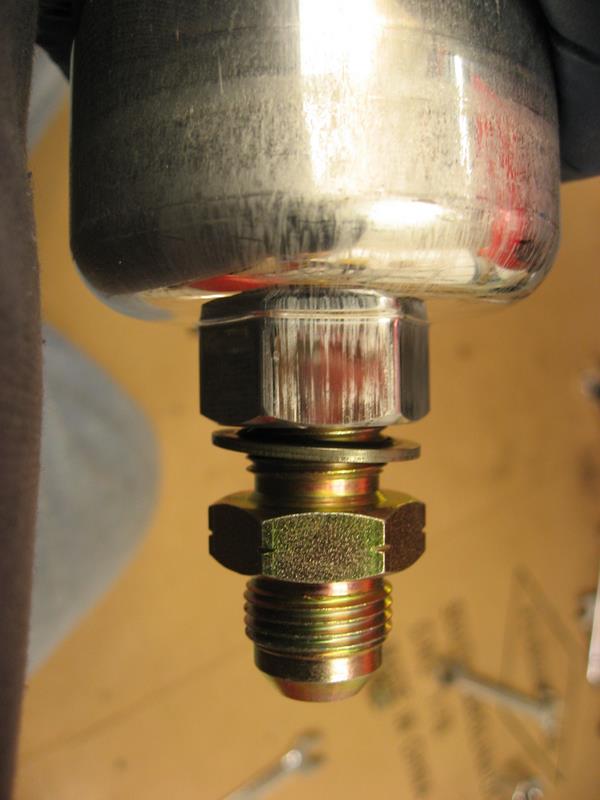
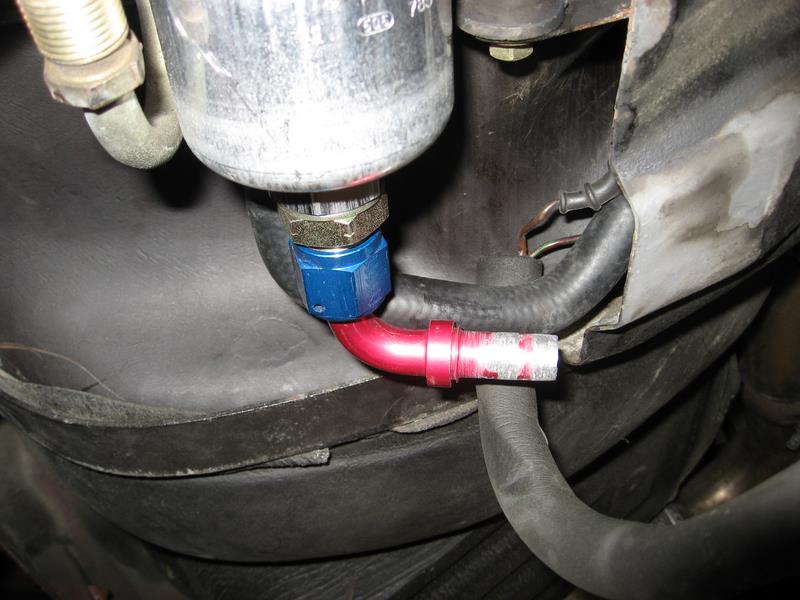
9. Assemble the bits to the fuel pump as pictured and then mount the fuel
pump into position. As you can see in the 2nd picture the fuel hose is too long.
I marked the fuel hose and cut it so it would fit and re-fitted the line that
goes from the pump to the filter as shown in the 3rd pic.
10. The wiring kit is really a nice little kit. This is needed because the
stock wiring isn't quite up to the task of feeding the pump's electrical needs.
It's a little mickey mouse to hook up but not too bad. I don't have everything
documented, but the wiring kit comes with direction albeit a little difficult to
follow. Here's how I routed some of the wires.
12V+ to relay
I used the bolt for the gas tank strap as the ground for the relay.
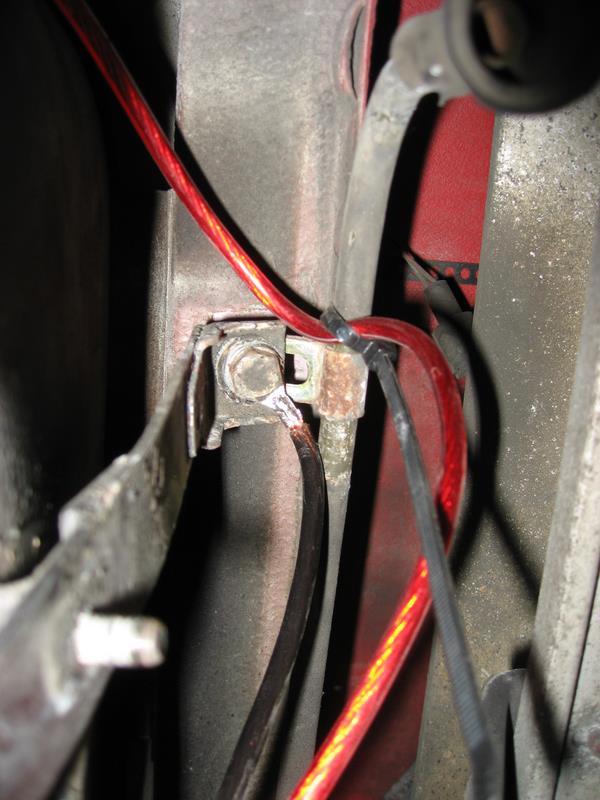
At ths point I have a lead from the fuel pump's + side to the relay.
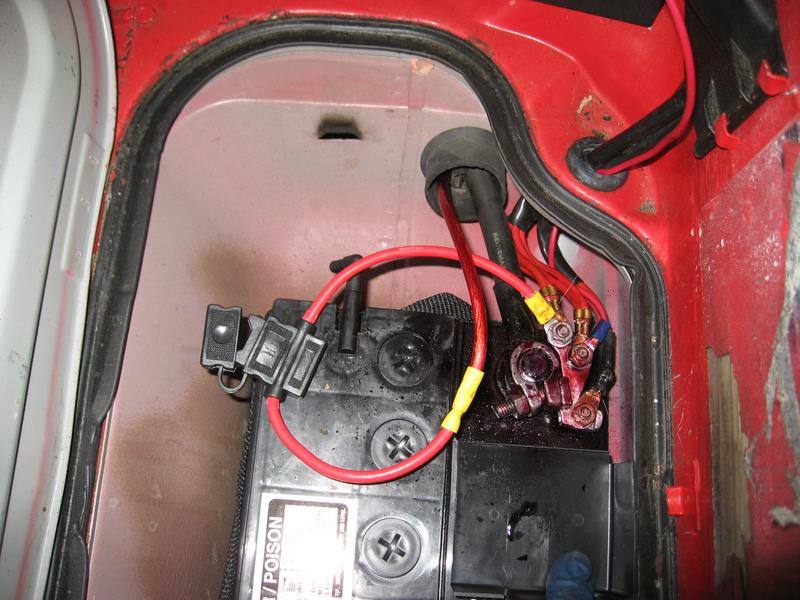
When I had everything routed, here's where the relay ended up. I wrapped it
up in some electrical tape to make sure nothing could short out.
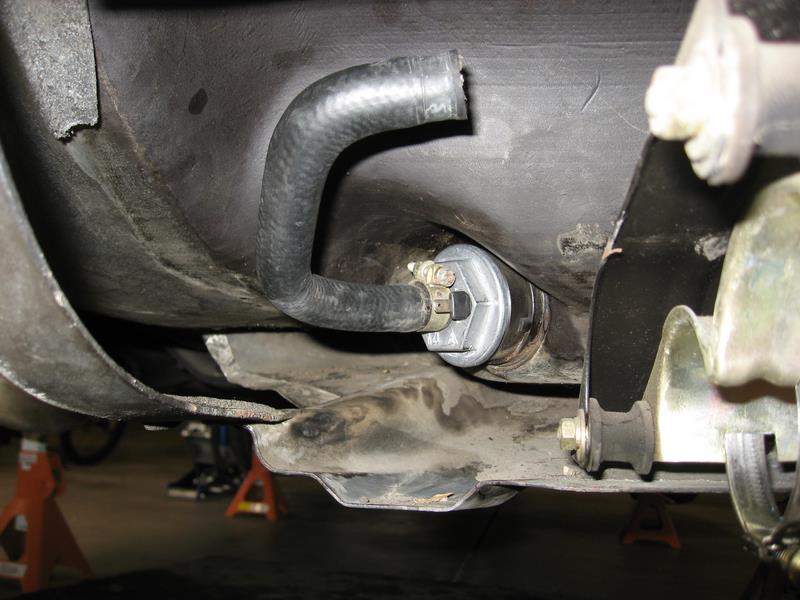
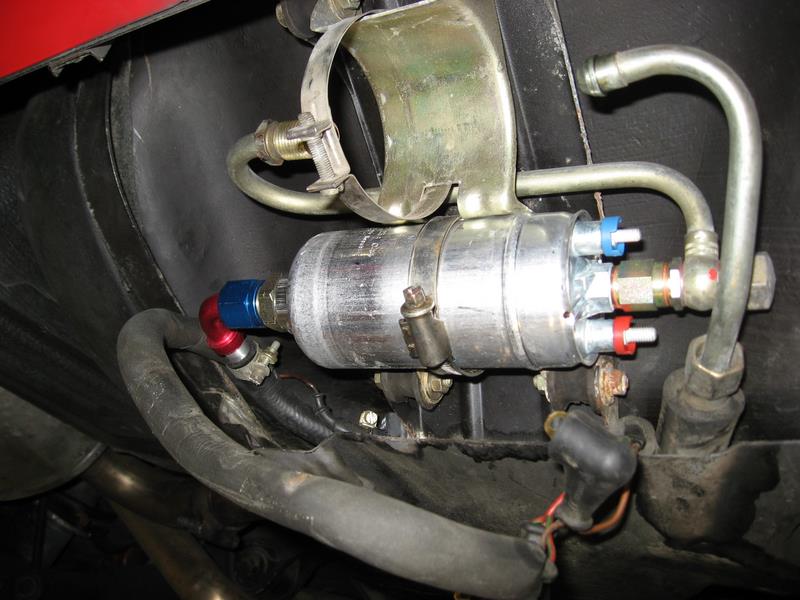
11. Now you can install the fuel filter and snug everything up. When you're
done it should look something like this.
Then just snug up the bolts for the tank straps. At this point I would add
some fuel, look for leaks, and if none are present try starting the can and
check for any other leaks. I didn't have any leaks. So I re-installed the cover
and took it for a spin.
Added search terms: Bosch 044 pump upgrade
__________________
Andrew Olson - 91 928 GT TS 5-Speed - Guards Red/Classic Gray... yeah... it's
Supercharged!
===========
Shark fans
Having a noticeable fuel pump buzzing, I decided to change-out my fuel pump. On
inspection I see I have both in-tank pump and exterior pump. Pat McGinnis was
kind enough to assist on the R&R. Here are some pictures with some pointers.
==========
Here’s a run through of the repair I did on my in-tank pump, which I’ve been
meaning to document for a while.
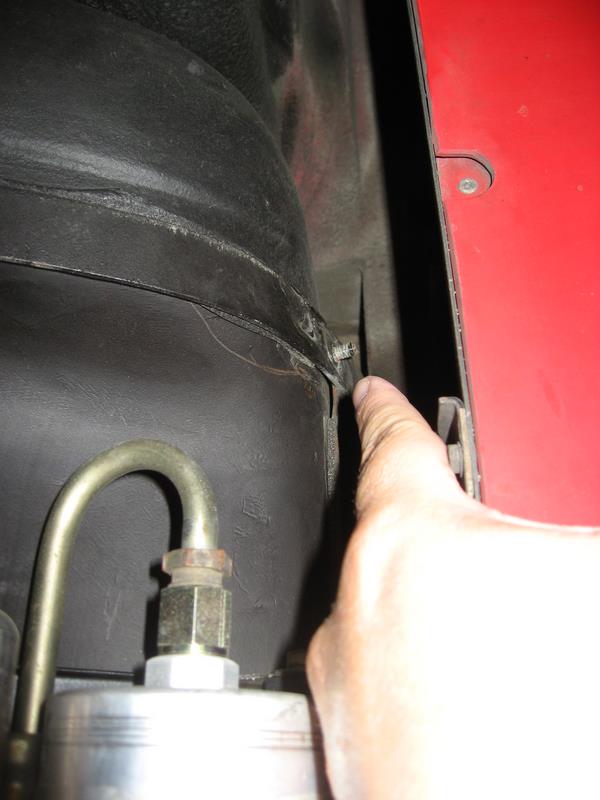
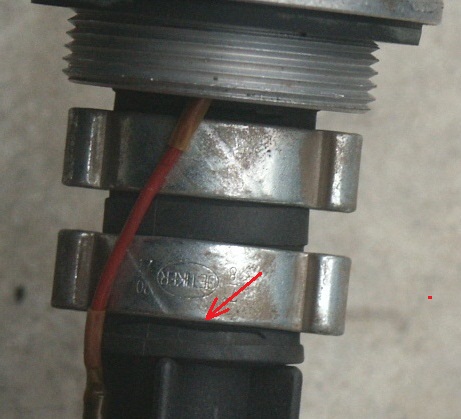
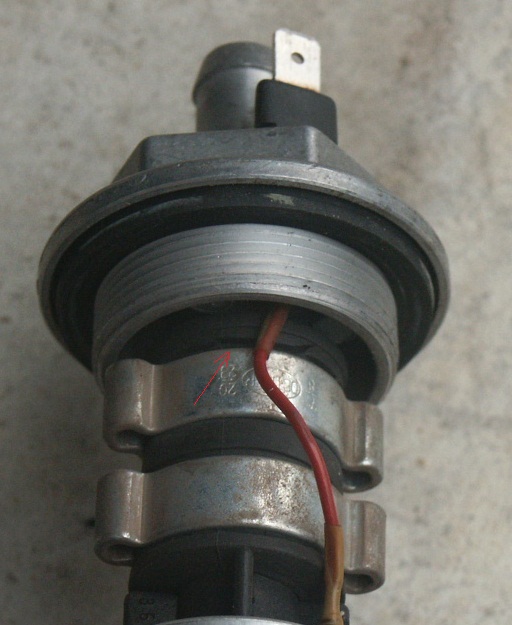
I pulled my in tank pump (original never been touched) and found that that the
hose was still intact, but starting to split, as the highlighting arrows show.
When I flexed it, it wasn’t difficult to get it to split right through. I was
surprised at the crappy un-reinforced hose that’s used as standard, and not at
all surprised that it splits and causes the problems it does. The clamps pinch
the hose so much that it starts cracks near the clamp edge as you can see.
I figured that fitting reinforced hose would limit the compression and
distortion of the hose, and would be likely to be more reliable.
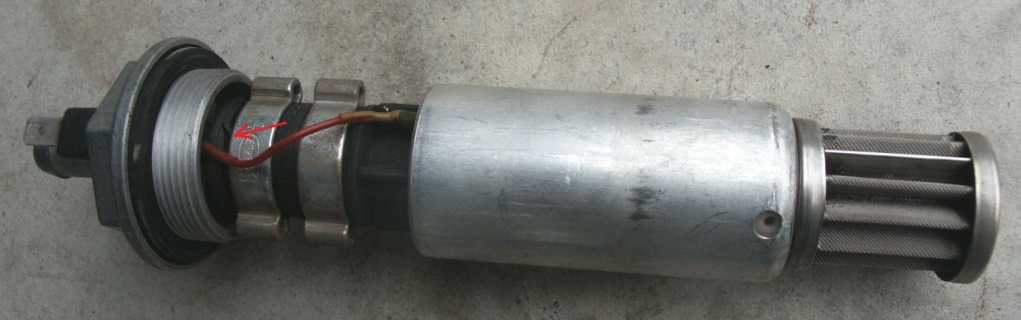
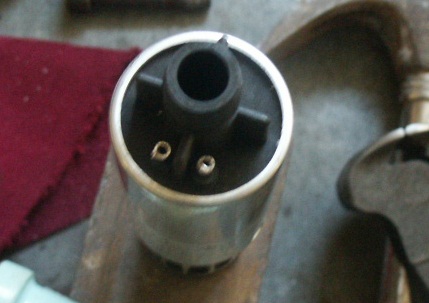
I cut the hose off, but found that when I flexed the wires I had a soldered
joint come apart, so I cut away the old hardened shrink sleeves, de-soldered the
wires and removed them as well. Here’s the pump with the hose and wires removed.
I'm sure that the bad soldered joint that I found was causing an intermittent
difficult/long cranking time start problem. The wires hadn't been inserted into
the hollow terminals, or properly soldered.
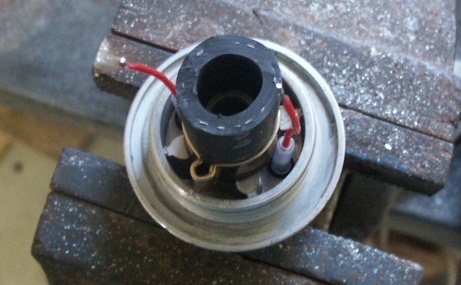
I then fitted a new section of reinforced submersible high pressure fuel hose to
the tank fitting, cut to the same length as the removed original; making sure it
was cut really square on the ends, fitted a new clamp, soldered the wires back
into the terminals, and fitted new heat shrink sleeves to those terminals.
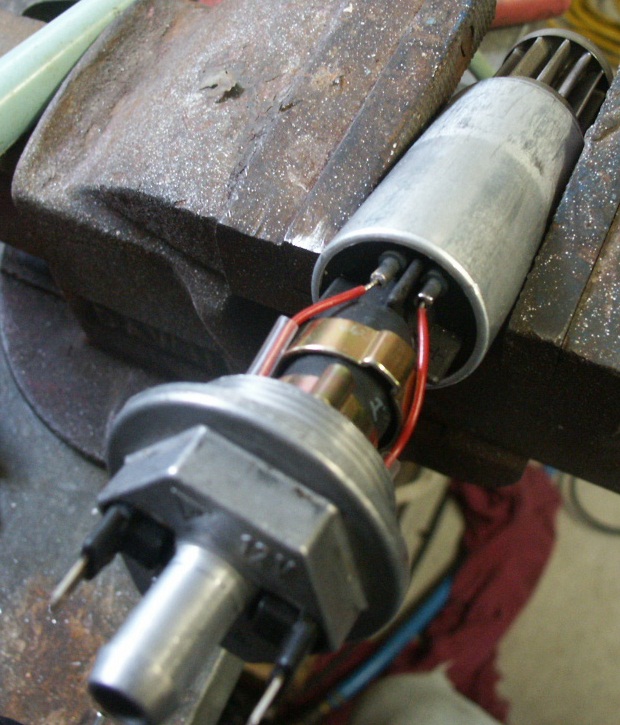
I then pushed the assembled tank fitting and hose onto the pump, with a loose
fitted clamp, re-soldered the wires back into those connectors, and loose fitted
new heat shrink sleeves.
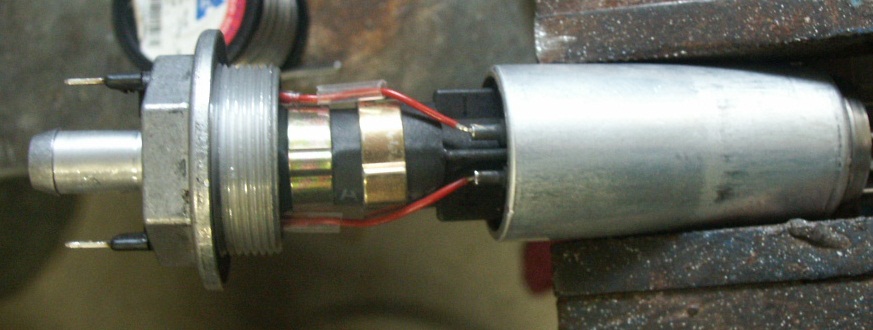
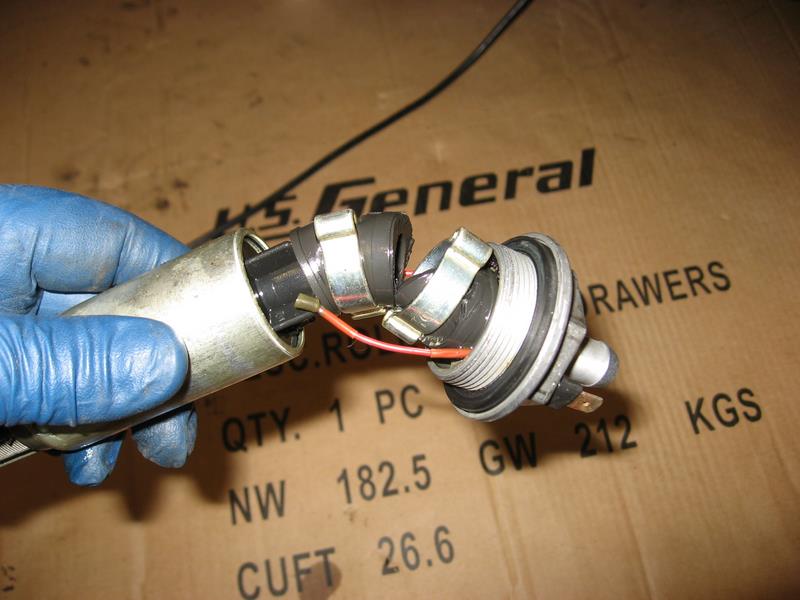
Here’s another pic of the loose assembly ready for clamping, re-soldering of the
wires into the terminals, and shrinking of the terminal insulating sleeves onto
the pump.
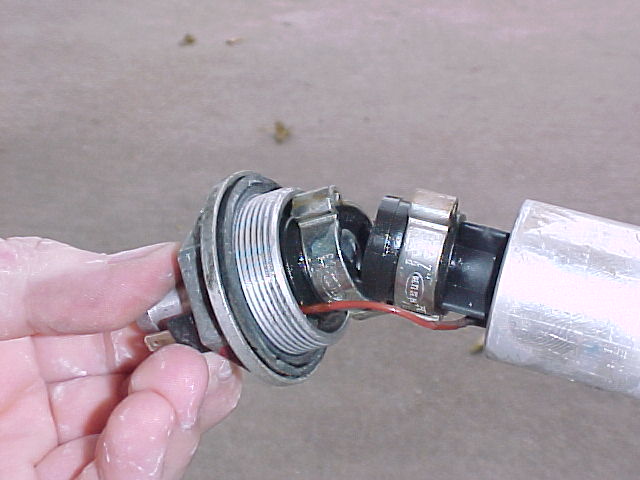
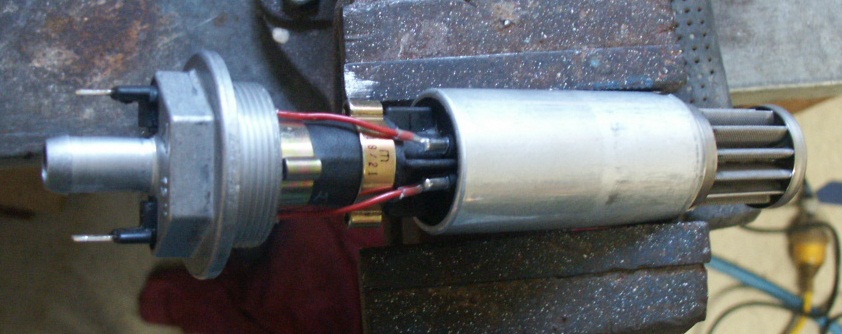
Here’s the complete assembly, with fitted clamps, and heat shrink sleeves in
place. I oriented the clamps the way I did to keep them away from the wires.
Notice how the new hose is not squashed like the old one, even though the clamps
are tight.
I attached a hose to the outlet and tested the pump in a bath of kerosene, and
then refitted it to the tank with a new O-ring, after drying with compressed air
and cleaning the pleated intake filter. After fitting I put some fuel back in
the tank and ran it for a while to flush it and check for any O-ring or hose
leaks.
__________________
Dave - Tas/OZ
============
The pump motor brushes tend to wear quickly.
When I took apart this pump on my '90 S4 at about 89K miles, besides the split
hose, the brushes were gone on one side (cause of motor falure) and almost gone
on the other side.
These internal pumps are usually only good for about 60K miles.
Barry