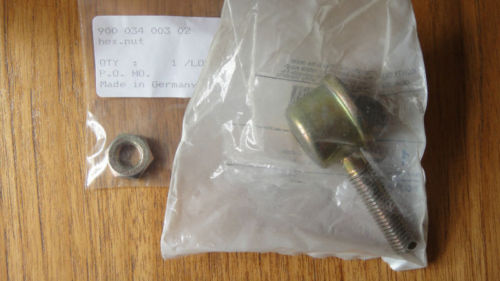
Rear shifter cup 928 424 005 00
I changed my shifter ball cup today, little booger causes a dead stick on the
shift linkage Nothing in any gear! Luckily the final shift was pulling her into
the garage. It had popped off 5 or 6 times on that last drive.
Kurt Gibble Click Here Guide hosted @ 928Int was a great resource on this fix.
Matt.
=======
Restore More Precise Shifting
Changing the ball cup on the shifter for more precise shifting
By Kurt Gibble
These are directions for replacing the shifter bushing that's located on the top
of the torque tube just behind the bell housing (and engine). The directions are
exact for an '87 S4 (s/n 0181). This is usually the culprit in fore/aft shifter
sloppiness(see Panorama May '97), although Dave Cooley has noted that sometime
the coupler just in front of the trans can also be the problem. The procedure
isn't too difficult, but you can't be ham-fisted.
1. Go in passenger footwell, remove the lower fuse panel(2 10mm nuts) and
disconnect the O2 sensor (thick gray wire with black plug). Push out the grommet
and wires through the hole in the tunnel.
2. Pull up shifter leather boot -- pull up the front of the plastic frame and
it'll snap out of the console. Pull up rubber boot. Look at the shifter and
memorize. Remove the 2 clips and the shifter rod pins and remove the shifter,
springs, bushings,washers, and figure eight piece.
3. Support car on jack stands -- no loss in having it high.
4. Optional step: Use a digital level to measure the position of the two
shifting rod pins. You could also measure the shifter before taking it out.
(This is so we're sure to get the bushing spaced properly.)
5. Remove Exhaust. Spray 13mm nuts to manifolds. Place support (jack) on cross
pipe in front of rear muffler. Remove two 13mm bolts and nuts on rear muffler,
one of same on each intermediate, 17mm center support hanger behind the cat.
Remove the nuts on the exhaust manifolds. Lower rear a couple of inches,then
remove the bolts from the manifolds, lower the front while feeding the O2 sensor
through the heat shields. (If you're near 60K, you might want to change the O2
sensor while the exhaust is down.)
6. Remove the center and two front heat shields -- ten 8mm bolts total.On the
center, I removed the exhaust hanger to get it down. Remove the front tunnel
brace to which the heat shields mount (four 13mm bolts).
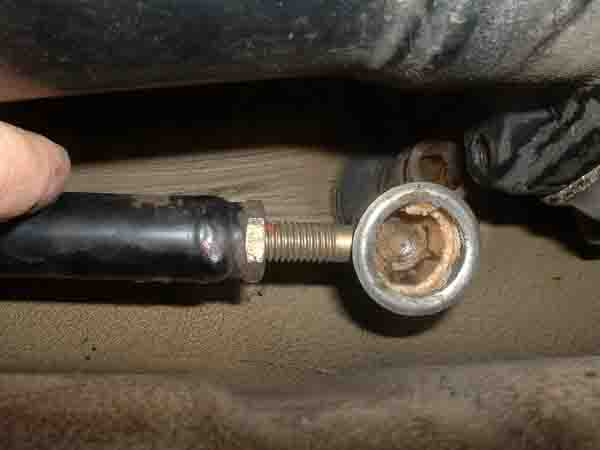
7. Pry the shifting guide rod cup off of the ballon top of the torque tube. I
used a Stanley wrecking bar -- the gently curved end. Others have used
screwdrivers and motorcycle tire irons.
8. Gently pull the shifting guide rod to the side and down -- mine went more
easily to the driver's side. There's a bearing welded to the top of the torque
tube (Jim Stadter) in which the guide tube rides, and you probably don't want to
break or bend this -- just a guess on my part.
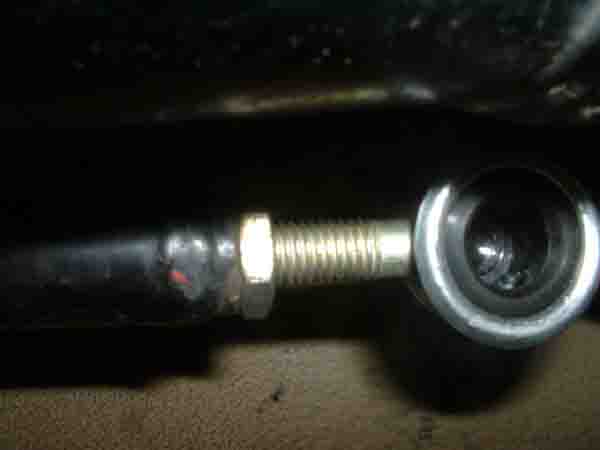
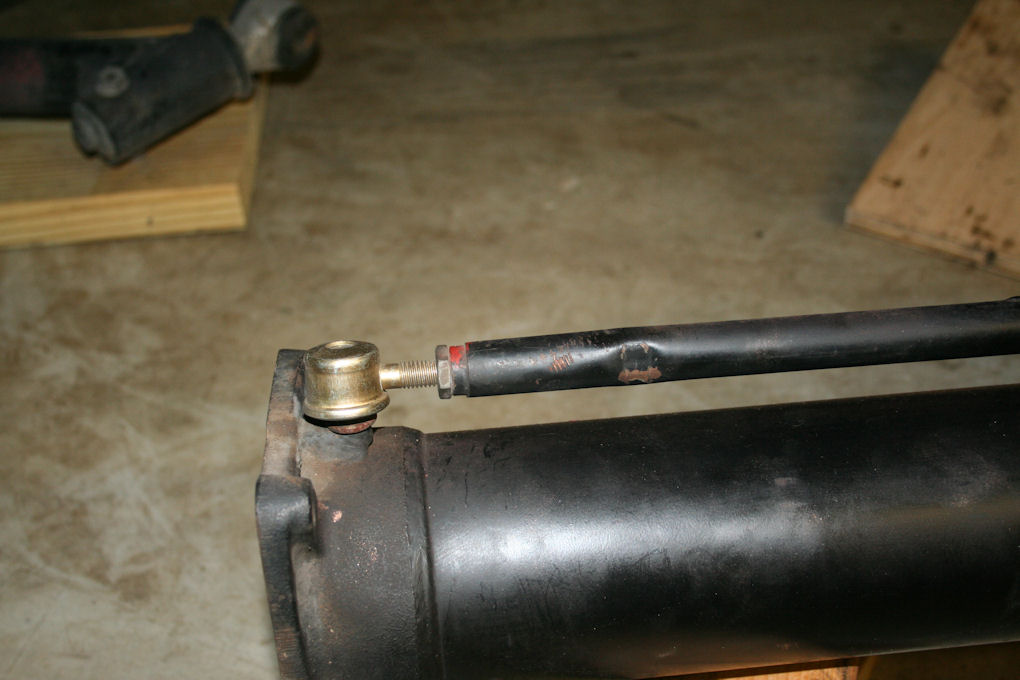
9. Measure the distance from the cup to the rod and mark the orientation. Loosen
the 17mm locking nut on the cup threads. How, you ask? Well,you might try to put
a 22mm wrench on the cup to counter-hold the torque you apply with the 17mm
open-end wrench. If you do, you'll probably twist the cup right off the threads
-- you can guess which you've been warned. I was able to grab the tube (back
about three inches) with a "normal" pair of pliers and then squeeze those pliers
with a channel lock to get enough grip. A channel lock won't go up in the
tunnel, as the clearance is too small (the tube has to stay fairly high for this
so that the narrow part of the pliers goes where the clearance is the
smallest).Unscrew the cup while counting the threads.
10. Put a little grease on the inside of the new cup and clean off the ball.
Thread on the new cup the correct numbers of turns, orient it properly, and then
measure the distance from the cup the correct number of turns; orient it
properly, and then measure the distance from the cup to the rod and adjust it if
you forgot how to count. Snug the 17mm nut. Place cup on top (Don't press on it
yet) of the ball. Go in the car and measure the angle of the pins/shifter, or at
least make sure things look aligned.
11. Tighten 17mm lock nut -- it really doesn't have to be too tight. Even if it
does work loose, the cup won't be able to unscrew, so i don't see a big problem
looming (YMMV). Push the cup onto the ball (my guess is the plastic will give
more easily on a warm day). I used the other end (right-angle end) of my Stanley
wrecking bar by pivoting it against a small piece of metal (aluminum, of course)
on the top of the tunnel. Worked really nicely.
12. Reassemble shifter. The trick inputting this in is finding some way to
compress the springs so you can get the clicks on. The springs fit tightly onto
the shift level so there's not a lot of room. I compressed the springs in a vise
and then wrapped four turns of No. 26 bare copper wire around the spring in two
places.Then install and cut the copper wire. Nylon thread may work (even dental
floss) and, as some of the copper remained,the nylon may be better here.
13. Replace cross member, heat shields, and exhaust, remembering to feed the O2
sensor wires (and install the grommet) before the heat shields are tightened,
and especially before the exhaust is entirely up.
=======
=======
Heel af en toe, bij het echt even stevig doortrappen van mij 928 blijft de
versnellingspook letterlijk vastzitten waardoor ik niet verder kan schakelen. De
enige oplossing is dan te stoppen, en na wat heen en weer gepor is ie weer los.
De bak maakt geen lawaai en schakeld verder prima maar af en toe blijft ie
hangen. Kan het zo zijn dat er te weinig olie in de bak zit, kan ik dat ergens
controleren. Kan er iets anders aan de hand zijn, ik heb echt geen idee. Ik heb
weleens gehoord dat er ergens een teflon blokje zit wat vernieuwd moet worden.
Graag jullie reactie.
Hans
========
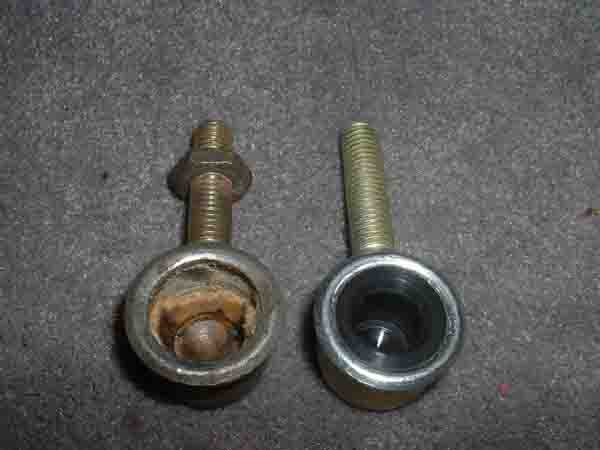
Het kan inderdaad de teflon cup zijn die versleten is. Ik heb de mijne vorig
jaar vervangen. De cup was helemaal verteerd, waardoor het balgewricht er uit
�popte�.
Op http://www.nichols.nu/tip413.htm en
http://www.nichols.nu/tip553.htm
kun je er meer over lezen.
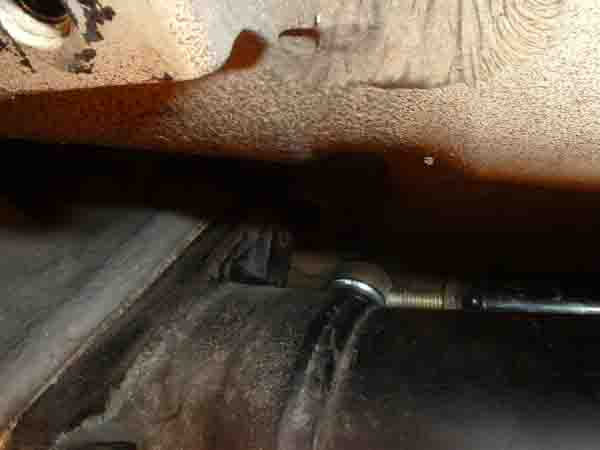
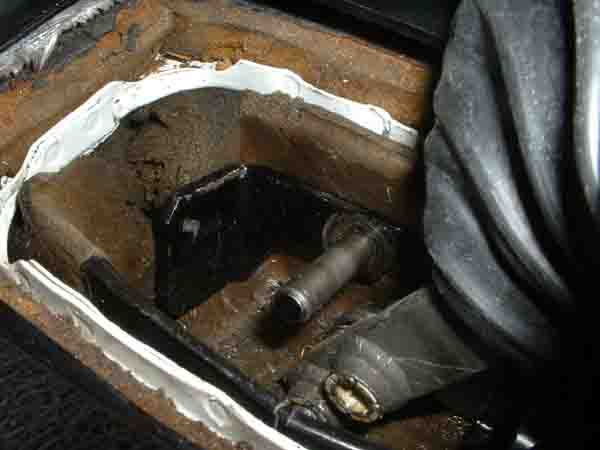
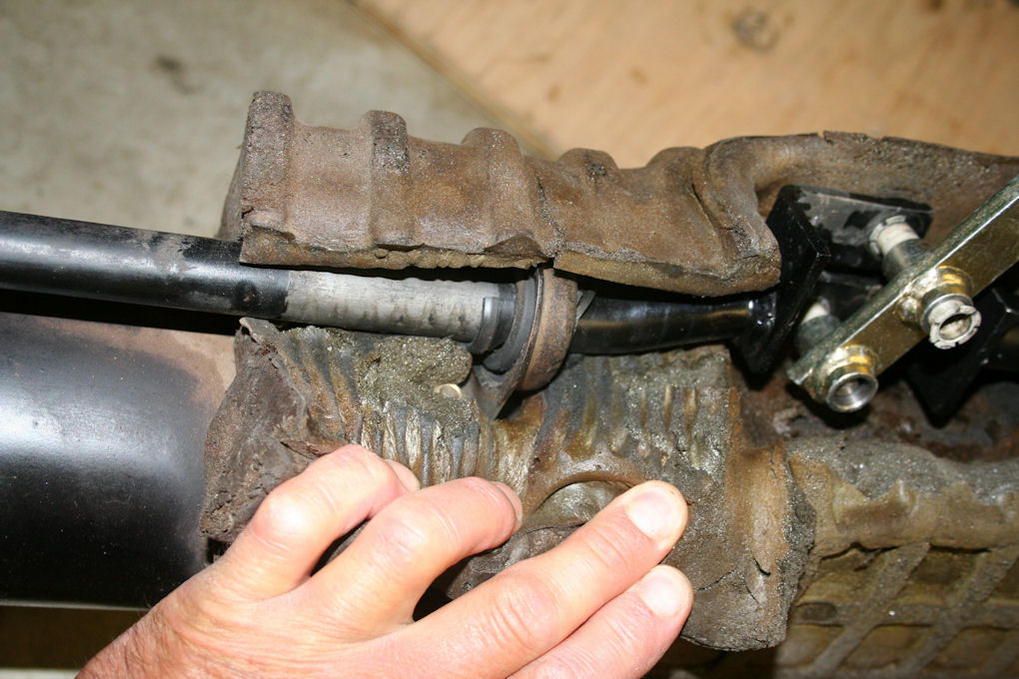
De check is redelijk simpel. Je auto moet alleen wel op de brug. Verwijder de
kunststof en metalen bodemplaat. Schroef de warmtewerende plaatt los en
verschuif hem, zodat je dmv. een zaklamp zicht hebt op de aandrijfashoes. Ter
hoogte van het schakelmechanisme zie je de duwstang, welke op een bal is geklikt
dmv. een cup. Hier duwt de schakelpook zich tegen af, zodat hij de schakelstang
welke naar de bak loopt in en uit de bak kan drukken. Op de cup mag geen speling
op zitten. In reparatieprocedure in de bovenstaande link staat dat je het
uitlaatsysteem moet laten zakken. Dit heb ik niet gedaan omdat ik de eerste bout
van de uitlaat al niet loskreeg en al een doemscenario voor me zag van
afgedraaide bouten en zo. Met flink wat buigen van het hitteschild kun je deze
net ver genoeg wegtrekken om er bij te kunnen. Hoewel dit niet gemakkijk gaat is
het te doen. Dit geeft je net iets ruimte om met je handen bij de cup te komen.
Wees wel voorzichtig, want de kabels van de sensor op de katalysator lopen door
het hitteschild. Wees ook voorzichtig met de sensor zelf, want dit heeft een
fragiel porseleinen (of iets dergelijks) huis. Het is even flink pielen, maar
scheelt je wel het werk van de gehele uitlaat eronderuit halen. Mocht je hier
toch voor kiezen, houd er dan rekening mee dat het uitlaatsysteem heeeeel erg
zwaar is. Dus ondersteun deze en zorg dat het hele gewicht niet aan 1 bout komt
te hangen. Dat geeft geheid problemen. Met flink wat gepriegel kun je de cup
eraf draaien. Dmv een tang of schroevendraaier. Aan de cup zit een tapeind en
een borgmoer. Markeer voor de zekerheid dmv een dikke stift de positie van de
borgmoer. Zo kun je deze overnemen op de nieuwe en hoef je de bak niet opnieuw
af te stellen.
Het scheelt enorm als je iemand in de auto hebt zitten die (even de
schakelafdekhoes e.d. verwijderen) de schakelpook in positie houd. Ik heb zelfs
de rivetringen in het schakelmechanisme op de pook verwijderd, en de stangen
losgegooid zodat je meer ruimte krijgt beneden om met je handen erbij te kunnen.
In de reparatieprocedure staat omschreven dat je dmv. een lijmtang de nieuwe cup
op de bal kan drukken. Als je ervoor kiest om niet alles los te halen gaat dat
niet. Ik heb eerst geprobeerd om dmv. een spanband deze er op te laten poppen,
maar dat ging niet. Uiteindelijk dmv. een koevoet ging het . Het �S�-gedeelte
van de koevoet gaf de mogelijkheid om boven de cup te komen en hem er zo op te
klikken. Wel even een beschermplankje ertussen doen, want je moet echt flink
kracht zetten. Eerst even wat vet in de cup smeren. Dit vergemakkelijkt de
procedure en is uiteraard nodig voor soepel schakelen.
De hele klus heeft mij (met 2 man en een autobrug) een uurtje of 3 gekost. Maar
het is de moeite waard. Niet alleen was het probleem opgelost, maar hij
schakelde gelijk weer zo solide als een nieuwe auto. Ik ben nog wel even een
tijdje bezig geweest om het schakelmechanisme bij de pook in elkaar te zetten.
Ook hier waren echt 4 handen nodig. Wat flinke grote schroevendraaiers en een
hamersteel houden het mechanisme in de veren gedrukt, terwijl je de rivetringen
dmv een tangetje en een schroevendraaier weer op z�n plek kan drukken. Succes!
Op
http://forums.rennlist.com/rennforums/showthread.php?t=223437 van een
ander forum staan wat tips hoe men mij heeft geholpen.
Andre
============
Replacing the bushings in the shifter just got much easier.
Pull the shifter boot up, gently wiggling it to loose it from the shifter. Pull
up rubber boot and inspect bushings on the shifter shafts were they sit. The
bottom ones in mine were shot, why I was replacing them. Place shifter in 2nd
gear. Get a pair of needle nose vise grips open up just to the where the shifter
shafts through the shifter. Place in the middle of them on the shifter. The
other side place on the upper shaft rod. squeeze gently to compress the springs
in the shifter assembly. You may have to tighten up the vise grips a little.
Depress only enough to release the tension on the c clips, remove them. Remove
the washer and gently remove the vise grips. Remove the shifter. If your going
to shorten it, now is the time. Replace the plastic bushings, lube well, replace
on the shifter rod shafts, compress the vice grips again gently in the same
place as before, replace the c clips... Put back on the rubber boot, shifter
cover & ball..... SUGGESTION: My 85 has these tinny PITA clips. Go to the local
hardware store and match up the c clips to the real clips that have the tang on
them that you can put on with a pair of needle nose pliers...!!!!!!! Get the
heavy duty ones, not the light ones. Much, Much Much easier. This is only a 2
beer job though.
Cordially,
wag928s@aol.com
Rear coupler:
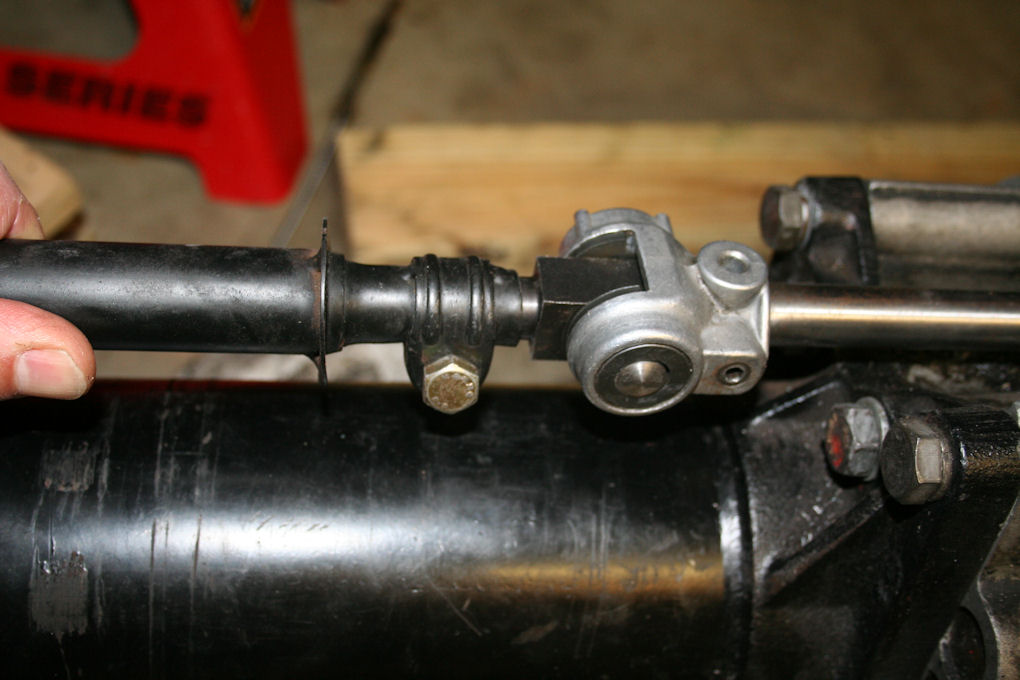
Front coupler:
______________
To get to the front ball cup you need to remove the heat shields (I removed
all of them all the way back except the one that kind of wraps around the
exhaust hanger doughnut. I left that one in but loose. The linkage just runs
along the top of the TT and you have to wrestle with everything between the TT
and the tunnel for all of these jobs.
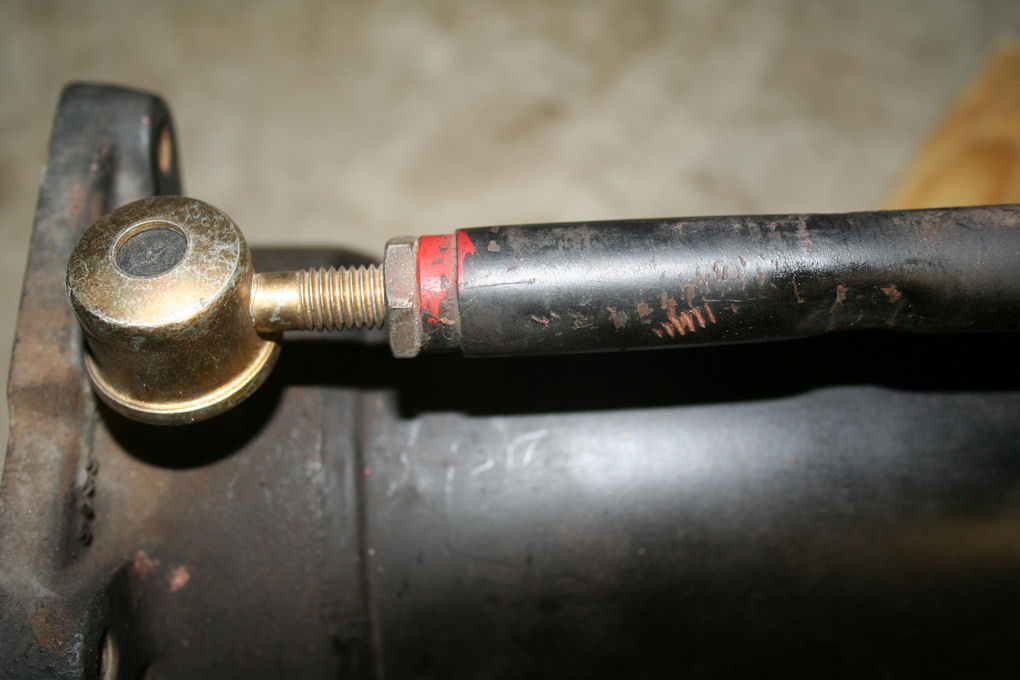
For the front cup: I think there's a *little* more room going in from the DS
(US) and there is a flat on the shaft #3 (which is actually shown in the
diagram). This will enable you to get a wrench on there to remove the nut and
ball cup once you get it popped off of the ball. Popping it off the ball is a
major PITA as Dave says. I took 3 or 4 attempts at it over two weeks before
finally getting the damned thing off.
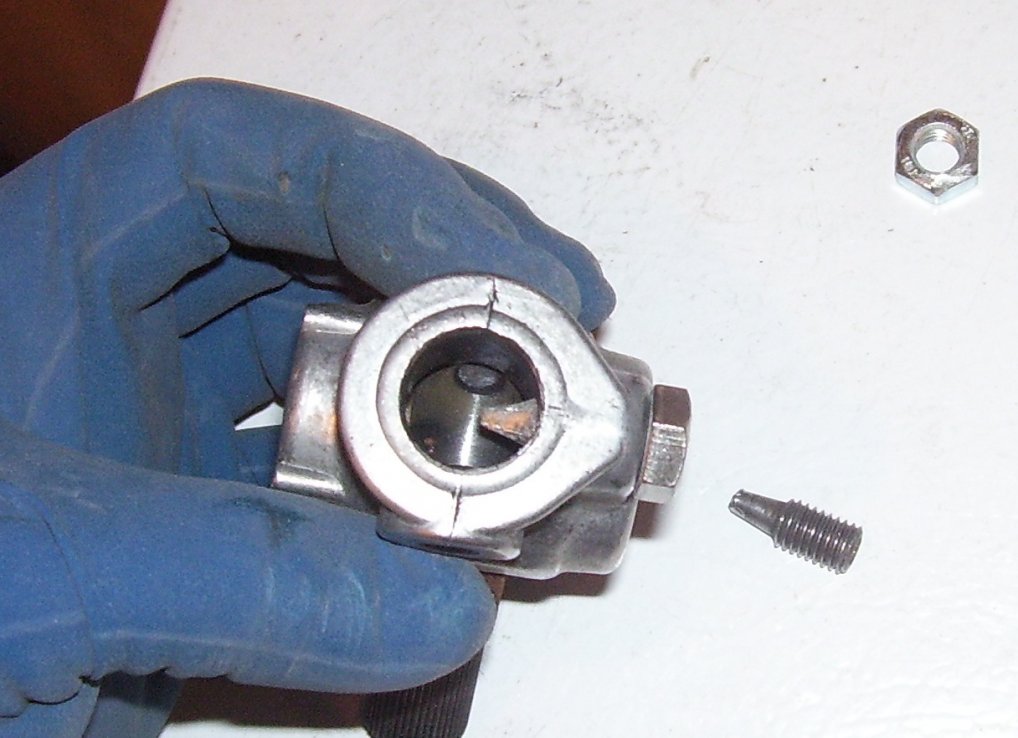
For the rear coupler: Make sure you have the right sized allen wrench the first
time for that conical set screw and use compressed air or a pick or something to
make sure the wrench is fully seated. It takes next to nothing to round that
head out and then you're in for a long and, shall we say intimate, period of
time getting to know that area of the car. For me it took a dremel, drill,
propane torch and several layers of skin from my knuckles to 'persuade' that one
off. The bolt on the front is a 13mm and easy to get out, but the conical screw
is the fun part. (after you either message, spindle and generally mutilate the
rubber sleeve off (13)). I ended up making my own conical screw with a 13mm head
so I never have to do that again:
You should find lots of threads on here but basically once you get in there
you'll see what you need to do, figuring out how to do it with your setup (lift,
liftbars, jackstands, whatever) is going to be up to you.
And don't forget the release arm ball cup: That's the same kind of
ball-and-socket assembly that is on the front ball cup and it does make a
difference in your shifting. It's accessed from inside the engine bay by
removing the air filter box completely (and probably the MAF). The ball is at
the top of the bell housing and you'll see the arm sitting on it. When I did
mine it was during a clutch R&R so I'm not sure what's required to do it with
everything hooked up, but you'll be able to see if there's lots of play (in mine
there was no evidence of the old bushing, the arm was just rattling around on
there. I think if you disconnect the clutch slave at the bottom of the bell
housing, you should have enough play to move it and do what you need to do but
I'm not sure. Maybe Stan (Mrmerlin) will chime in. He's been a huge help for me
on things like this.
If you're lucky like me, each one of these things will make a HUGE impact on the
way it shifts and drives. My car was sloppy as hell when I got it and now it's
nice and smooth: Snick-snick-snick.
Good luck and post your results!
__________________
1985 grey
Mike Freye
====
Note: If you are going to replace your motor mounts, do yourself a favor and
replace the shifter linkage bushing first. I could have done this job with two
inches to spare between the torque tube and torque tube tunnel. New motor mounts
make pressing the socket with fresh bushing onto the ball nearly impossible.
I just replaced the ball and socket bushing on the front shifter linkage without
removing the exhaust and without removing the socket cup from the linkage.
I did have to remove the heat shield above the exhaust, the one near the
driver's side frame rail protecting the positive wire from the battery, and the
small brace that they attach to. You can snake out the large heat shield with
the exhaust in place. At least, I managed to.
You'll have to unhook the linkage from the shifter. From underneath the car,
pull the linkage down the side of the torque tube towards the driver's side. I
used a rachet strap to hold the linkage downward. The strap was wrapped around
the exhaust and hooked to the passenger side sway bar bracket. I also had to use
a wrench on the lock nut to keep the linkage from rotating.
Using two long straight blades, dig the old bushing out of the socket.
To put the new bushing in, you can press it in with your fingers enough for it
to hold, at this point, I used a C clamp to press the bushing into the socket.
Now, you have to work the lip of the bushing into the socket which will rest
inside a groove and provide a nice, tight fit. I used the same two straight
blades.
I pushed part of the lip underneath with one straight blade, then pushed right
next to the first straight blade with the second, and began to walk them around
the socket until the whole thing was done. It is a slow process.
The hardest part was getting the ball back onto the socket. I don't believe
people have been securing the lip into the socket, because I could not do it by
hand using a rope looped over or a crow bar. I tried twisting a rope with a jack
handle, and the rope broke. I tried jacking the engine hoping the torque tube
would press the socket against the top of the tunnel. The car was lifted off the
jack stands...
You'll need to put your shifter on the pin of the linkage in the car. You can
use the bottom hole on the shifter. It's just temporary. Have a helper hold the
shifter according to your instructions to keep the socket dead centered over the
ball. I couldn't do it alone, because the socket would slip to the left or right
off of the ball.
I eventually snaked a rachet strap over the top of the linkage. One hook was
placed into the driver's side mount for the exhaust heat shield brace that
stretches across the exhaust. The second hook went around the passenger side
exhaust pipe and stretched back to the driver's side sway bar mount.
Long story short, I broke the racheting mechanism while using an adjustable
wrench to rachet the strap. Luckily, the locking part of the rachet was still
holding. This allowed me to insert a crowbar above the linkage that previously
would not fit. I had to use a jack to put enough pressure onto the crow bar to
press the linkage on. I imagine it took a half ton of pressure to pop the socket
onto the ball.
I bought a huge bag of graphite powder off eBay a long time ago. I use a paste
made of lithium grease and graphite powder for the clutch fork bushing and the
linkage bushing. That is the black grease like substance in the bushing in the
photo.
Rachet strap on passenger side sway bar mount.