Hi all,
Today I picked up the center-vent vacuum pod that I ordered.
Symptoms for ordering a replacement: the heater stays on. When there's a massive
leak in the vacuum actuator system there will be not enough vacuum left to pull
the hot water valve close and therefore you will get hot air inside the cabin
despite of putting the lever in the console fully to cold. I had to plug the
vacuum line (orange) so that the car stopped heating in the summertime. Another
typical thing I noticed is that the comb in the center-vent housing stayed down,
so you need to put the blower in 3 or 4 to really benefit from the AC.
So..... I ordered a new POD, and decided to fix the thing.
Its part 928.573.309.03 and it did cost 25 euro's approx. Not too bad. Labeled
in august 2005, bagged and labeled by Porsche in sept 1st 2005, mounted (by me)
on sept 17th 2005. How's that
for a short stock cycle?
Here's a DIY instruction:
0. you want to disconnect the battery I suppose ;-)
1. take off both console side panels
2. take off the dash glove box lid (3x m4 screws at bottom)
3. remove the dash glove box (4x parker screw) (there's a cool-air hose attached
to it as well)
4. take off the hidden m4 (8mm hex) bolt in the top-left opening of the
dash-glove box space (holds the center console to the dash frame)
5. take off 2 philips screws on the bottom right side where the center console
mounts to the dash
6. take off 2 philips screws on the bottom left side where the center console
mounts to the dash
7. remove the center-vent grill (gently pull straight back)
8. remove the two m4 (8mm hex) bolts inside the vent opening, which hold the
center console to the dash
9. unplug the plugs of the window, rear wiper, and roof (just follow the leads,
connectors on both sides
10. remove radio
11. unscrew the two parkers that hold the center console to the chassis at the
rear side of the console left and right
12. you should now be able to move the console backwards a few inches.
13. If you have a mityvac, now is the time to check the two valve you can see.
You don't want to replace a perfectly good working vacuum pod unless you intend
to do it as a PM. I have a defective center-vent pod (the upper one), and
replaced the footwell pod (lower one) sometime ago. It does make sense doing
both at the same time ;-)
14. You can just replace the lid, spring, and the membrane of the actuator and
leave the pod mounted. (almost no other way) Take the lid off by prying the
little locks and disengage them.
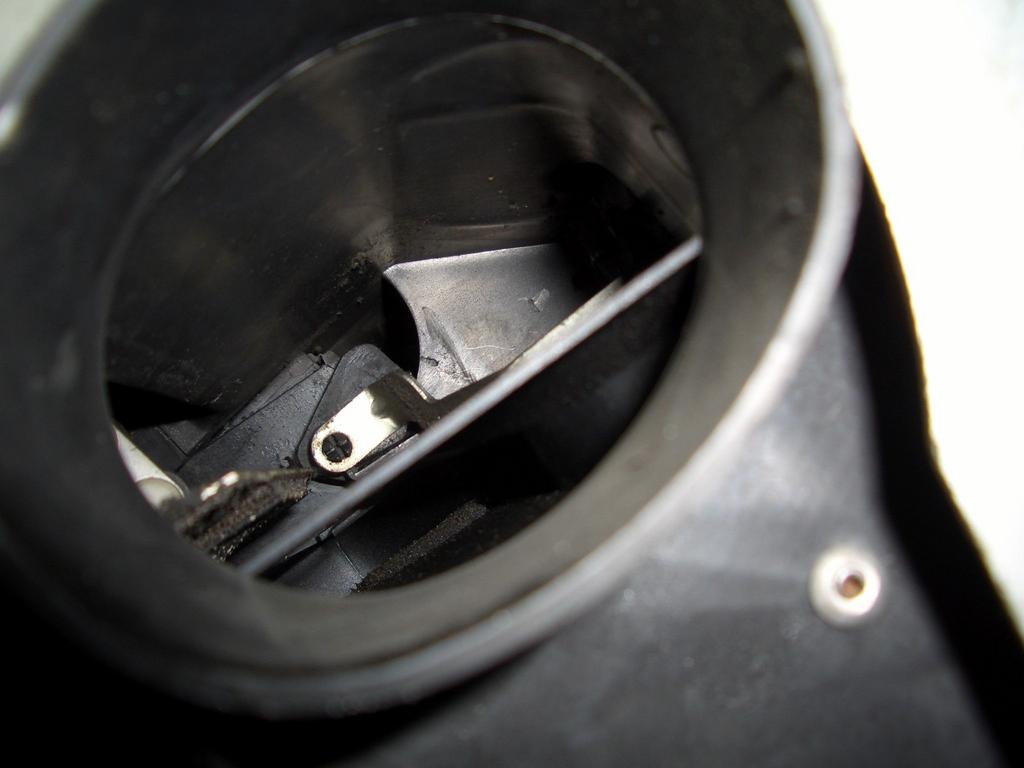
15. maneuver the arm that is linked to the vacuum membrane until it unlocks from
the arm that moves the comp in the center-vent housing.
16. So far so good. Now comes the frustrating part: try to put the new vacuum
membrane and arm in and link it up to the arm that moves the center-vent comb.
You cant see it, you will have to feel. Its really hard and frustrating. You can
remove the air tube on the right side and look inside (use a flashlight and
mirror) and maybe use a screwdriver to help the arm re-attach, but its really
hard to get it linked up again. It helps moving the comb flap up.
==> here's a trick I saw, its an idea from Ed Scherer I believe (thanks Ed!!!):
you drill a fairly large hole just left of the vacuum pod, at a 10:00 or 11:00
angle. That's where the arm is supposed to be. It does not help to link the arm
but at least you see a tiny bit what you're doing. After some real struggling it
suddenly clicked and it was attached. Use some tape to seal off the hole that
you drilled.
17. now put the spring in, put on the lid, and check with a mityvac if it pulls
vacuum and actuates the comb in the center-vent.
18. next plug in the orange vacuum line and make sure its firmly in the rubber
sleeve.
19. move all the stuff back into position, and start with the upper m4 bolts in
the center vent housing to attach it to the main dash.
20. from there on put all screws back in, mount the radio again, check for
unplugged wires and connectors (windows, wiper, roof) Leave the grill off.
21. put the side panels on
22. reconnect the battery, have a test drive, test all related controls. Watch
the center vent comb move when vacuum is on.
23. Put the center-vent grill back on.
24. time for a beer.
It took about 3 hours to finish, just taking it slowly. Now I know why the parts
guy smiled when I asked him how much work it would be.
Hope this little procedure helps someone.
Regards,
Theo
'88 928s4 cherry red
The Netherlands
http://928s4.no-ip.info