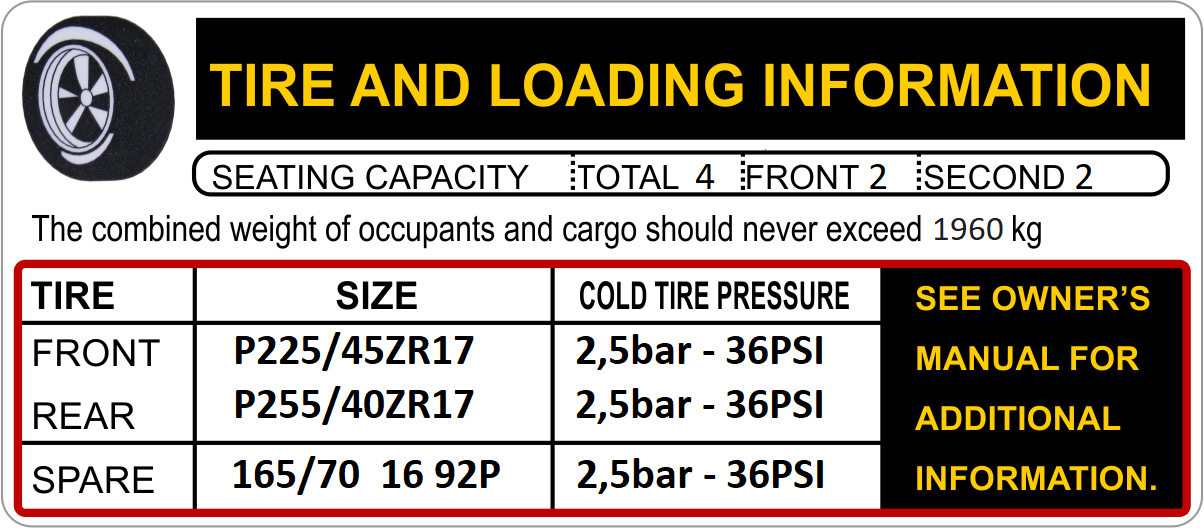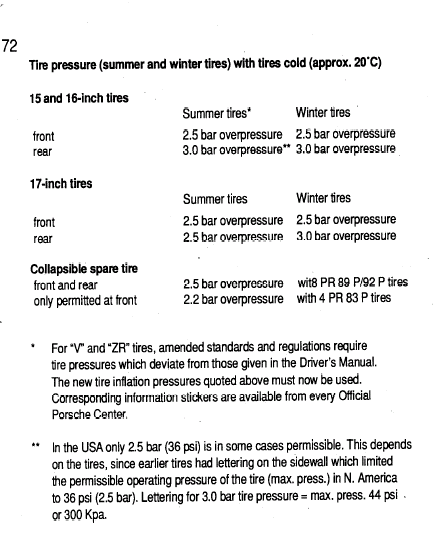
Place card: Tire size and pressure info for a 928 GTS:

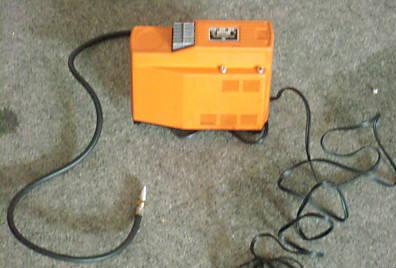
Porsche Original tire compressor for the 928:

Tire Pressure Guide
By Dan Barnes
Tire Pressure Hints
A quality, trustworthy gauge makes it more pleasant than with the
uncertainty of the gas station's beater, though in European Car's
tire-pressure-gauge test (July 2000), four randomly selected gas station air
hose pressure gauges were checked, and none was in error to a degree that would
lead to a dangerous condition. Since then, the Porsche(R)-approved gauge we
chose as our favorite has been seen all over the place, from The Tire Rack to
local auto parts stores, at very affordable prices.
Some people aren't sure where to set their tire pressures. The one thing that is
certain is that the maximum inflation pressure on the sidewall is not the
right one to use. The vehicle manufacturer's recommendation is always a
good starting point. It will be somewhere in the car.
This used to be a sticker in the driver's door jamb, but more and more it's
located on the back of the gas filler door. If that fails, the information
should be in the owner's manual. Sometimes, there will be a range specified, or
two different recommendations, depending on load.
Anywhere between these numbers should be safe. Changing the tire size or going
to a plus-size fitment will change the required inflation pressure somewhat.
Within the range of optional OE tire sizes, the vehicle manufacturer's
recommendations should be followed. For sizes outside the range, the tire
manufacturer should be able to help. Yokohama, for instance, includes pressure
recommendations for stock and plus-sizes, by vehicle, in its annual Fitment
Guide, which your tire dealer should have a copy of.
Typically, these are 0-3 psi higher for a Plus-one or Plus-two fitment. Also listed are maximum load ratings at maximum inflation pressure for each size of each tire Yokohama makes. If the recommendations you find leave you with a range and you want to know more specifically, you can experiment. Air, after all, is free. A change of 2-3 psi can completely change a vehicle. An under inflated tire will ride smoothly but feel sluggish, have mushy turn-in and go around corners with high slip angles or just not much grip at all. An over inflated tire will feel harsh on impact and over smaller bumps, and while responding crisply, will lack grip when pushed hard. To an experienced person, these characteristics are obvious even from the passenger seat. Try the minimum and maximum of your target range, and maybe slightly outside it, and decide what you like. In the event that you aren't able to find a recommendation for your car, or the tires on your car are so different from those that were originally fitted from the manufacturer as to be incomparable, we received the following rule of thumb from Oscar Pereda, an engineer for BFGoodrich. He calls it a "realistic starting point," saying it has never been just right, but is a good place to start.
The rule is:
(Vehicle Weight in lb/100) + 2 psi at heavier end + 2 psi all around if
suspension and alignment are stock.
Example: Stock 911, 3,000 lb.
(3000/100) = 30 psi
Add 2 psi all around = 32 psi
Add 2 psi to heavy end = 34 psi at rear
With modified suspension, the result is 30 psi front, 32 psi rear.
"There is no 'golden' tire pressure," Oscar said.
The optimal setting depends on the individual driver and his preferences. For
those inclined to find the ultimate setup for track use, Oscar provided
additional instructions. First, get a skidpad, and plan to be dizzy. Take your
dramamine. Drive in a circle, first one direction, then the other. Measure and
record tire temperature distributions with a probe-type
pyrometer that actually penetrates the rubber, not the "aim and click"
infrared type. You want bulk temperature, not surface temperature, because the
surface cools rapidly while the inner temperature is more stable. When measuring
tire
temperatures, if center is hotter or cooler than shoulders, there is too much or
too little pressure, respectively.
Adjust pressures in 2-psi increments and record all adjustments. Adjust
pressures by differences.
If you start at 30 psi, and want to take out 2 psi, but the tires have heated up
and are at 33 psi, set them at 31 psi rather than 28. The sum of all the changes
made will be very close to the change from your initial cold setting. To check
this, leave the tires alone at the end of the day, let them cool, and check the
pressures in the morning. If at any point during the day you "reset"
your pressures to some arbitrary starting place, you are suddenly lost, and all
the work you have done that day is gone. The ideal caster and toe alignment
settings will give even tire pressures all across the tread. This can be
determined in the same way as the optimum tire pressure. You'll never get the
tire temperatures perfectly even, but the best you
can do is the best you can do, which is the point of the exercise. What works
best will vary from car to car depending on camber curves, body roll, ride
height and other factors. Which tire pressure gauge to use? Oscar told us that,
in general, less expensive gauges tend to deviate more at higher pressures. To
run the vehicle manufacturer's recommended pressure,
accuracy is more important. To dial in a car, precision and repeatability are
more important. For more information, consult your tire manufacturer. The better
tire company websites have extensive technical information. Another good source
is the Rubber Manufacturer's Association. http://rma.org/tiresafety/
=========
| Rimm Size | Size | Pressure | ||
| 928, 928S, 928S2 |
Front Rear |
7J x 16 7J x 16 |
225/50ZR16 225/50ZR16 |
36psi (2,5bar) 44psi (3,0bar) |
| 928S4 |
Front Rear |
7J x 16 8J x 16 |
225/50ZR16 245/45ZR16 |
36psi (2,5bar) 44psi (3,0bar) |
| 928GT |
Front Rear |
8J x 16 9J x 16 |
225/50ZR16 245/45ZR16 |
36psi (2,5bar) 44psi (3,0bar) |
| 928GTS |
Front Rear |
7,5J x 17 9J x 17 |
225/45ZR17 255/40ZR17 |
36psi (2,5bar) 36psi (2,5bar) |
| 18inch |
Front Rear |
8J x 18 10J x 18 |
225/40ZR18 265/35ZR18 |
30psi (2,0bar) 32psi (2,2bar) |

-------------
Tire pressure must be checked at 20C temperature
with a quality air gauge as the inflation pressure cannot be accurately
estimated through visual inspection. For convenience, purchase a tire pressure
gauge to keep in your vehicle. Gauges can be purchased at tire dealerships, auto
supply stores, and other retail outlets.
If your vehicle’s tires are under inflated by only 5 psi it could lead to tire
failure, a build up of internal heat, increase rolling resistance and reduction
in fuel economy. If your tires are over inflated by 5 psi, they could be damaged
when running over potholes or trash in the road. Higher inflation pressures can
improve steering response and cornering stability.
===========
The RDK becoms active at speed greater than 5km/h
for at least 20 meters.
Steady indicator means one wheel sensor have reported a low pressure
Flashing indicator means one wheel sensor has reported a low pressure...OR....
speed was over 50 km/h while a low pressure warning existed.
The manual calls for determining the pressure trigger point of each sensor, and
make actual pressure 0,3bar over the trigger point. This is not so easy if you
do not have access to a diagnostic tool to evaluatie the RDK sensor response
over the diagnostic bus.
_______________________________________________________________
Procedure... for 16" wheels, ambient temperature 20C, tires not "hot"
Step 1:
Air front tires to 30 psi (2,0bar) and rear to 38 (2,6 bar).
Drive around the block not exceeding 15 mph (25km/h).
Step 2:
Air the fronts up to 42 psi (2,9 bar) and rears to 50 (3,4 bar).
Drive around the block not exceeding 15 mph (25km/h).
step 3:
Bleed fronts down to 36 psi (2,5 bar), rears to 44 (3,0 bar).
Pressure must be equal on both sides (left/right)
You are done.
________________________________________________________________
Procedure... for 17" wheels, ambient temperature 20C, tires not "hot"
Step 1:
Air front tires to 30 psi (2,0bar) and rear to 30 (2,0 bar).
Drive around the block not exceeding 15 mph (25km/h).
Step 2:
Air the fronts up to 42 psi (2,9 bar) and rears to 42 (2,9 bar).
Drive around the block not exceeding 15 mph (25km/h).
step 3:
Bleed fronts down to 36 psi (2,5 bar), rears to 36 (2,5 bar).
Pressure must be equal on both sides (left/right)
You are done.