Hi all, I just finished my window bumper repair today..... things finished
well but took quite a while (6 hours) due to a few snags. He is the whole
story and some tips I learned along the way.
First, start early in the day so you have extra time in case you run into trouble.
Tools needed...... bring your whole tool box.... good for getting out of jams.
But you need an Allen wrench set, also I made good use of a long claw device
and a long magnet stick ( these helped me big time when I dropped bolts or
the Allen wrench.... twice...into the depths of the door ), a long set of
curved needle nose pliers are a must unless you have tiny hands and arms
nearby......hey kid come here!!..... I had to have the pliers to hold the
bumper (that is closest to the hood) while I threaded the bolt that holds it
in place back on. The rear bumper was not a problem at all......lots of
room to maneuver through the center hole in the door.
First I lowered both windows all the way. Then I removed the center panel in the door as well as the lock covers, and the inside door handle covers, released some of the top door clips by pulling outwards to give a little more room to SAFELY remove the inner window weather stripping.....just run your finger underneath and apply pressure upwards and it will pop off the ridge, pull out the front part by the mirror first and work your way back until you are an inch or two past the last bumper....STOP THERE.....you do not need to go any further and save yourself the trouble. Then I loosened, actually on the first door I totally removed the bolt and the two washers ( mistake ).....you should leave the bolt and washers hanging in there slot until it is time to re-install the bumper, this will make it easier to line things up and get the bolt started. After the bumper unit was released from the bolt I just pushed it down and let it fall into the bottom of the door (this is the front bumper and it is tough to get a hand in there ) then I used my $1.00 flex claw ( you know the tool that is a long flexible coil and you push the button on the top of it and a claw spreads out to grab things) and grabbed the bumper and handed it to my other hand at the center hole in the door. Make sure you have thick paper or cardboard to put between the metal bracket that held the bumper and the window or you will damage your tint film or window glass. The rear bumper you can grab with your hand and just slide it down and out the hole. I took a good look at the bumpers, they were worn right to the metal piece. I cut strips of Velux, a synthetic material that looks stock and is soft and durable.....total cost of the material need for all 4 bumpers was .50 cents at Fanny Fabrics. When cutting the strips, cut them a little longer and a little wider than you need and trim them after the glue has dried.....much easier this way, no hassles. I used 3-M adhesive spray #77.....worked great. I sprayed the bumper old felts, waited 20 seconds or so and placed the new strips on top and pressed into place....no problems. Just spray the bumpers, NOT the strips.....glue will get where you do not want it and it is not necessary. Also, wear rubber gloves.....I am missing my finger prints right now from scrubbing off the extra 3-M #77. I started to talk to my neighbor while the new bumpers were drying. The bumpers are a part you DO NOT WANT to but new from the dealer......they cost $30 a piece and are NOTHING.....you will be pissed off if you buy them and put them in yourself. It is just a little metal bracket with some thick felt wrapped around it. The cutting and gluing of the new felt took 5-10 minutes for all four.
After my neighbor left it was time to put in my new bumpers. Remember I took out the bolt and washers?..... I put the 3 pieces together and wrapped a piece of electrician tape under and over the top......stuck my Allen wrench into the top, now it is there snug and I can lower the set up into the mounting bracket as I line up the bumper hole with it (after the bolt is threaded, use your needle nose pliers to remove the tape)......worked pretty well until one set up slipped off and into the depths......I tried my magnet stick but to no avail......so off came the door panels and I found it by the front access hole. I took the opportunity of having the door panel off to inspect my previous zip-tie fix of the widow guides....they need a few more zip-ties and better spacing. I also used my 3-M #77 spray to put back up my moisture barrier (plastic sheet) worked great. The front bumper unit is a bit of a pain in the ass to replace....I do not know what grown person can fit there hand up in the space provided....I used some long, angled needle nose pliers and did some maneuvering but managed.....GOD I LOVE THESE CARS. The rear bumper went in with little trouble and I tested the window......clunk and rattles.....the bumpers need to be properly set up/adjusted so the window slides smoothly into the top of the door seal and the window is not loose and any point from bottom to top. Basically I just put pressure with my finger, pushing the window out and slide the bumper out away from the cockpit of the car, and tighten down on the bolt.....make sure the bumpers stay flush with the window......test it out.....and tighten down for good Put the inner window seal back in and start reassembling what ever you took apart. Clean your windows.....they have dirt and grease all over them.
NOTES ; the second window went much faster with my learning experience on
the first one. I left the bolts in the slots and lowered the bumpers out.
I loosed the door fixtures right away and popped out the top door snaps to
loosen the top of the door panel and slid out the inner window seal. I
already knew what to do as far as setting up the position of the bumpers
before bolting them down for good.
Hope this helps someone save some time and do a good job.
I want to thank all of you who took time out to e-mail me info, especially Dan Brindle tips and write ups on the 928 tips page.....professional stuff.
Take care, Dan 87 5 speed , black/black w/RMB & cat by-pass
========
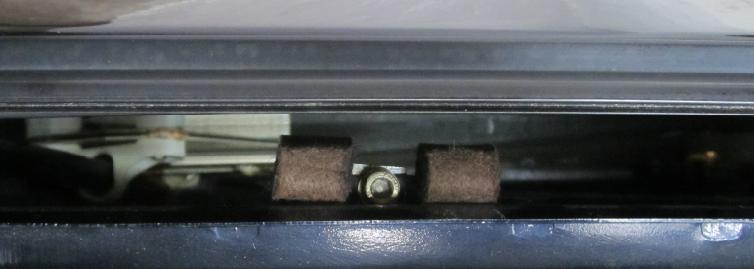
Each window has 2 of these guides. Easy to access; window down, lift up the
inside/lower window rubber piece (start at the front of the door) and it will
expose them. As you can see, they're held in place by one cheese-head bolt.
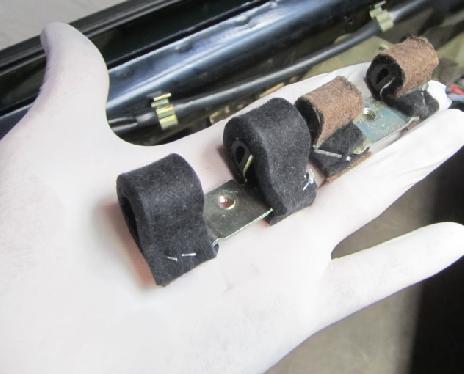
FWIW, I wouldn't bother with new guides. Just remove the old felt and glue on
new (Welwood contact cement works great.) I tried new guides but as you can see,
they're just too big and put too much stress on the window and motor.
PET the part number is 928 537 085 03 if you want to buy original units

NoVector
===
When I was refurbishing window mechanism (new nylon guides) I replaced the
felt rollers with new parts. The felt on the new parts was so thick I was
worried the resulting strain/tightness would break the glass! The post you
linked mentions a similar issue with the new parts.
I removed the new parts and decided to re-felt the originals. Got a sheet of
adhesive backed black felt from local arts and crafts store which was thicker
than the original now very worn felt (it was worn pretty much to the roller).
I’ve just grabbed the felt sheet and it measures around 1.5mm thick or 0.06”.
The rebuilt rollers have been fine for past couple of years since install. If
the felt wears fast (to be honest I’ve not even looked) then I’ll just re-felt
them as that one sheet will be enough for stores of rollers!
I don’t know if Porsche will change the design of the new part - the felt is
really ridiculously thick compared with the original.
====
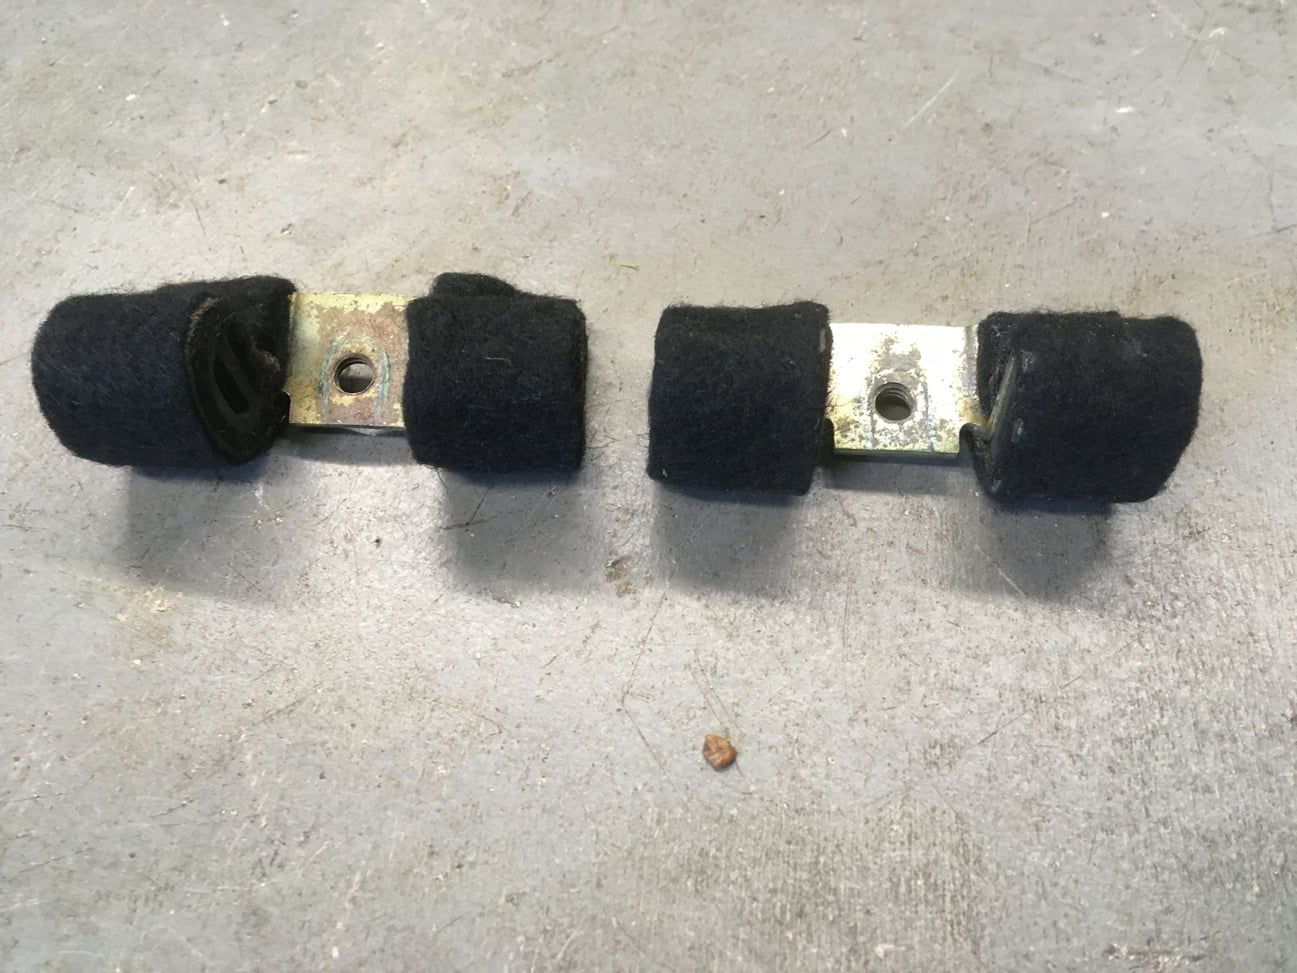
Found some pics I took of the original rollers, and after replacing the felt. I think I pulled off the old felt and cleaned off as much old glue as I could..
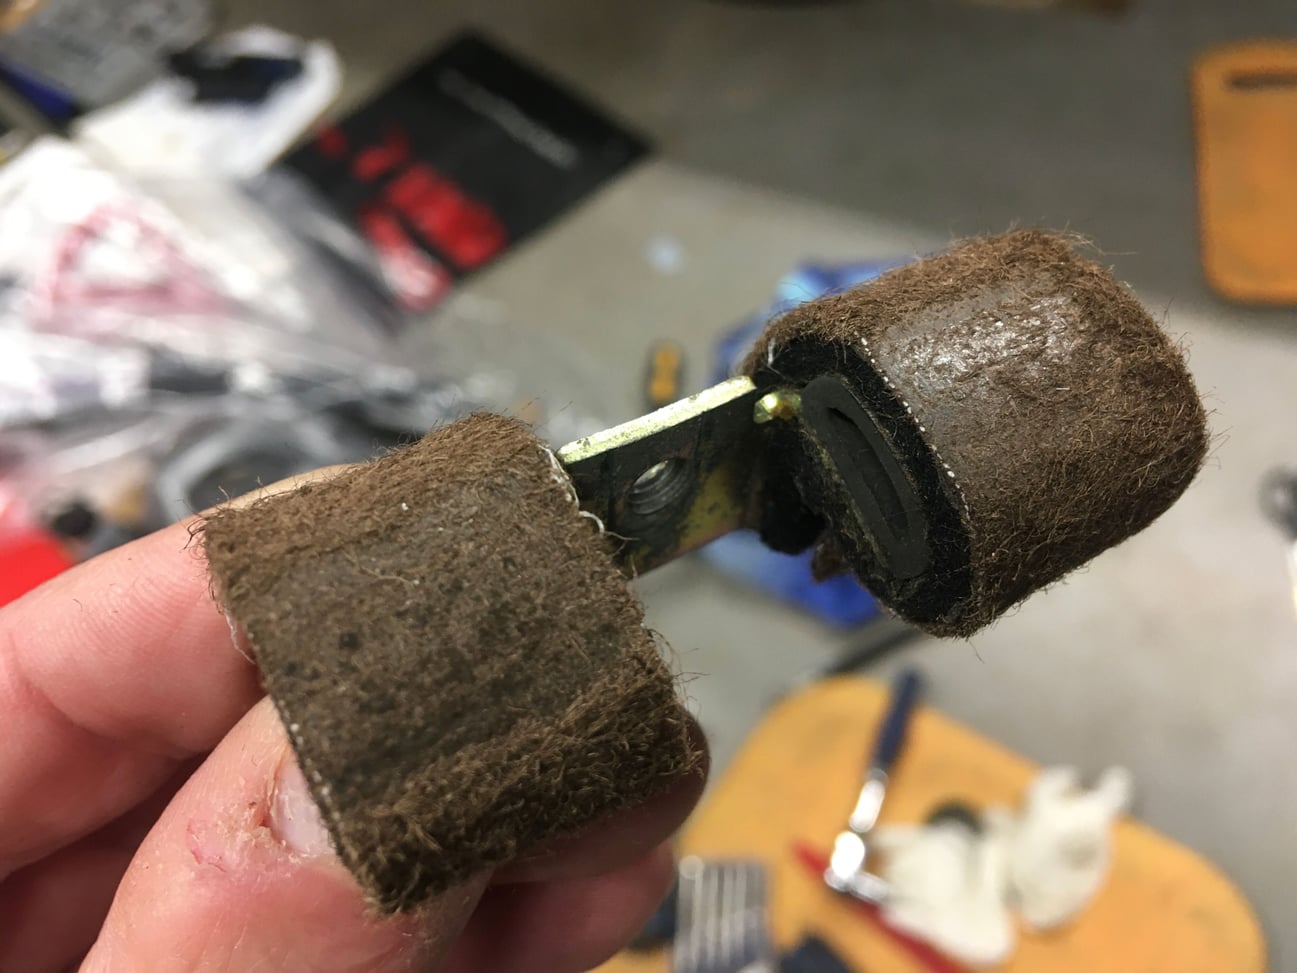
StratfordShark.
===
6mm thick, 20mm wide.
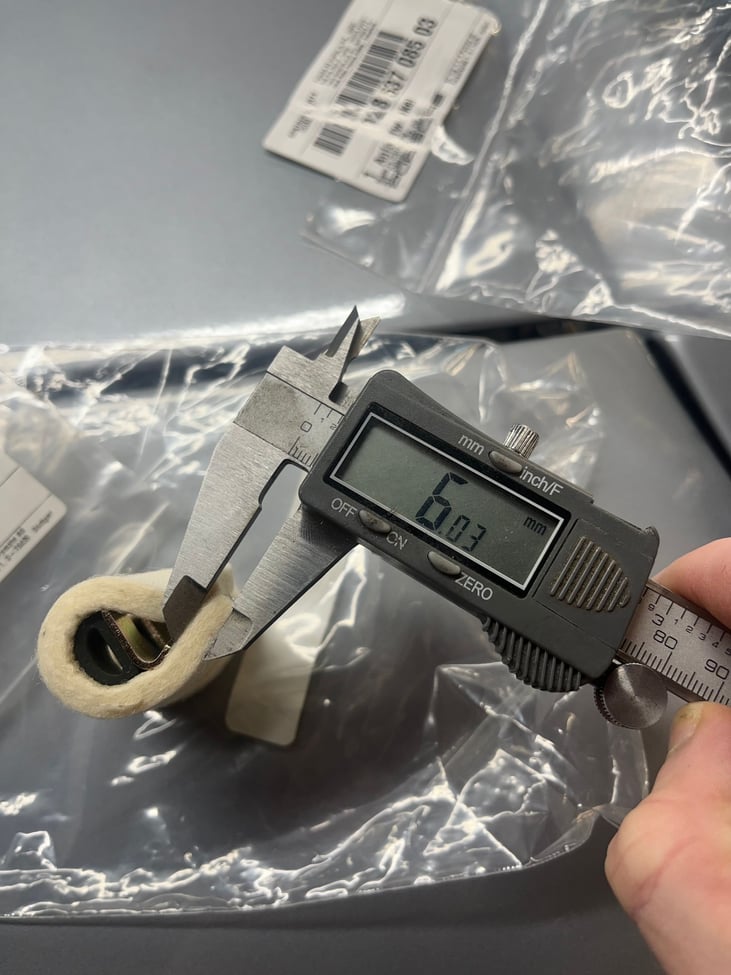
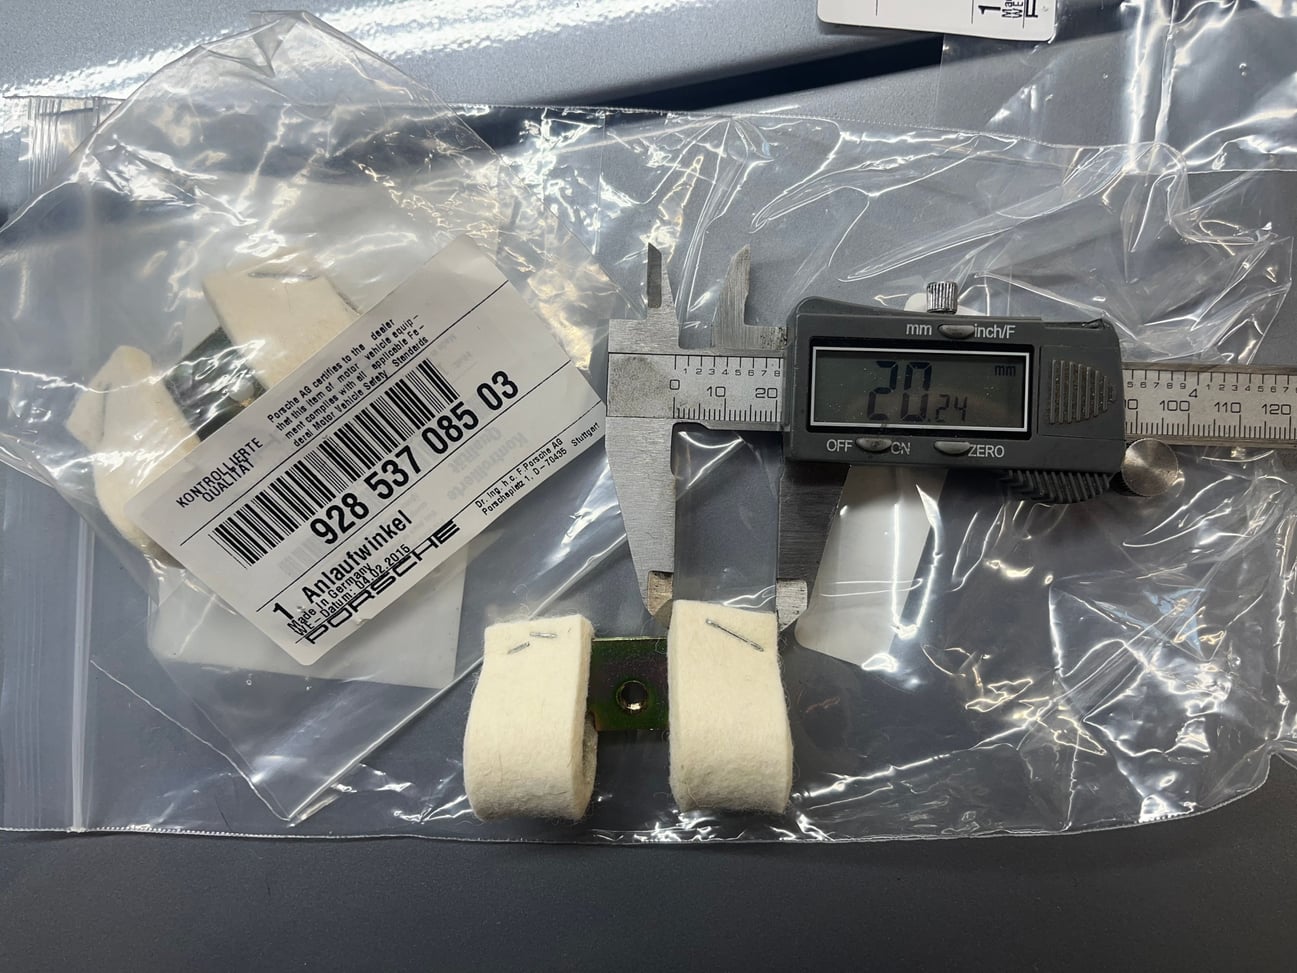
TheBeerBaron
===