+/- 0.1 mm lift rather than 1.6 mm.
Also note - these values are ONLY for the '85 and '86 32-valve engines.
Wally Plumley
928 Specialists
www.928gt.com

I just checked the cam timing on my car a few weeks ago. Checking and
adjusting it isn't anything too mysterious or difficult to do. The hardest
part is probably removing the passenger side valve cover.
Before you start, the timing belt needs to be at the proper tension, and
both valve covers need to be removed. To check the cam timing on the
passenger side cylinder bank you need to turn the engine to top dead center
on the compression stroke for cylinder number one. Mount a dial indicator
to the cylinder head so that it will measure the amount of lift for an
intake valve on cylinder number one. You'll need a bent tip on the dial
indicator to be able to get it on top of the valve lifter, and the dial
indicator must be mounted so that it measures perpendicular to the valve.
If the dial indicator is at some angle to the valve stem you won't get an
accurate measurement of the lift. Slowly turn the engine in the direction
of normal rotation until the valve has opened the specified amount. On 1985
and 1986 model year cars the engine should be turned until the valve has
opened 1.6 +/-.01 mm, and on the S4 cars the lift should be 1.8 +/-.01 mm.
The value for the Club Sport and GT cars is 2.8 +/-0.1mm, and for the GTS
it's 1.83 +/-0.1mm. If you turn the engine too far you'll need to go around
two revolutions. You can not just back up until you get back to the
specified valve lift. When you have turned the engine so that the specified
valve lift has been reached, the pointer on the front of the engine should
be pointing to the 20 degree mark. If it's not, you'll need to adjust the
cam timing.
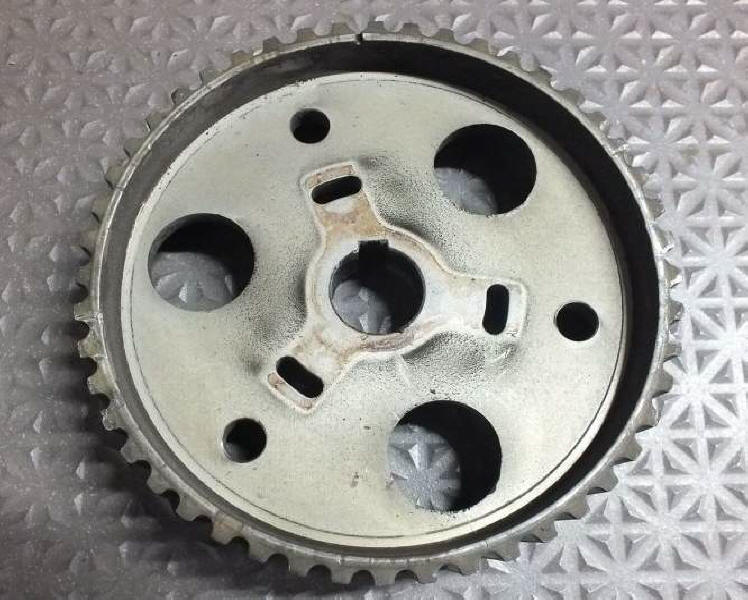
To adjust the cam timing you have to remove the ignition rotor for that
cylinder bank. Install and tighten three 5mm x 15mm bolts in the holes for
the ignition rotor. This is to keep the cam sprocket from moving in
relation to the cam until you want it to. Loosen the bolt on the front of
the cam sprocket that holds the sprocket to the cam. You must counter hold
that kind of oval shaped nut behind the bolt with a wrench when you loosen
the front bolt. Check to make sure that the valve lift is still at the
specified value. If it's not you'll need to rotate the engine until you get
the proper valve lift again. Once the valve lift is at the correct value, loosen those three 5mm bolts you put in place of the ignition rotor. Turn
the engine slowly in the required direction until the pointer on the center
timing belt cover is at the 20 degree mark. The cam sprocket will move when
you do this, but the cams should not. There is a woodruff key in the cam,
and a wide slot for it in the cam sprocket. This will keep you from setting
the cam timing too far from where it should be, but still allow enough
movement for adjustment. When you have the engine at the 20 degree mark,
tighten the three 5mm bolts to keep the sprocket from moving in relation to
the cams. Counter hold the nut on the front of the sprocket and tighten the
bolt on the front of the sprocket to 47 ft/lbs. Turn the engine two
complete revolutions until the valve lift is again at the specified value,
and check if the pointer is at the 20 degree mark. If it's not you'll need
to repeat the procedure.
Checking and adjusting the driver side cylinder bank is basically the same.
On that side the valve lift is measured on an intake valve for cylinder
number 6. The valve lift value used for checking this side is 2.0 +/-.01mm,
and is the same for the 1985 and 1986 model years as it is for the S4. The
value for the Club Sport and GT is 3.1 +/-0.1mm, and for the GTS it's 2.08
+/-0.1mm. The engine is turned so that cylinder number 6 is on it's
compression stroke with all it's valves closed, and then slowly turned
until the specified valve lift is reached. The pointer at the front of the
engine should again be at the 20 degree mark when the valve is at this lift.
Don't expect to get any massive power gains by adjusting the cam timing.
The Porsche engineers did not miss a bunch of extra horsepower because of a
slight change in the cam timing. What changing the cam timing will do is to
move the power curve of the engine in the RPM range, not increase power.
Advancing the cam timing will shift the power curve lower, and retarding it
will shift the power curve higher. Advancing cam timing might give you a
little better start off of the line because peak power occurs at a lower
RPM, but then you'll have less power at the top end. Retarding it will have
the opposite effect.
In my case the driver side cam timing was okay, and the passenger side was
off by about 3-4 degrees. A mechanic for a previous owner had been in there
before, so I assume that's why the one side was off.
Mike Schmidt
=======
The positions of the cam timing marks at TDC on the crank are determined by
the length of the timing belt and the distance around the sprockets, and these
positions are not adjustable.
The positions of the camshafts driven by those sprockets are adjustable on the
32-valve engines. The camshafts can be moved within the sprockets, correcting or
adjusting the camshaft timing. The procedure is given in the Factory Workshop
Manuals, with illustrations. If you don't have the manuals, contact Jim
Morehouse and get the 928 tech info CD set that Jim has prepared.
"porken", a RennList Discussion Forum member, has developed a way of installing
adjustable sprockets on the 16-valve engines, and was selling kits of the
necessary parts.
http://forums.rennlist.com/rennforums/showthread.php?t=131058&highlight=adjustable+sprockets
Note that you have no way of knowing whether the cam timing on your engine is
correct or not, except by pulling the cam covers and going thru the cam timing
procedure!
Here is a brief synopsis of the procedure:
For an '85 or '86 four-valve engine:
4a. With the crank on TDC-firing for #1, mount a dial indicator so as to measure
the lift of an intake tappet on cylinder #1. The indicator must be mounted
directly in line with the valve stem, which will require an off-set attachment
for the indicator to get around the cam. Preload the indicator by about 5mm,
since valve lift will be down, away from the indicator, then zero the dial.
4b. Rotate the crank about 540 degrees (about one-and-a-half turns), and start
watching the indicator. Stop when the indicator reads 1.6 +/- 0.1 mm.
Note - NEVER turn the crank backwards!
4c. Check the crank dampener - the 20 degrees ATDC mark must be exactly on the
pointer. If it is, move to the other cylinder head.
4d. If the crank is not on the 20 deg mark, remove the distributor rotor, and
firmly install three M5 by 15 mm bolts in the rotor mounting holes.
Loosen the cam sprocket retaining bolt, counter-holding the washer. Do not let
the camshaft move!
4e. While holding the camshaft in place, slightly loosen the three 5 mm bolts
enough to allow the sprocket free movement on the drive flange and the camshaft
(the Woodruff key slot in the sprocket is slightly oversize to allow limited
movement). While holding the camshaft in place, with 1.6 mm lift showing on the
dial indicator, move the crank until the 20 deg mark is perfectly aligned with
the pointer. Note - NEVER move the crankshaft backwards! Louis Ott suggests that
it is easier to put the crank on 20 deg ATDC and to move the cams to get the
correct lift, using the cast-in flats, and I think that he is correct. Tighten
the three 5 mm bolts.
4f. While carefully counter-holding the washer, and ensuring that the camshaft
does not move, tighten the cam bolt to 65 Nm (47 lb/ft).
4g. Rotate the crank almost two turns, then carefully watch the dial indicator
and stop at 1.6 mm lift. Check to ensure that the crank is exactly at 20 deg
ATDC.
4h. Remove the 5 mm bolts and reinstall the distributor rotor.
4i. Repeat steps 4a thru 4h on an intake valve for cylinder #6, but use 2.0
+/- 0.1 mm lift rather than 1.6 mm.
Also note - these values are ONLY for the '85 and '86 32-valve engines.
Wally Plumley
928 Specialists
www.928gt.com