DR sent me the Official Timing Belt Tensioner and I have been playing :-)
The object of my games is to make a cheap alternative
Here are my results, please anyone feel free to comment ( constructively
that is)
Theory.............
Tension is easy to measure in a belt when access is available to the points
of external force being applied. If we could somehow measure the side load
in the camshaft bearings for example and then divide it in two we would have
a figure of belt tension. This we cannot do, so other methods are needed.
The approach is based on the elastic properties of the belt material. As
the tension is increased the belt stretches.
So if at a given tension the overall length of the belt is X mm. then if
we increase the tension of the belt by adding a given extra belt length path
then we can calculate the original tension ( assuming linearity in belt length
to tension over this range)
So if we increase the distance by which the belt must travel , by such
means as the 'wiggle' in the Official Tool, by a small percentage, dt (%), then
the tension will increase by dt as well. Knowing dt will enable us to know the
value of T, the actual belt tension.
Of course in practice the actual values of tension and wiggle are replaced
by easy read number scale ( 0 to 10 in this case)
All we need is a tool which will 'deform' the straight section of belt by
a fixed amount and then measure the force needed.
Assumptions
Introducing a wiggle in the belt ( or a twist as per the finger thumb method)
has its results also dependant on certain belt material properties, properties
that can vary with age, temperature, and possibly oil contamination and
humidity. It is probably best to assume the Official Tool and all derivatives
thereof are most accurate on a new belt
Experimentation
Well I did several things
:-)
First I ran a a finger thumb method test, setting tension by the Finger
thumb 90 degree test method several times and recording the actual tensions with
the Official Tool
Results, not too accurate, ranging from 3.0 to 6.3 ( Book figure of 4.5 is
correct). Whilst this method puts the tension ion the correct order of
magnitude it is NOT at all accurate ( no surprises here)
Next I made a little device with telescopic tubes and springs and
measuring rule, the idea was that by applying a known pressure I could adjust
the
tension such as to allow the belt to deflect a known amount
After an hour of welding, grinding and making this thing, it was only a
little more accurate then the finger thumb method. Results of same test range
from 3.6 to 5.8, NO ***** good
Not to give up and realizing that the problem was not with the method but
with the accuracy with which reading can be made I decided to go for a variation
of the Thumb twist method
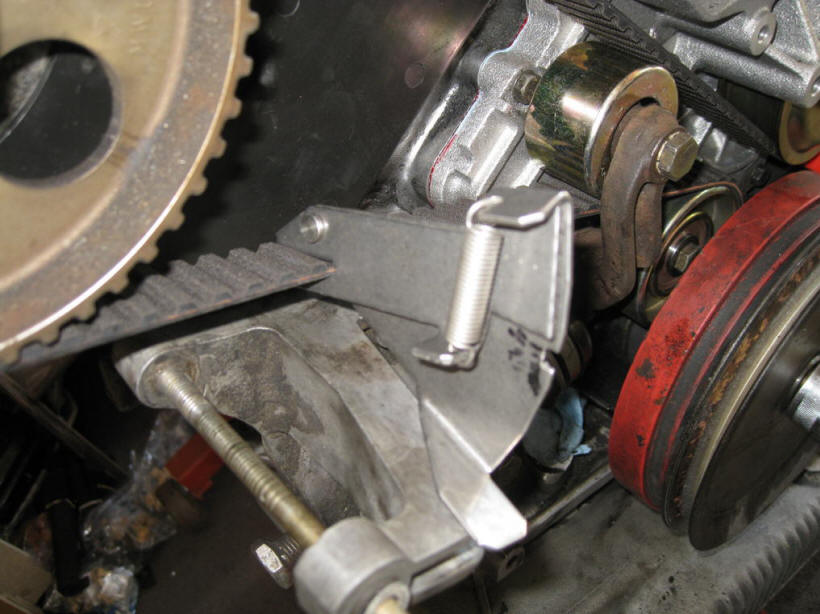
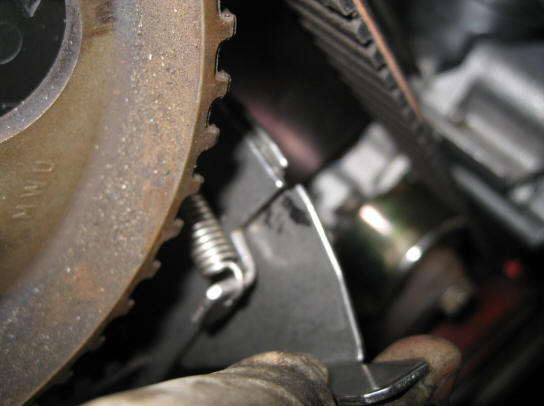
I cut a section of clear acrylic about 1.5 inches wide and I guess 8 inches
long ( just fits between belt at air pump and the radiator. I cut a slot so
it would fit snuggly between the slots on the belt. then I set the tension
with the Official Tool to 4.5. Sitting this acrylic on the belt in place of the
Tool, it twisted the belt by its own weight about 1.2 inches down from the
horizontal. I then ground the far end of the acrylic to 1.2 inches. Now ,
by simply setting the level and marking with tape on the radiator, all I have
to do is to slide my acrylic tool on the belt and adjust the tension until
the top edge of the acrylic is in line with the level mark. Its own weight
drops it that much. This is incredibly accurate, simple and cheap. I found
repeatability excellent. Setting up wit this tool gave results of 4.4, to
4.6 every time, in fact it may be the Official Tool that is not very
repeatable.
So, if anyone wants more detail, measurements or whatever, just ask.
This is a cheap easy accurate method to set tension, with greater
readability than the dial gauge Official Tool
Anyone see any problems with this method?
I found the belt twist to be approx 10 degrees, so belt properties are
kept to a minimum
Phil
==================================
The belt properties have more effect the more the belt is distorted from
its natural line
Therefore the less the deflection caused by the measuring tool the less the
belt properties have effect on the measurement. This is what is wrong with the older factory tool, that twists the belt.
My tool deflects the belt very little, but is long to 'magnify' this
deflection and make it visible
My tool easily measures the change in tension of the whole belt when
another part of the belt is twisted with finger and thumb
The Official Tool can see this too, but is seen as less of a change on the
dial.
Therefore I conclude my tool is more accurate and is suitable for used
belts as well as new
Ill be making a drawing today and making it available for any who want to
see it
Phil
=======================================
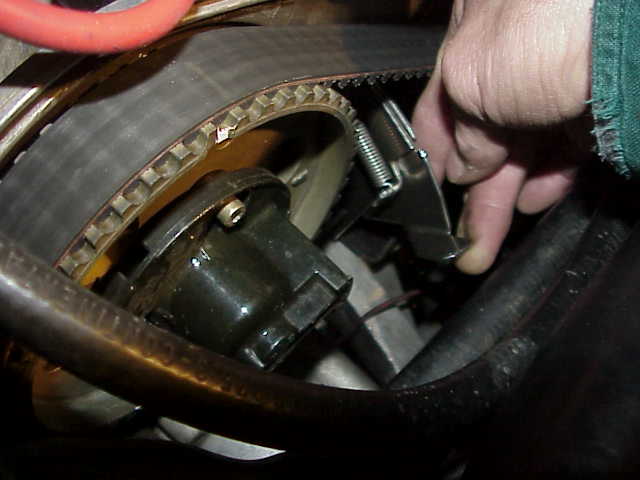
Also what exactly is the official tool measuring,
> tension around the whole path of the belt or just deflection between 2 points on that side only?
Here we go again , the tensioner directly tensions the timing belt from the
crankshaft to the passenger side camshaft drive pulley . The rest of the
belt is running over toothed gears , the tension changes as each camshaft
rotates compressing and releasing valve springs . This is why the engine
must be at TDC to measure tension . The crankshaft gear is pulling down from
the drivers cam gear and turns the oil pump gear along the way . The farther
away from the crank gear as you follow the belt up around the oil pump to the
drivers cam around the water pump pulley to the passenger cam around the
tension pulley then back to the crank pulley the more work the belt must
perform ; the load accumulates . This is why the drivers side camshaft is
the one that breaks when the belt is too tight , the passenger cam gear only
has the load of turning that camshaft the drivers cam has the load of
turning both camshafts and the water pump as the belt is pulled down toward
the crankshaft . Which also brings up the warning never to turn the belt
backwards by turning the crankshaft backwards . The tensioner is designed to
carry only the load of the loose side of the belt and not all the force
needed to rotate the camshafts . Turning backwards can damage the cup shaped
bi-metallic washers in the tensioner . The tension at the water pump
pulley
driven by the smooth back side of the timing belt varies depending on the
alternate pushing and pulling affect of compressing and releasing valve
springs on each camshaft . The belt acts much like a bicycle chain with half
of it tight the other half just going along for the ride . The fact that it
is a toothed belt running on toothed gears means the length of the belt from
the crank gear all the way to the passenger cam gear cannot change without
jumping teeth , the tensioner is playing with the part from the passenger
cam to the crank . And most significantly we are measuring the tension of a
non- running engine , I believe that when running there is little or no
tension at the tensioner examining the idler pulley you will note that it
does not touch the belt but is needed to keep the belt from hitting it's
self as it runs up to the passenger cam then back down to the water pump .
For the belt to hit it must be loose . The later style tensioners have an
internal baffle / damper to control flutter to keep the tension roller in
contact with the belt to keep the warning light from coming on . Has anyone
run their engine with out any covers and observed what the belt is doing at
higher rpm ?? maybe use a timing light for the stop motion to better see
deflection and cyclical motions, please do not drive on the street this way
.
Jim Bailey
928 International
jim@928intl.com
======================================
Hello
all,
If you go to the 928 International site and look in the accessory area there
is a new product called "Aftermarket Belt Tension Tool". Those of you
that
know me know that I can't stand taking my car to somebody when there is a
way to accomplish a maintenance job myself. Those of you that really know me
know that's an understatement ;) That's how this tool was born. If
interested use the link below.
http://www.mailordercentral.com/928intl/products.asp?dept=102
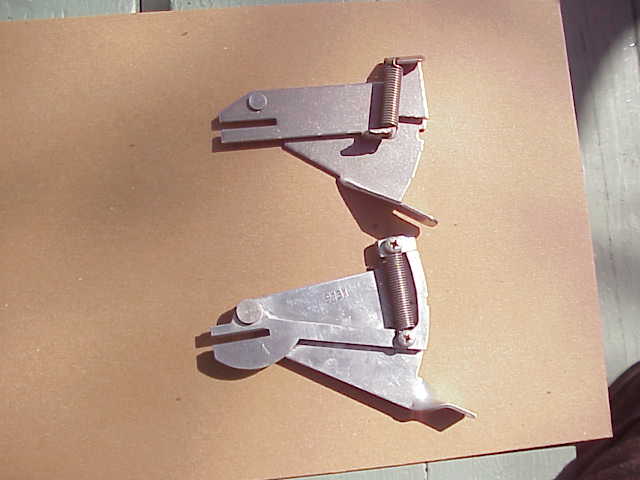
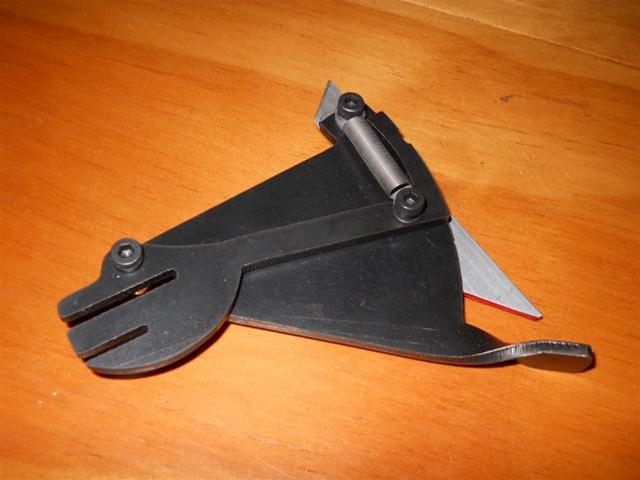
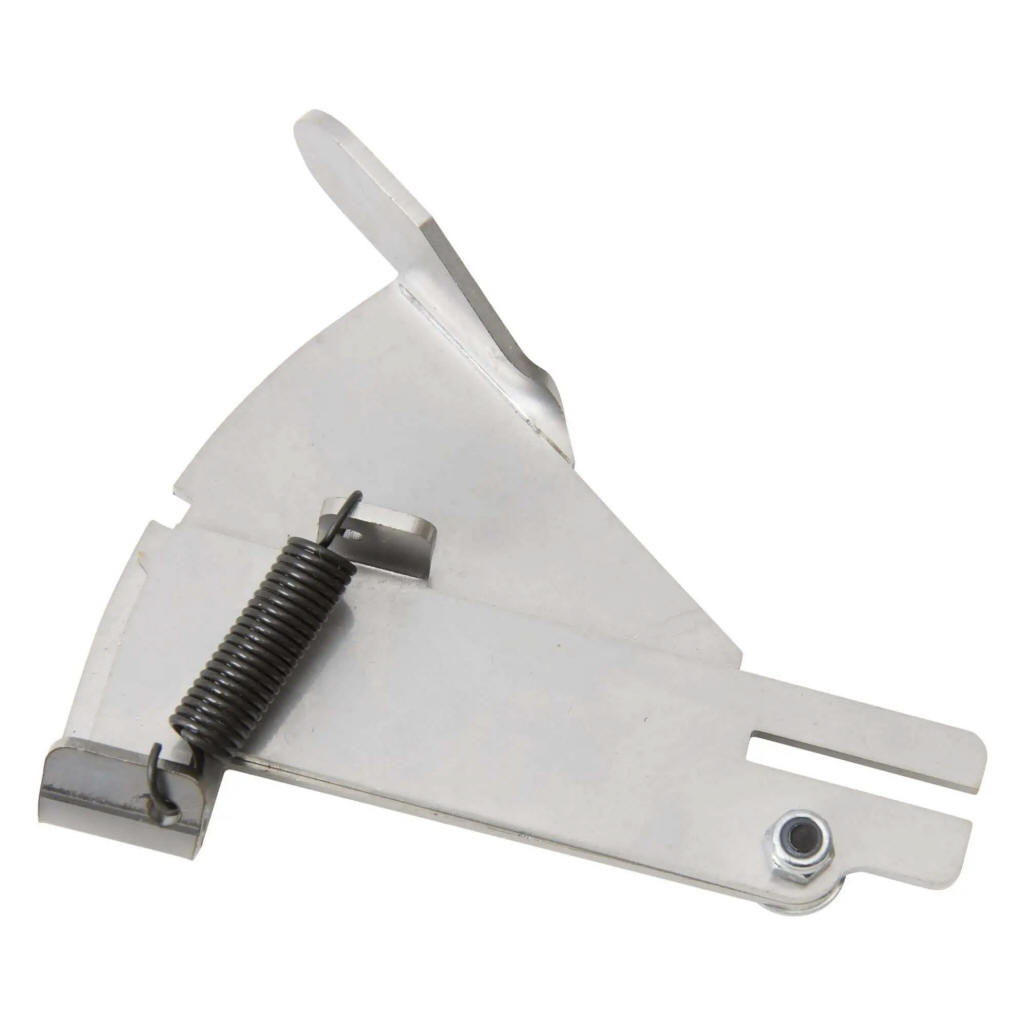
It's a faithful but updated copy of the original cam belt tensioning tool.
The construction is entirely stainless steel so it can't rust or go out of
calibration. The tool is elegantly simple and comes with detailed
instructions with clear pictures featuring my 79 WIP and also an S4.
Thanks to Mark Anderson for helping to get this going and for putting the
finished product in the virtual catalogue.
Contact me with any questions or follow the link above.
Regards,
Jay Kempf
=======================
Jay,
I just bought one of your $50 t-belt tension gauge tools from 928
International. Tried it out this weekend on a friend's '87 that had just
reached 2000 miles after having a new belt put on. As might be expected,
the reading was a bit low, just outside the lower range. So he adjusted
the
tensioner about 1/4 turn and that placed the gauge right in the middle of
the range.
After using that other, high-dollar tool a few times I've got to say I like
yours a lot better. It's nice to have a tool that:
1) Gives consistent readings from one try to the next
2) Gives consistent readings when being tried by two different people
3) Doesn't cause a sore back from hovering over the engine trying to get the
thing perfectly level, not touching anything, etc.
Simplicity is good.
Well Done,
+Greg Nichols
==============
Wow
Greg,
Thanks,
I was away from the computer for a few days (visiting Scott Mohr and family,
thanks for the hospitality) so this response is a little late.
Keep us all updated as the belt settles. The great thing about having a tool
is you can check it every 1k miles if you want.
A lot of people asked about using the new tool on an S4 and certainly that
was done for about a year before the tool was introduced but independent
verification is welcome and would give people good feedback. I am biased of
course so my opinion only counts like any manufacturers opinion that wants
you to buy their stuff.
Glad you are pleased and thanks again for the kind words.
Jay Kempf
-------------
I set
all of the belts I do to the top of the edge on the Kempf tool, this should
cross to the 9201 tool and be at about 5.0
My Kempf tool, when the window is closed, is 5.3 on the 9201 tool. 5.0 is about
80%.
I set new belts to "closed" (5.3) and retension to 80% (5.0).
I agree with Mr Merlin for 32V cars. Setting your belt in the center of the
Kempf tool "notch" or "window" works but it's not 5.0 according to my calibrated
9201.
I've checked the Kempf tool with the 9201 tool about a dozen different times. On
MY Kempf tool, 90% of the window covered is 5.3 on my friend's 9201 tool. I put
a paint line on my Kempf tool at that point, and always reset the tension to
that line.
My Kempf tool looks like yours. Mine is calibrated against the Porsche 9201 tool
to the high side so far that hardly any of the window shows (for a 5.0 setting).
In the center of the window is about 3.0...which works ok on older non-32V cars,
since the tool was designed using one of them. However, If I understand you
right, and your tool indicator doesn't even reach the window. I'd guess that
you're about to throw a belt.
Better watch it. That would be way too loose....If I understand what you're
describing correctly, you could be walking soon and facing a huge repair bill.
If my belt were that loose, I'd either adjust it correctly before driving or
have it tailored until i could.
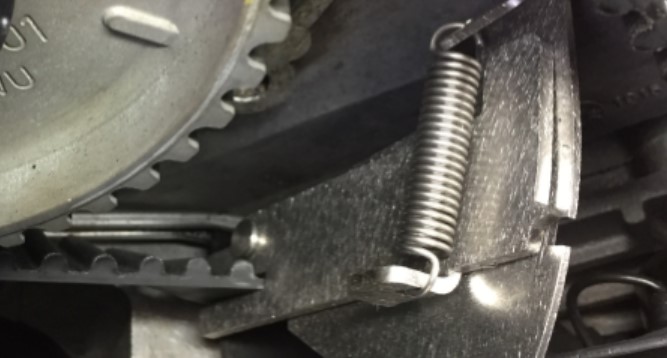
Way to
measure belt with Kempf is to use 9th free opening counted from cam gear. This
is right at edge against center cover and on top of tensioner housing.
-----
calibration is easy with the Kempf tool!!
I just did a test with a 5lb weight and some speaker wire. no disassembly
necessary. Just feed the wire through the Kempf tool and hand the weight. 5lbs
goes to full scale.
check out you Kempf tool !!!
Mark Kibort
==========
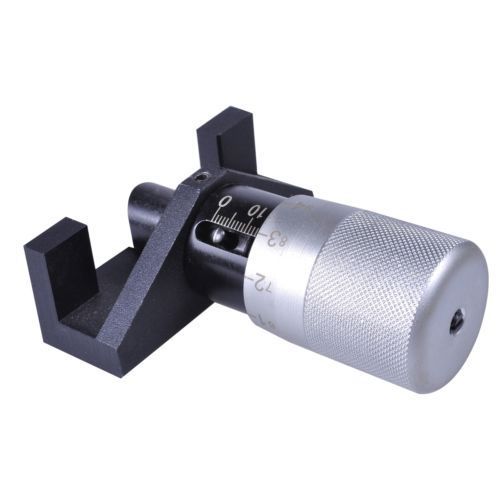
Here is a "universal" tension check tool. no experience with this however....