You may see two different filters/seal sets with Mercedes numbers: 126 271 108 0 (left) and 126 277 029 5 (right) which are compatible.
![]()
![]()
This is sometimes also offered as compatible 126 277 029 5, but it is not! The seal does not have the right shape.
![]()
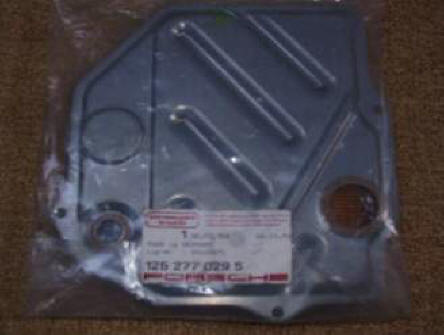
126.277.029.5 Mercedes part ... oh, and buy yourself a new seal for the pan !
Procedure 1
I recently did this service on the same '89 S4. Here's some things I learned
that may help you:
1) Raise the car up at all four corners so it's roughly level on the stands.
This will make refilling fairly simple and accurate.
2) I used Mobil-1 ATF, which is Dexron compatible. Any quality ATF will be fine,
so long as it is Dexron compatible. I used the Mobil-1 after having great
results in my other cars with it.
3) The pan bolts up with a formed neoprene or rubber gasket. It's a typically
stout, over-engineered Mercedes piece; Very Nice.
4) The plastic reservoir has two metal inserts molded into the bottom to receive
the mounting screws. They can be damaged if you over-torque them on
installation.
5) The tube to the plastic reservoir may need to be loosened to allow the pan to
drop free.
6) I purchased a transmission filter service kit, which includes the filter, a
pan gasket, and two aluminum washers for the drain plugs.
After the car is raised up, you'll need to rotate the motor to expose the drain
plug on the torque converter. I used a socket and handle on the front crank
pulley. Remember that the motor should only be rotated clockwise; If you go too
far, go around again rather than try to 'back up' the engine. I read this
warning someplace but don't remember where. It took me several times to get the
plug exposed through that little opening in the cover.
Drain the fluid from the sump and the converter. The manual recommends that this
be done with the transmission hot; beware that hot ATF will give you a nasty
burn if you get some on yourself. Also, don't loose those two plugs into your
catch sump.
Once all the dripping has stopped from those two plug holes, use the new
aluminum seals and replace the plugs. Tighten to specification.
Remove the two screws that secure the plastic bottle to that pan bracket.
Cut the plastic tie that secures the wire harness to the side of the pan.
Remove the bolts that hold the pan to the transmission, and lower it carefully.
Best to lower the side away from you first, so that any remaining ATF will pour
somewhere other than on you. Carefully drain the remaining ATF into your catch
sump, and inspect the bottom of the pan for debris. A little fine gray powder is
the remains of the metal intermediate plates in the clutch packs. Anything more
than that is cause for concern.
Remove the screws that retain the filter from the valve body in the
transmission, noting their position for reassembly. Prepare your new filter by
saturating the media with ATF, and install it with the new gasket/o-ring on the
suction tube.
Clean the pan completely with a lint-free towel, and make sure that there are no
stray bits of dirt or fiber remaining around or under any of the bolt bosses in
the pan. If you use mineral spirits as a cleaning solvent, make absolutely sure
there is none left in the pan when you reinstall it.
The rubber gasket is used without any sealer. Use a lint-free towel to wipe the
mating surface on the transmission housing, and reinstall the pan. Draw the
bolts up evenly so that the gasket is just touching the housing, then carefully
turn them an even number of turns until you feel resistance. Use your torque
wrench to draw them up the last little bit, using a diagonal pattern to keep the
pressure on the gasket even.
Reinstall the reservoir on the bracket, and snug up the mounting screws. These
are very delicate.
Tie the wire harness back to the side of the pan with a new wire tie. I believe
the purple ties add a bit of horsepower, but a black one would probably be OK in
a pinch.
I found a pump intended for gear oil service, one that's designed to screw into
the top of the gear oil bottle. In the U.S., these are sold under the "Sta-Lube"
brand name at most parts houses. I modified the length of the suction tube at
the bottom to accomodate the size of the ATF bottle, and also added a longer
discharge hose, about six feet. I tied the hose to the nearby exhaust pipe with
the end in the reservoir, and pulled the other end out to the little pump and
bottle next to the right rear wheel.
Once all the hoses were rigged, I started s-l-o-w-l-y pumping the ATF into the
reservoir. Too fast and it won't flow through that little screen and it ends up
on the floor. I was able to lay under the side of the raised car while watching
the clear hose and the level in the reservoir.
When you get to the point where no more ATF will go into the reservoir, it's
time to start the engine and let the trans pump the converter full again. Run
the engine for ten seconds or so, then shut it off and go back to filling. You
will need to repeat this several times before it no longer draws the level in
the reservoir and pan down.
At this point, with the pan apparently full, you'll want to run the car a bit to
warm up the ATF. My experience was that the amount of ATF in the car was a
little low, so run the car just enough to get the ATF up to temp. Then raise it
and check the level, and add ATF as necessary to get it up to the full hot line
on the reservoir. Remember that this last check should be done with the engine
running, after 'cycling' the transmission through all the gears a few times and
returning to 'Neutral' position. When the indicator shows a level above
the max marker while the engine is running in "N" that you have
overfilled the tranny and MUST drain some fluid to prevent overheating and
damaging the system. Also ATF being blown out of the system indicates
overfilling.
Check carefully for leaks. The pan gasket is fairly foolproof. Those seals on
the two plugs will be fine if they are installed clean and are tightened
correctly. The plastic reservoir should be clean so you can see the level in it,
and so there's no risk of dropping debris into the filler if you need to adjust
the level.
After you drive the car a bit more, it's a good idea to recheck the fluid level
just to be sure. For this duty I employ a large mirror and a hand flashlight.
This allows me to check it hot on level ground, without the need to raise the
car. Remember that ATF levels should be checked only after driving the car, and
with the engine running in park or neutral gear position.
Since this was my first time doing the service, I ended up spending a couple
hours under there. Much of that time was spent cleaning, inspecting and checking
things out. Next time could probably be compressed into an hour or so, but I'll
still budget at least two to be safe.
Use good stands to hold the car up. Ramps would be fine, but the car needs to be
fairly level to get the fill level correct. The stands need to hold the car up
while it's running with you underneath as you do that last bit of filling. We
certainly don't want anybody hurt!
And one last word on cleanliness-- The trans is particularly sensitive to any
contamination of the fluid. Fibers from a cleaning towel, a bit of dirt that
falls into the filler on the reservoir, or whatever, risks fouling a hydraulic
valve or servo. Make sure the area you are working is clean, and take a few
minutes as necessary to clean all around the transmission where there's dirt you
might accidentally disturb and get into your delicate works.
Mineral Spirits, or common paint thinner over here, will cause seals to swell
and get soft. It doesn't take much, so be extra careful if you use this as a
cleaner in the pan.
I usually wear plastic gloves to protect my hands. Latex swells up when ATF gets
on them, so I find the vinyl painters gloves work best in this service.
Hope this helps!
dr bob (some corrections by Theo Jenniskens)
===============
Procedure 2
Before you start, get the car off the ground at least high enough to easily
crawl under it. Also, it should be level. You will need a few items before
attempting the job. I believe the drain plugs are 6 mm allen head bolts. You'll
need a large open catch tray and rags for the inevitable spill. A tube at least
1.5 meters in length that will fit into the filler hole. A funnel that will fit
into the tube. Some line to hold the tube in place while refilling the tranny.
First, get the torque converter lined-up with its drain plug in the lowest
position and remove the plug. Second, remove the filler cap and drain the pan by
removing the plug. Third, remove the pan to expose the filter, and then replace
it with a new one. Fourth, install a new rubber pan seal with the pan. Take care
not to over-tighten the pan bolts. Fifth, replace both drain plugs. Sixth, place
the tube into the filler hole. Raise the open end above the level of the filler
hole, place a funnel in the open end of the tube, and slowly add the new fluid.
For fluid I use Mobil 1 Synthetic ATF. I can do the entire job in about an hour,
but if you've never done it before, allow at least two.
I forgot to mention that the fluid reservoir has markings to indicate the fill
level. As you fill the reservoir the level will rise, but you will have to have
the car running and in gear to get it to the correct level. Also, the level is
temperature dependent. The lower mark is for temps around 20 degrees Celsius.
Lastly, do not overfill the system. Take not of how much fluid came out so that
you'll have a clue of how much to add.
Ed Ruiz
=====================
The MB (generic)
Procedure